Showing posts with label local produce. Show all posts

Monday, October 11, 2010

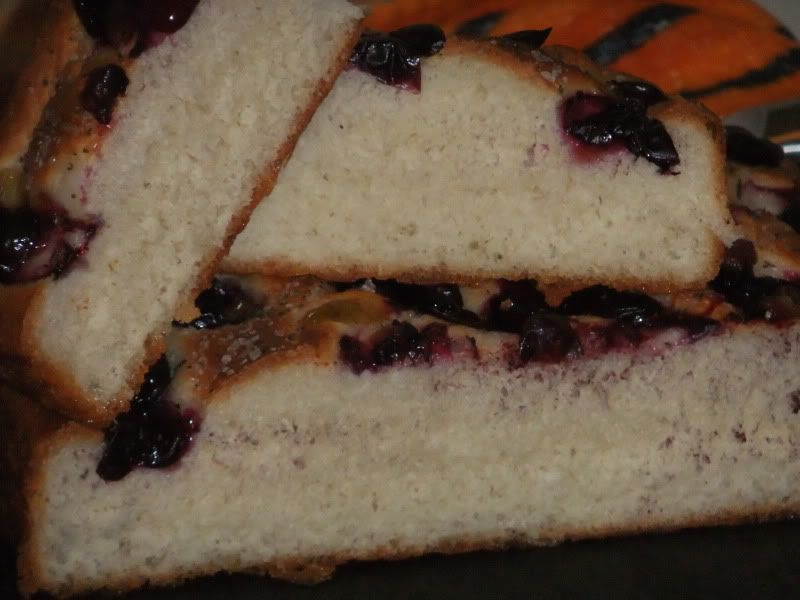
Concord Grape and Rosemary Focaccia

I've been obsessed with making pizza lately; I've been tossing thin crust pizzas, to be baked at the highest temperature my oven will reach, with a different array of toppings at least once a week. After a visit to the Italian fest this weekend, and some of the best thick-crust pizza of my life, I decided I need to tackle a thicker crust. Then, at Hurley's Market at Indian Lake, I found some of the most beautiful concord grapes. I've been eager to get my hands on some concords to try this Smitten Kitchen recipe, but I couldn't resist a few changes. I didn't want that thinner crust she had. My favorite focaccia is a two-inch thick, well-herbed, well-oiled, lightly golden piece of carb heaven from a local bakery, and that was what I wanted to emulate, while still incorporating the sweet-savory combination of concords and rosemary.

I started researching focaccia recipes, while in the back of my head knowing two things from previous experience: I wanted a small amount of sugar in the dough (makes it delightfully addictive), and I wanted a cold-fermentation rise. My recent experience with thin crust pizzas has shown me how much the flavor and texture develop overnight in my refrigerator, and I was hoping that would translate equally well in focaccia. From there, I went to my two most trusted sources: King Arthur Flour, and Peter Reinhart. I made a smaller loaf, and a few other adjustments, including the addition of high gluten flour. One change I will try the next time is to increase the water; this creates a sloppier dough, but also yields light, airy holes, which this dough is lacking. In some ways, I think this dough is almost too tender, white-bready. I'm thinking about nixing the powdered milk, and replacing some flour with semolina.

Now, for just a second, I want to talk about sweet, salty, tangy brilliance that is the concord grape/rosemary topping on this lovely bread. I thought Smitten Kitchen's photos looked so good, and I was dying to try this combination that reminded me of the backyard growing up: grapevines on one side, and mom's glorious herb garden on the other. Once it started baking however, doubts began to set in. It smelled glorious, don't get me wrong. But, it also sort of smelled like grape jelly pizza, so I started to become skeptical. Don't be. Come on. This is like having your wine ON your bread, and not merely with it. Go. Get in the kitchen. Make this, before concords are out of season. If you prefer a thinner crust, please refer to the Smitten Kitchen link above!
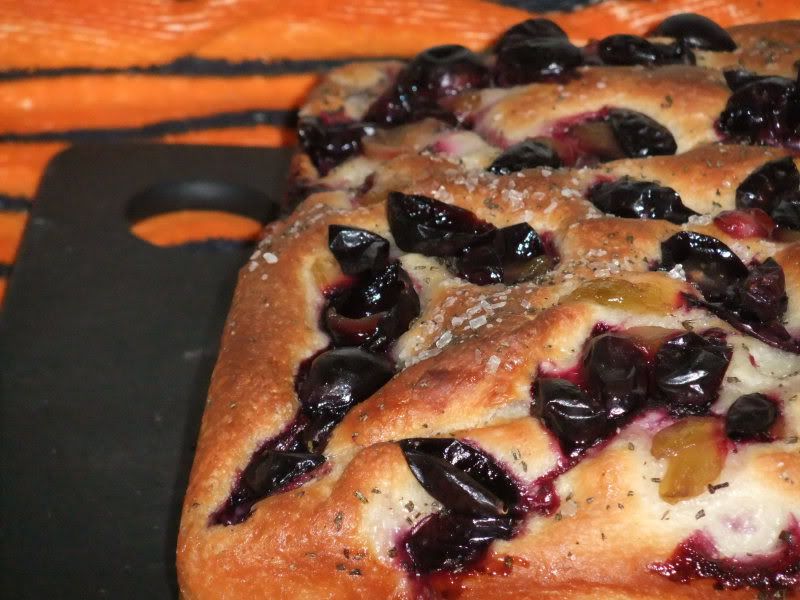

Concord Grape and Rosemary Focaccia
makes one 8x8, delightfully thick bread

1 1/3 c. all purpose flour
3/4 c. high gluten flour
1 1/4 tsp. baking soda
1 tbl. powdered dry milk
1 tbl. sugar
1 1/4 tsp. instant yeast
1/2 tsp. kosher salt
1/4 c. olive oil, plus additional
3/4 c. cool water
1 c. halved and seeded concord grapes
1 tsp. fresh rosemary (I like mine very finely chopped, almost to powder)
course sugar for sprinkling
kosher salt for sprinkling

Combine first nine ingredients in stand mixer, and knead with dough hook for 10 minutes. Grease glass bowl large enough for dough to double. Add dough to bowl, covering dough on all sides with olive oil. Cover with plastic wrap, and place in refrigerator overnight. (Mine was in for about 20 hours).

About an hour and a half before baking, remove dough from refrigerator. Line the bottom an 8 x 8 with parchment paper, and brush the paper and sides of pan with olive olive. Stretch and push the dough into the pan, deflating it as little as possible. Brush on more olive oil, cover with towel, and allow to come to room temperature and rise.

About 30 minutes before baking, preheat the oven to 425 degrees. Right before baking, sprinkle dough with coarse sugar, kosher salt, rosemary, and grapes. Bake for 20 - 30 minutes. Enjoy the bizarre scents wafting through your kitchen. Try to let it cool before digging in.

Saturday, August 7, 2010

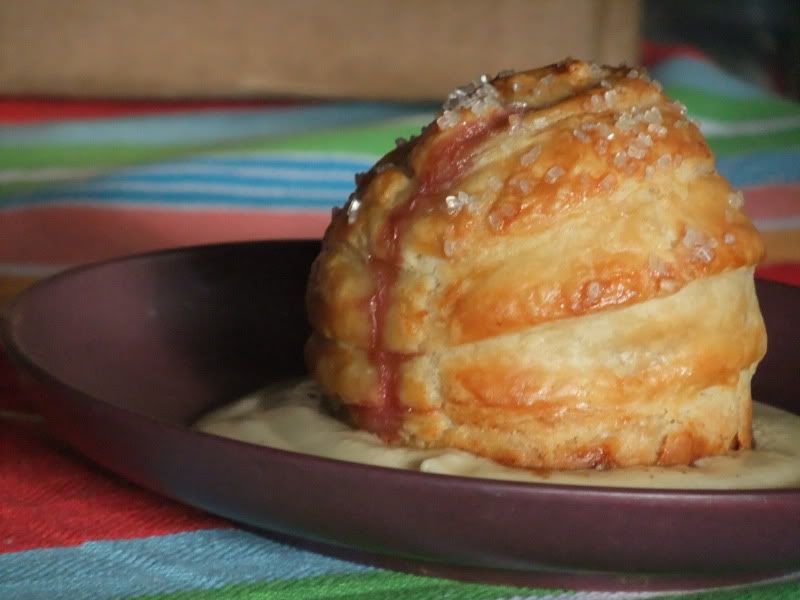
Peach Beehives

I've been so busy lately; baking, while it's happened on occasion, hasn't been of the photogenic variety. However, I think you'll find these worth the wait. Just back from vacation, I have 1/4 peck of Ohio's first ripe peaches of the season (from Hurley Farms at Indian Lake) sitting on my dining room table. One of Carolyn's favorite summer desserts is something her mom makes, called Peach Beehives. Like any time I try to duplicate something someone's mom makes, it comes with high expectations and the decision as to whether to simply recreate an identical dish, or to attempt making it my own.
Today, I decided to make this mom classic my own in small ways. I used my favorite pie crust recipe, sprinkled coarse sugar on the crust for extra crunch and sparkle, and added some booze to the sauce (always a way to reclaim any recipe as my own...just add booze!).

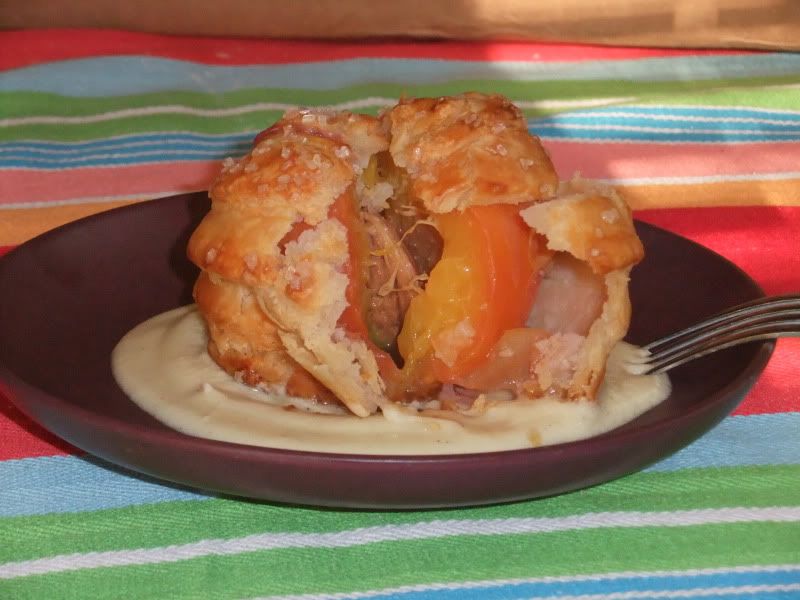
One of the most unique parts of this recipe is that the peaches are left completely alone. You don't season them, you don't peel them, or pit them. All that happens is that they are carefully encased in crust, exalting them in their peachy, peak-season glory. Most interestingly, somewhere in the baking process, the skin of the peaches all but dissolves. It's not tough or even noticible in the final product. I also love that single rivulet of pinkish peach juice that leaked out of the top and dripped down the side. It lets you know there is a lush, juicy treat waiting just inside that crispy crust.

I attempted to reduce the quantities in the various recipes I looked over, and ended up with an almost perfect amount of crust for two peaches (just enough extra to bake up scraps with cinnamon and sugar) by halving what I usually make for a single crust pie. The sauce is another story...I have a ton of it left. Good thing it's tasty enough to just eat off of a spoon.

Peaches:
most recipes use prepared crusts; I made 1/2 batch of my favorite recipe
2 peaches, washed and still damp
half an egg white (use remaining white and yolk in sauce)
coarse sugar

Cut the crust into 1/2" in strips, and wrap around the peaches, overlapping each strip halfway over the one before it, so it looks like a beehive. I found having damp peaches helped the crust strips stick to the peaches quite well. Press the strips firmly into one another, being careful not to squash or misshape them, but making sure they are well sealed. Place peaches on a parchment covered baking sheet. Brush peaches with egg white, and sprinkle with sugar. Bake at 400 degrees for 30-45 minutes until golden brown and pretty.


Sauce:
1/4 c butter
1 egg yolk, plus the half of the white you didn't use on the peaches (farm fresh if you can)
1 tbl cream
1 tbl Navan (vanilla cognac)
a few drops vanilla bean paste
1 c powdered sugar
pinch of freshly grated nutmeg

Cream the butter with an electric mixer, then add the egg yolk, beating until smooth and fluffy. Add cream, Navan, and vanilla bean paste, continuing to beat until completely smooth. Add the powdered sugar 1/4 c at a time, fully incorporating each portion before adding the next. If one wanted a thicker sauce, one could add more powdered sugar...but I liked it exactly how it came out, smooth and spoonable! Place under or over beehives right before serving, preferably while the peaches are still warm.


Sunday, April 11, 2010

Cherry Pie-let, Redux


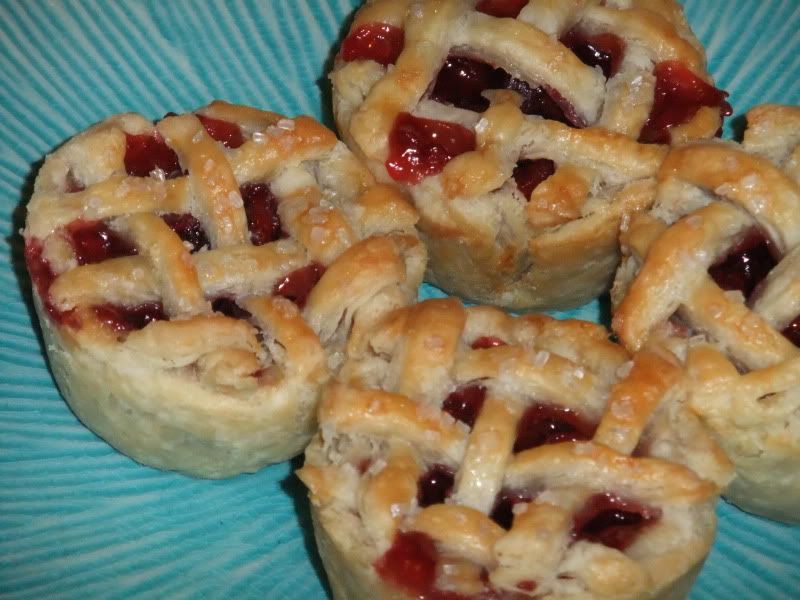
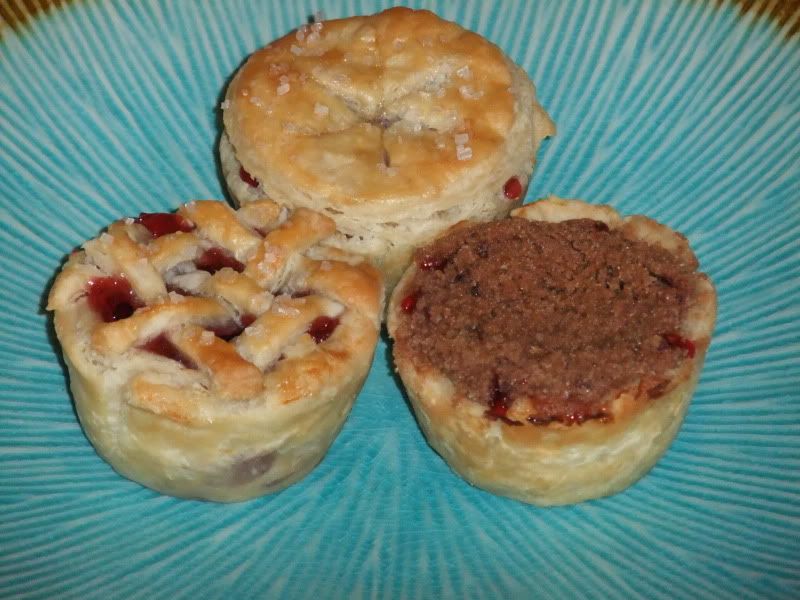
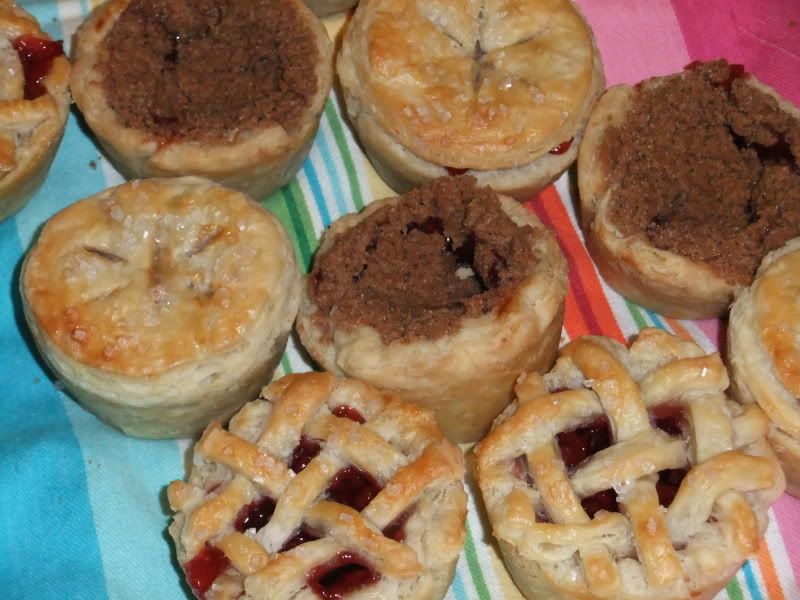
During a conversation with my mom about my new-found interest in (read: obsession with) all things wine, she commented that it's a good thing I don't have as many hobbies as most of my family members. My family is composed of crafters and artists: leather work, needlework, painting, clay modeling, woodwork, crocheting, knitting, quilting, sculpting, scrap-booking. I merely commented that my interests primarily lie in consumables. I hate dusting, and don't collect much of anything (unless, of course, you count all those shelves in the basement with bakeware, cupcake liners, and sugar sprinkles for every occasion...). However, as I was making these pie-lets, with their tiny lattice tops, I decided that baking and cooking are my crafts.


The cherries have been sitting in the freezer since last summer, and are from Hurley Farms at Indian Lake. I know I don't have too many blog posts here, so it seems a little absurd to post another Cherry Pie-Let entry. So I won't talk any more. I'll just let you enjoy the pictures. These are what I usually mean when I say pie-let. If you watched the brilliance that was Pushing Daisies, you might also know them as Cup Pies. If you haven't ever watched the show, you should. Go. Click that link. I'm going to go have some pie, myself.

Sunday, November 1, 2009

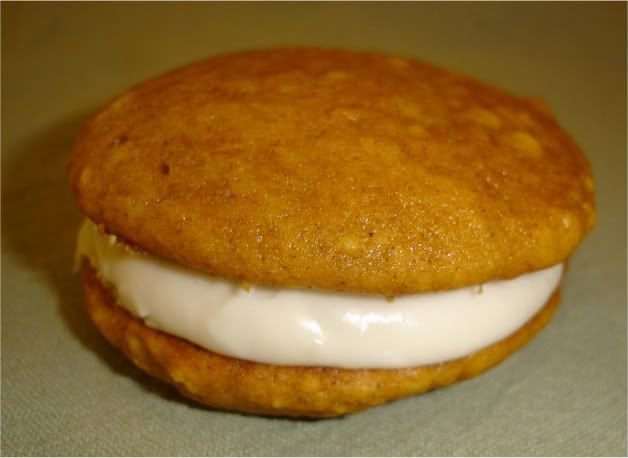
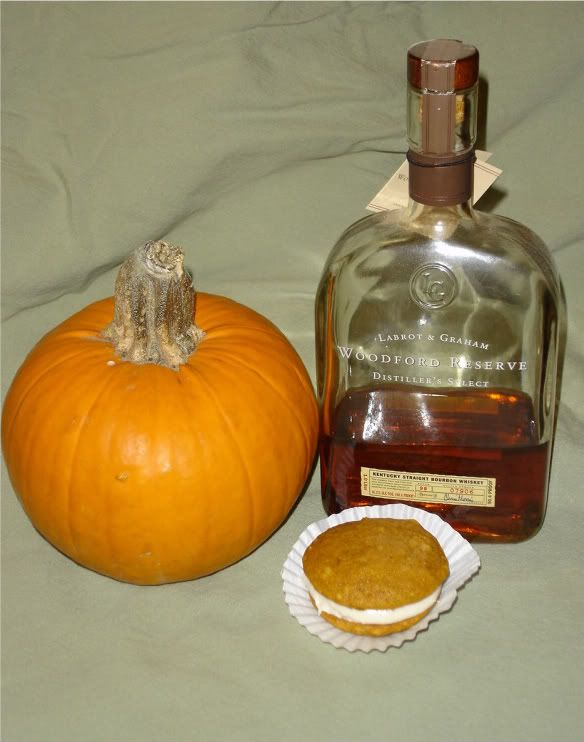
Pumpkin Whoopie Pies with Maple-Bourbon Cream Cheese Filling

Oh, fall. How I love you, with your abundance of squash. We picked up a couple pie pumpkins last weekend (along with acorn and butternut squashes) at Hurley Farms in Indian Lake. This one pumpkin produced some pumpkin risotto, a half dozen whoopie pies, and a 3" pumpkin cheesecake for the two of us. The pumpkin whoopie pies were for a friend's birthday--a friend who has a love for pumpkin as deep as I do. The recipe was an adapted recipe from How to Eat a Cupcake. She halved the recipe when she made it; I quartered it. I also made the frosting extra-special for my friend; instead of a standard cream cheese frosting, I made a maple-bourbon cream cheese frosting, which appeals to pretty much his entire flavor palate (and mine--the frosting was SO good)

The proportions are mine, with the original proportions in parenthesis.

Pumpkin Whoopie Pies
Makes 14 cookies (7 pies if you can stand to wait until they are cool to taste that pumpkiny goodness)

5/8 cup all-purpose flour (2 3/4 cups)
1/2 teaspoon baking powder (2 tsp)
1/4 teaspoon baking soda (1 tsp)
1 teaspoons ground cinnamon (4 1/2 tsp)
1/4 teaspoon ground nutmeg (1 1/2 tsp)
1/4 teaspoon ground ginger (1 1/2 tsp)
1/8 teaspoon ground cloves (1/2 tsp)
1/2 stick (4 tablespoons) unsalted butter, at room temp (2 1/2 sticks)
1/4 cup sugar (1 1/2 cups)
1/2 tablespoon molasses (3 Tbsp)
1/2 teaspoon vanilla extract (2 tsp)
1 large eggs (4)
1/3 cup pumpkin puree (not pumpkin pie filling) (1 1/4 cups)
1 oz buttermilk (1/2 cup)

Preheat oven to 325 degrees F. Whisk dry ingredients (except sugar) together in a medium bowl.
Using electric mixer, beat butter, sugar, molasses and vanilla in large bowl to blend. Add eggs 1 at a time, beating until blended after each addition. Add pumpkin puree.
Mix in dry ingredients in 3 additions alternately with buttermilk in 2 additions, beating until just combined.
Line large baking sheets with parchment paper. Drop dough by rounded tablespoonfuls (I used a number 24 ice cream scoop) onto prepared sheets, spacing 2 inches apart, leaving enough room for dough to spread.

Bake for 10-15 minutes, until cake springs back when lightly pressed in the center. Cool completely on wire racks before filling.

Maple-Bourbon Cream Cheese Frosting (my own recipe)
3 oz. cream cheese, softened
1 tablespoon unsalted butter, softened
1-2 cups confectioners' sugar, sifted, plus more if needed
a bit of vanilla extract
a bit of maple extract
a good glug of bourbon (I used Woodford Reserve)

Blend cream cheese and butter until smooth and well combined. Add in 1 cup sugar and flavorings. Blend until combined. Add additional powdered sugar, a little at a time, until frosting becomes stiff enough to not run off the cookies. Taste for flavor, and adjust if necessary.

Spoon a good amount of frosting on half of the pies (or pipe on with a pastry bag), an squish a second pie on top. Place in the fridge for a while to let the frosting firm up some more. Then enjoy. Mmm.

Monday, October 5, 2009

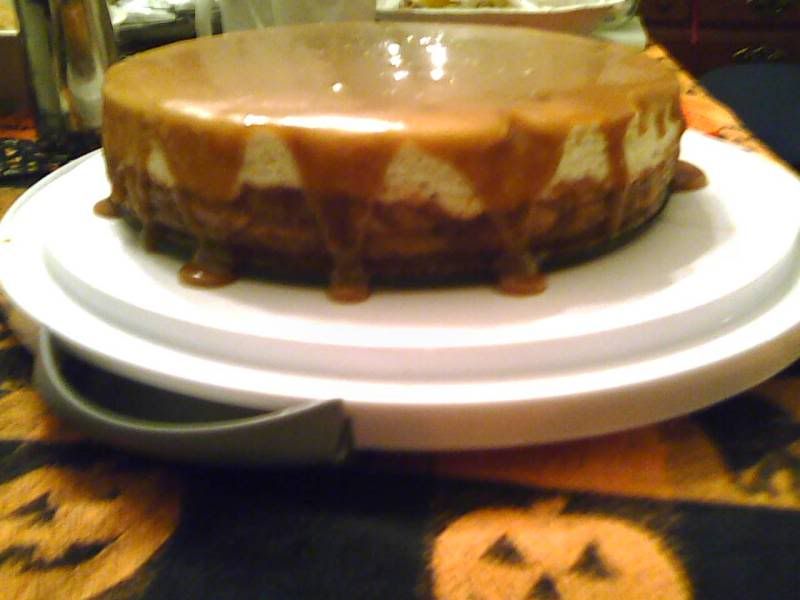
Caramel Apple Cheesecake

Mmm...fall. There are a number of things about fall I look forward to, including the ever changing colors of the leaves, pumpkin beers, Halloween, and apple desserts. My CSA has been keeping us in apples and pears for the last several weeks--so many that we can hardly keep up. In celebration of my dad's and brother-in-law's October birthdays, I made a caramel apple cheesecake. The singular inspiration being all the apples in my house, and the desire to make something other than apple pie. I couldn't find a recipe that was exactly what I wanted; Not Quite Nigella's came closest in terms what I was visualizing, but fell short of my exact expectations (I used my own cheesecake recipe, made it less sweet, I wanted more apples...). Like most dabbling food bloggers out there, I simply used the recipe as a jumping off point, and embellished. Here's the recipe, as I butchered it:

Crust:
Several large handfuls of vanilla wafers (I used the fun color minis, but I'm sure that's irrelevant)
6 tablespoons butter

Blend in food processor until it come together. Press into bottom of springform pan, and bake for 10 minutes or so until it's kinda firm and not going to float away when you add filling.

Apple Layer:
2 tablespoons butter
3 large apples, peeled, cored and sliced thinly (I used three different varieties)
3 tablespoons brown sugar
glug maple syrup
1/2 teaspoon cinnamon
a touch of powdered ginger
a touch of all spice
a touch of freshly grated nutmeg
1/2 tsp cornstarch

Saute apples with butter, brown sugar, and maple syrup until there is liquid from the apples in the pan. Add spices and cornstarch, continuing to cook over medium heat until apples are soft but not mushy, and there is a nice syrup. Smoothly layer onto cooked crust.

Cheesecake:
3- 8 oz packages of cream cheese at room temperature
1/2 cup sugar
3 eggs
2 teaspoons flour
1/4 cup cream
1 tsp vanilla bean paste
Whip cream cheese and sugar in electric mixer until smooth and fluffy. Add eggs, one at a time, beating until fully incorporated before adding the next one. In a small bowl, combine the cream and flour, stirring until smooth. Add to cream cheese mixture, along with vanilla bean paste. Mix until smooth and well blended. Pour slowly on top of apples (be careful here so you don't dislodge the apples).

Bake in a water bath for about 55 minutes at 325. Center should be set but jiggly when you pull it out. Cool, the refrigerate until serving. Right before serving, top with caramel sauce.

Caramel Sauce:
6 tablespoons butter
2/3 cup brown sugar
1/4 cup cream

Melt butter and brown sugar together over medium heat, until it boils. Cook for several minutes until mixture is thick and fragrant (like, say, caramel!). Add cream, and stir until combined. If your cream is cold, it may seize the caramel mixture and bubble furiously. Just keep stirring over the heat until it comes together. Cool until ready to top cheesecake.

By all accounts, this dessert was a hit, and nearly every one stuffed themselves with an entire slice, even after a rather filling dinner. Pardon the poor quality of the photo--it was taken with my cell phone camera, since I was at my parents' house.

Saturday, August 8, 2009

Leave Zucchini on Your Neighbor's Porch Day

August 8th is known as "Leave Zucchini on Your Neighbor's Porch Day." The entire month of August, however, is an exercise in creativity when it comes to zucchini--baked, fried, grilled, turned into muffins and bread--as this crop starts to pop up everywhere. Earlier in the summer, in my eagerness, I actually bought myself zucchini from a farmer's market. However, at this point, there is no reason to pay for the vegetable. In spite of my utter lack of green thumb, pretty much every person I know is growing zucchini, and leaving it in the most unusual of places: back porches, on top of the communal microwave at work, in boxes outside empty classrooms at the university where I work.

My mom had some pretty spectacular zucchini bread the last time I saw her, and when I asked her for the recipe, I promptly got a scanned copy directly from the old Lazarus cookbook. I even followed the recipe for the most part, except I had three cups of zucchini, rather than 2 1/2. I made one loaf of bread, and 12 muffins. The muffins were great right out of the oven, but became sticky after a day or two. As an aside, mom doesn't peel her zucchini, and it gives the bread pleasant green specks. For some reason I peeled mine, but it's definitely not necessary.


Wednesday, June 10, 2009

CSA Share: Day 1

After a lot of reading about the benefits of local produce, I decided back in January that we would join a CSA this year. If you're not familiar with what a CSA, or community supported agriculture group is, the basic idea is that you pre-purchase "shares" from a local farm. You pay upfront, in the beginning of a growing season, and pick up the freshest veggies you've ever had when they come in season. Every CSA works a little differently, and you can find the best options for you at Local Harvest. Local harvest is where I found The Wayward Seed, and several other nearby options. I sent emails to the farms I liked, and after communicating with the farmers, chose the one that suited me best. The truth is, I just found The Wayward Seed to be very personable, eager to answer my questions as an ignorant newbie in the CSA world, and I was very impressed with the beautiful photos on the website. I started pretty small this year, and am only getting a single-person share of vegetables, and of fruits, every other week.

What I really loved about the idea of joining a CSA, in addition to the positive impact it has on the local farming economy and the environment (not to mention the high quality of the food!), was that I didn't get a choice in the vegetables I get every week. I love to cook, but like most people, I get in a rut. I buy the same things over and over, and don't venture too far out of what I know how to cook. I was assured, however, that I'd get recipes for the more obscure produce each week, and that the flavors and quality would be the best around. And you know what? They are!

Here's what I got today:


A tour of the veggies, from the upper left, clockwise around the strawberries: braising greens, hakurei turnips, fresh cilantro, white radishes, evergreen hearty scallions, and red pac choi.

When I picked up the goods, they talked me through each vegetable, and gave cooking and storage suggestions. They also encouraged me to go through and taste each element of the braising greens mix, because it was a variety of greens, including mustard greens and several other things I can't remember; I'm so glad I did this! I don't know greens very well, and a couple were surprisingly peppery, but delicious raw. And so, for dinner tonight, I grilled chicken breasts that I marinated in olive oil, garlic, cilantro and lime juice, and I roasted a combination of the turnips, braising greens, and red potatoes. The turnips were amazing! They were quite tasty before they were cooked--sweet and crunchy--but after they were cooked, they were soft, buttery and slightly caramelized. I really wish I had more! I only used about half of the greens, and definitely am looking forward to using up the rest later this week. The taste combination is quite unique, and, much to my pleasure, all new for me.

And the strawberries? Let me just tell you, you can smell them from five feet away, and my fingers would be dyed red right now if I hadn't stopped myself from eating an entire quart...