Showing posts with label recipes. Show all posts

Monday, July 11, 2011

Maple Bacon Scones...and where I've been

I'm a slacking blogger. But, not a slacking baker. I've been busy with projects of varying sizes, and haven't had nearly the free time I imagined "summer vacation" would give me. I had envisioned days of baking brilliant new inventions, interrupted only by an urgent need to lay poolside. It hasn't quite worked out that way, and summer break is half over. I've been busy making things like graduation cakes that look like Oreo cookies,


and small projects that take no time at all, like the wedding cake I made this past weekend for my niece (Congratulations, again, you two!):


But last night, I was taken with the whim of invention. Just like that, my desire to be creative is back!

My scone recipe is basic, and I've posted it before. That's where this whim starts. I had some bacon ends from the place that produces the best home smoked bacon in Ohio, Grandpa's
Cheesebarn, and I thought that some candied bacon belonged in a scone. I fried up some of the bacon, and once it was almost done, I sprinkled in some brown sugar, and a bit of maple syrup (from the maple trees in my back yard!). I cooked it until it looked candied, then moved the bacon onto a buttered piece of foil to cool. Here's the rest of the "recipe":

While the bacon is cooling, make the scone dough up to the point where you have blended the butter into the dry ingredients. The only change I made here was using brown sugar instead of white, and I added a few cinnamon chips to the dry ingredients at this point. Chop up the cooled bacon, and toss into the dry ingredients. It's important that you let the bacon cool, or else it will melt the butter and ruin the texture of the scone.

To the egg and milk mixture, add in some maple extract. Gently add the wet ingredients to the dry, and proceed with the basic recipe. I brushed the tops of the uncooked scones with a mixture of cream and maple extract, and sprinkled with coarse sugar.


As these baked, they smelled like a pancake breakfast: smoky bacon, sweet bread, cinnamon and maple. Obviously, this is a good thing. A really good thing.

Sunday, January 9, 2011

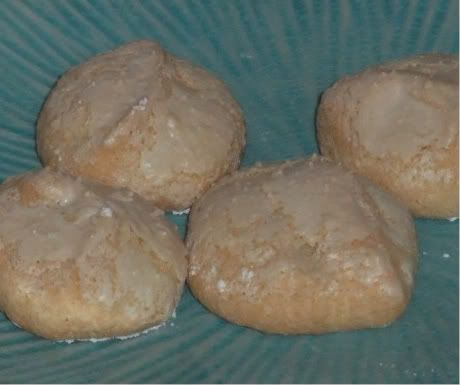
Pistachio Macarons


I spent my Christmas break baking up a storm. Since I'm sans paying job right now, I gave all my family and friends homemade treats as gifts this year. My sister wanted "something pistachio," but left the decision up to me. I'd been meaning to make some macarons, and decided this was the perfect time to do it. I decided on a pistachio shell, and a honey swiss meringue butter cream filling. The filling gave me fits, but in the end it all worked out. Most importantly, my sister liked them, and I finally got over being intimidated by macarons.

I made a practice batch, wherein I discovered several things to help those who haven't made them before:

  • If you're going to use food coloring, use very little. It turns super dark later if you use too much. My first macarons were GREEN (not pictured).
  • Every recipe says to use powdered food coloring. I only have gel food coloring. The first time, I added the gel color as I was grinding the pistachios and almonds. This is when I added way too much, because it was so light when it was in the flour, and then it turned really dark when it was wet. The second batch, I just added a couple drops directly to the egg whites after they were whipped. I was able to control the color more, and didn't notice that it made the batter too liquid-y.
  • I can't pipe evenly. For my second batch, I traced rows of a half dollar coin on the back side of the parchment so they were closer to the same size.
  • Slightly wetting the underside of the parchment, one row of cookies at a time, was the only way I could get the baked cookies off the parchment sheet without crushing them.
  • The shells keep longer than I thought. My first batch stayed really fresh and chewy and nice in a ziploc bag for more than a week (unfilled). I had read they get soggy. Mine didn't.
  • Let them sit before baking to develop a shell. My first batch I only let sit for about 30 minutes, and most of them rose lopsidedly--flat on one side with a foot on the other. The second batch I let sit for an hour, and they rose more evenly, with pretty frilly feet all around.
  • I've indicated before my preference for weighing ingredients, anyway, but for macarons, I think it's really important. I wouldn't try this without a scale, since the batter is so delicate.
  • On aging egg whites: both times I made the recipe, 90 gr was perfectly 3 egg whites, aged overnight. They weighed about 91-92 grams fresh, but dried a bit overnight to 90 gr.
  • I used my food processor to turn the nuts and powdered sugar into the fine flour. I ground it as much as I could, then sifted. What wouldn't go through the sifter went back into the processor, then was sifted again. I did that several times. I'm considering just buying pistachio flour for next time.
  • Every website says to use raw nuts. I only had roasted, salted nuts. They were still very, very tasty. In fact, I might add a pinch of salt if ever I'm using unsalted nuts. Because I liked my sweet things with a pinch of salt. I also tend to think roasted nuts taste better than raw nuts, and I don't think it impacted the texture at all.
  • One way to make this process less daunting is to make the nut flour/sugar mixture ahead of time. Macarons seem to take a long time, partly because this step is intensive. Doing it a couple days in advance makes the macarons come together MUCH faster.

Without further ado:

For the shells:
90 gr egg whites, aged overnight on your counter
30 gr granulated sugar
200 gr powdered sugar
55 gr almonds
55 gr pistachios
green food coloring

Combine the powdered sugar, almonds and pistachios in the food processor, and grind into a powder. Sift well. This step can be done well in advance, storing the nut/sugar flour in a sealed container. In a stand mixer, whip egg whites until foamy, and slowly add granulated sugar. Whip into a glossy meringue (stiff peaks, but glossy, not dry). If using gel food coloring, add to meringue until desired color is reached, thoroughly blending. Add flour mixture, and stir with quick strokes at first to combine, then gentler strokes. Don't deflate the egg whites all the way. Tartelette says this should all take less than 50 strokes, so that's what I went with. When you drizzle the batter from a spoon back into the bowl, it should take about 10 seconds to disappear. If it doesn't disappear, it's not stirred enough. If it disappears right away, you've over stirred. So take it slow.

Fill a pastry bag with a plain tip (I used a Wilton 12), and pipe small rounds in rows onto a parchment covered baking sheet. Preheat oven to 275. Let cookies sit for at least an hour so that I firm shell forms. Bake, one tray at a time, for about 15 minutes. They should look dry, but not turning golden. If not done at 15 minutes, watch carefully until done. (Mine took about 18 minutes before starting to brown). Let cool and remove from cookie sheet.


For the Filling:
2 egg whites
1/4 c sugar
1/4 c honey
pinch of salt
2 sticks of butter, softened

In the top of a double boiler set over simmering water, whisk together the egg whites, sugar, honey and salt. Continue whisking until the sugar is dissolved and the mixture becomes too hot to touch about 8 minutes.

Transfer the mixture to the bowl of an electric mixer fitted with a whisk attachment. Beat on, medium-high speed until the egg whites hold a stiff peak, about 8 minutes, and is no longer warm. Add the-butter, one tablespoon at a time, beating after each addition until incorporated. Keep at room temperature.


To Assemble:
Match up shells so they are paired together by size. Fill piping bag with filling, and pipe a good blob of filling (about a tablespoon, depending on cookie size) on one shell, and top with a second. Repeat until all shells are used. Eat.

Monday, October 11, 2010

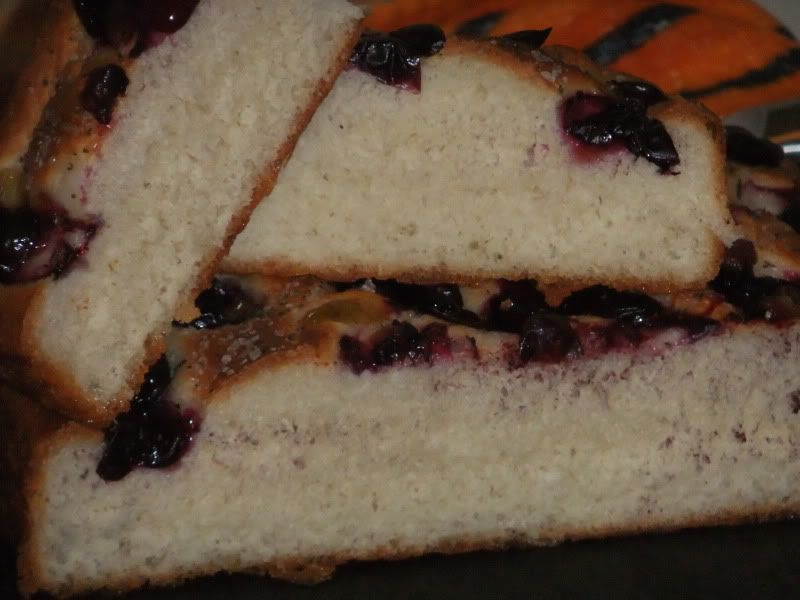
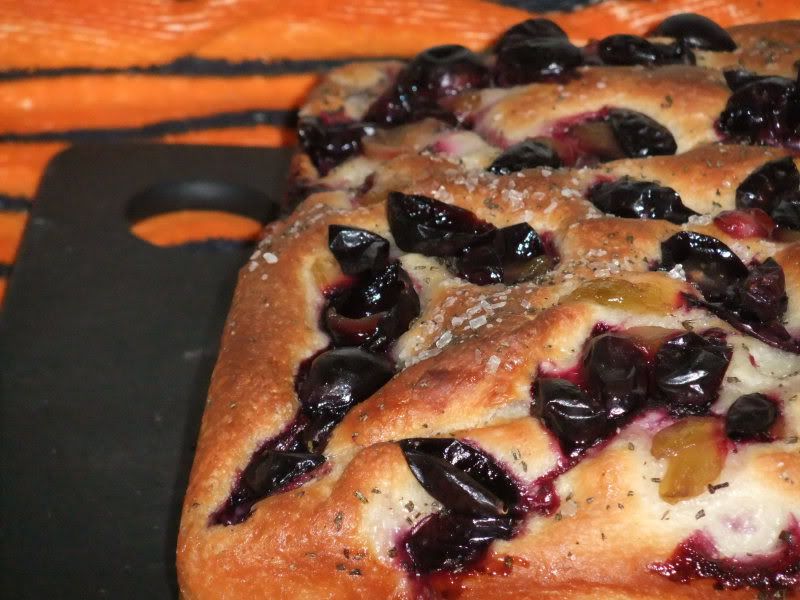
Concord Grape and Rosemary Focaccia

I've been obsessed with making pizza lately; I've been tossing thin crust pizzas, to be baked at the highest temperature my oven will reach, with a different array of toppings at least once a week. After a visit to the Italian fest this weekend, and some of the best thick-crust pizza of my life, I decided I need to tackle a thicker crust. Then, at Hurley's Market at Indian Lake, I found some of the most beautiful concord grapes. I've been eager to get my hands on some concords to try this Smitten Kitchen recipe, but I couldn't resist a few changes. I didn't want that thinner crust she had. My favorite focaccia is a two-inch thick, well-herbed, well-oiled, lightly golden piece of carb heaven from a local bakery, and that was what I wanted to emulate, while still incorporating the sweet-savory combination of concords and rosemary.

I started researching focaccia recipes, while in the back of my head knowing two things from previous experience: I wanted a small amount of sugar in the dough (makes it delightfully addictive), and I wanted a cold-fermentation rise. My recent experience with thin crust pizzas has shown me how much the flavor and texture develop overnight in my refrigerator, and I was hoping that would translate equally well in focaccia. From there, I went to my two most trusted sources: King Arthur Flour, and Peter Reinhart. I made a smaller loaf, and a few other adjustments, including the addition of high gluten flour. One change I will try the next time is to increase the water; this creates a sloppier dough, but also yields light, airy holes, which this dough is lacking. In some ways, I think this dough is almost too tender, white-bready. I'm thinking about nixing the powdered milk, and replacing some flour with semolina.

Now, for just a second, I want to talk about sweet, salty, tangy brilliance that is the concord grape/rosemary topping on this lovely bread. I thought Smitten Kitchen's photos looked so good, and I was dying to try this combination that reminded me of the backyard growing up: grapevines on one side, and mom's glorious herb garden on the other. Once it started baking however, doubts began to set in. It smelled glorious, don't get me wrong. But, it also sort of smelled like grape jelly pizza, so I started to become skeptical. Don't be. Come on. This is like having your wine ON your bread, and not merely with it. Go. Get in the kitchen. Make this, before concords are out of season. If you prefer a thinner crust, please refer to the Smitten Kitchen link above!


Concord Grape and Rosemary Focaccia
makes one 8x8, delightfully thick bread

1 1/3 c. all purpose flour
3/4 c. high gluten flour
1 1/4 tsp. baking soda
1 tbl. powdered dry milk
1 tbl. sugar
1 1/4 tsp. instant yeast
1/2 tsp. kosher salt
1/4 c. olive oil, plus additional
3/4 c. cool water
1 c. halved and seeded concord grapes
1 tsp. fresh rosemary (I like mine very finely chopped, almost to powder)
course sugar for sprinkling
kosher salt for sprinkling

Combine first nine ingredients in stand mixer, and knead with dough hook for 10 minutes. Grease glass bowl large enough for dough to double. Add dough to bowl, covering dough on all sides with olive oil. Cover with plastic wrap, and place in refrigerator overnight. (Mine was in for about 20 hours).

About an hour and a half before baking, remove dough from refrigerator. Line the bottom an 8 x 8 with parchment paper, and brush the paper and sides of pan with olive olive. Stretch and push the dough into the pan, deflating it as little as possible. Brush on more olive oil, cover with towel, and allow to come to room temperature and rise.

About 30 minutes before baking, preheat the oven to 425 degrees. Right before baking, sprinkle dough with coarse sugar, kosher salt, rosemary, and grapes. Bake for 20 - 30 minutes. Enjoy the bizarre scents wafting through your kitchen. Try to let it cool before digging in.

Friday, August 27, 2010

Sweet, Boozy, Italian Happiness

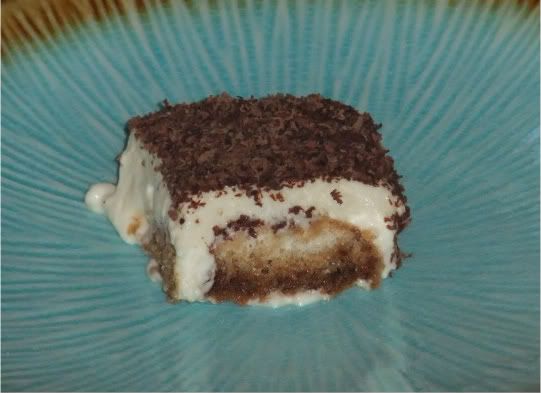
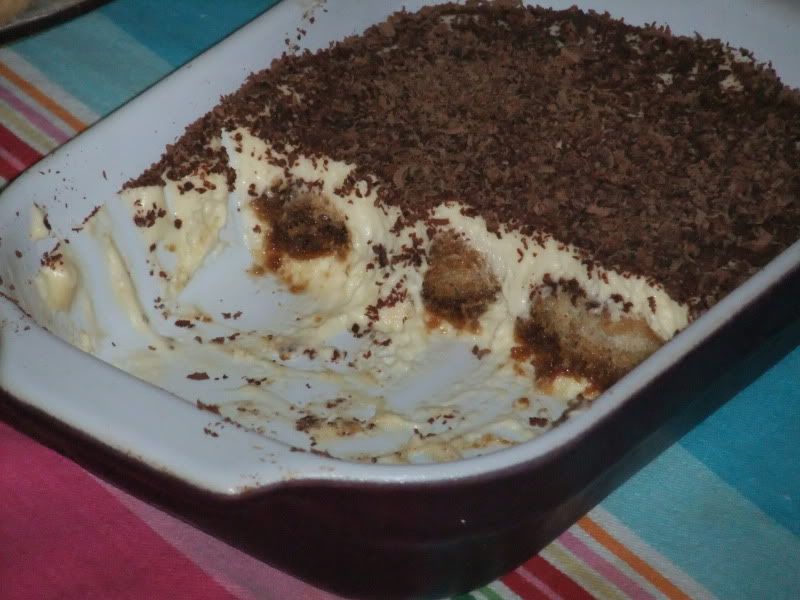
Several weeks ago, I was thrilled to find that Miceli's, a Cleveland cheese maker, now has a comparatively inexpensive mascarpone (oddly, it's not featured anywhere on their website). I immediately bought it with plans for tiramisu. The wedding cakes I made (more pictures of that later) took precedence, though, and I only got to the tiramisu yesterday. I made a miniature, one layer tiramisu, using a 5' x 8' ceramic dish I have. I forgot to take pictures before we dug in after a dinner of wine, bread, cheese and veggies, so there are no pictures of the fully assembled, un-attacked dessert. Oops.

I used La Tartine Gourmand's recipe for lady fingers, but only made 1/3 of the recipe, since I was trying make a very small portion, and didn't want an abundance of cookies. I had a few leftover, however, and found I really like them! They are barely sweet, and a little dry, but pleasantly flavored. I didn't feel like doing the whole piping bag deal to make fingers, so I just used a small scoop, and made normal, round cookies. I based my tiramisu recipe off of David Lebovitz's recipe, but again, reduced it significantly. I wish I had used a smaller dish, or individual dishes like David's though, just so I could have managed another layer of lady fingers before running out of filling. The only other change I would make is in the rum/espresso mixture. It's supposed to be boozy, but I just found it too boozy. I think it's probably the rum--I'm not actually a huge rum fan, so next time, I'm thinking about using kahlua instead, to up the coffee flavor in addition to the booze.

Lady Fingers
1 egg, separated
2 tablespoons cornstarch
2 tablespoons flour
1 oz. sugar
powdered sugar for dusting

Preheat oven to 350. Whip egg whites with half of the sugar, until the whites form stiff peaks, gradually adding more sugar until it's all incorporated. Mix in the egg yolks. then sift the cornstarch and flour into the egg mixture, gently folding until just combined. Do not mix quickly or deflate the egg whites. You want fluffy here! On a parchment lined baking sheet, you can either pipe the batter into the traditional finger shape, or if you're lazy like me, just use a small scoop to make rounds. Space them a bit apart, since they will puff. Sift powdered sugar over cookies, and let it absorb. Repeat. Bake for 10 to 15 minutes until golden. Let cool.


Tiramisu
1/4 cup espresso (I used water and espresso powder)
1 tablespoon dark rum
1/2 tablespoon cognac (I used my baking buddy, Navan)
1 large eggs, separated, at room temperature
small pinch of salt
3 1/2 tablespoons sugar, divided
1/2 cup mascarpone
lady finger from recipe above
bittersweet chocolate for grating on top

Combine espresso, rum, and cognac, and set aside. Whip egg whites, salt and half of the sugar until firm peaks form. In another bowl, whip egg yolk and remaining sugar until thick and pale. Add the mascarpone to the egg yolk mixture, combining until smooth. Carefully fold in egg whites, in two stages, until completely combined. Spoon a small portion of egg mixture into the serving dish. Dip the lady fingers into the espresso mixture for a few seconds, and layer into serving dish. Feel free to break cookies to get a full layer of cookies. Spread cookie layer with egg mixture. Grate chocolate on top, and put in the fridge for as long as you can handle.

Sunday, April 25, 2010

Bagels, Glorious Everything Bagels


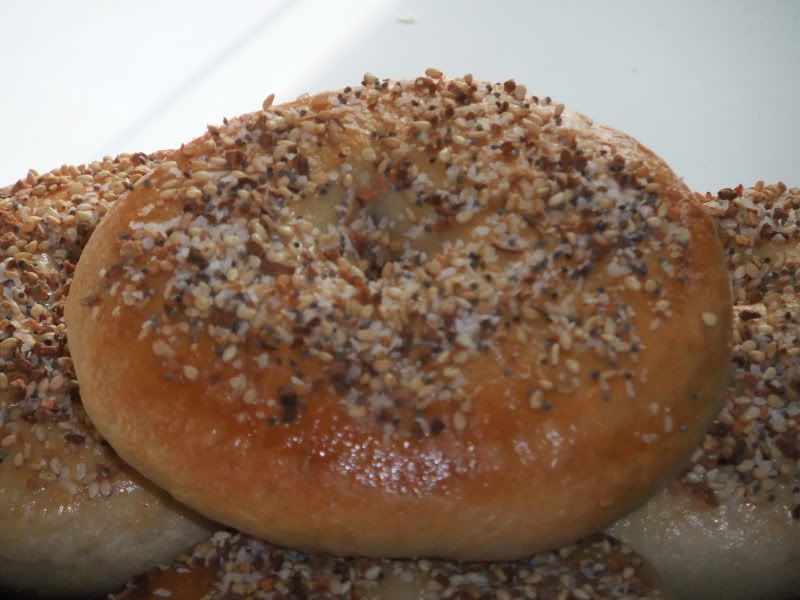
The first time it occurred to me to make my own bagels was back when stupid Panera increased their costs to something like $1.09 for their "cafe" bagels, which are the non-fancy flavors. I was really annoyed. Then, in November, one of my favorite food blogs, Smitten Kitchen, posted the recipe for Peter Reinhart's Bagels. That was in November, and I promptly began acquiring necessary ingredients I didn't already have, like high gluten flour, and non-diastatic malt powder. Those of you in NE Ohio might not be aware you possess a rare and beautiful gem in the plaza at Chapel Hill: you have access to Mr. Bulky's. On a recent trip up and down their spice aisle, I found the perfect ingredient for my dream everything-bagel: dried, minced, roasted garlic. Smelled heavenly. Then, a couple weeks ago, King Arthur Flour sent me an email about making my own baby bagels. Ok, muses of baking, I get it. I'll make the damn bagels already.

I have to admit, Smitten Kitchen's lengthy instructions on bagel making intimidated me, and made me feel like I needed a ton of time to make my own bagels. So, Saturday afternoon was reserved for baking. I got up and went to the farmer's market before heading to work in the morning, was home by 1:15, and made a spectacular lunch that involved arugula from the market. Then, amid the gray, rainy weather, I ended up snuggled on the couch with my sweetie, catching up on missed episodes of Bones. And then I fell asleep. I woke up in time to grill out for dinner, but my bagel preparation time had rapidly faded. I quickly reviewed both recipes, and took the best from both worlds...or something. I wanted to fully prepare and shape the dough before bed, so that they could be boiled and popped in the oven in the morning with as little to-do as possible. Peter Reinhart's bagels gave me that option (KA's requires shaping and a 90 minute rise in the AM). The steaming step in the KA recipe also would have required me to dig our my veggie steamer. So I stuck with Reinhart's recipe, but with proportions closer to KA's recipe. What? There is nothing in the world two people need with as many bagels as 8 cups of flour would produce! I still ended up with 8 rather hearty sized bagels. Here's my recipe, but you should really educate yourself with the links above before trying to follow my guide!

Sponge:
1 cup high gluten flour
1/8 tsp instant yeast

1/2 cup cool water


Combine and let sit, covered, for at least two hours.

Bagels:
3 1/2 cups high gluten flour
1 1/2 tsp instant yeast

1 tbl non-diastatic malt powder

1 1/2 tsp
salt 1 cup warm water.
another 1 1/2 tbl non-diastatic malt powder for boiling


Bagel Topping:
one egg white for washing
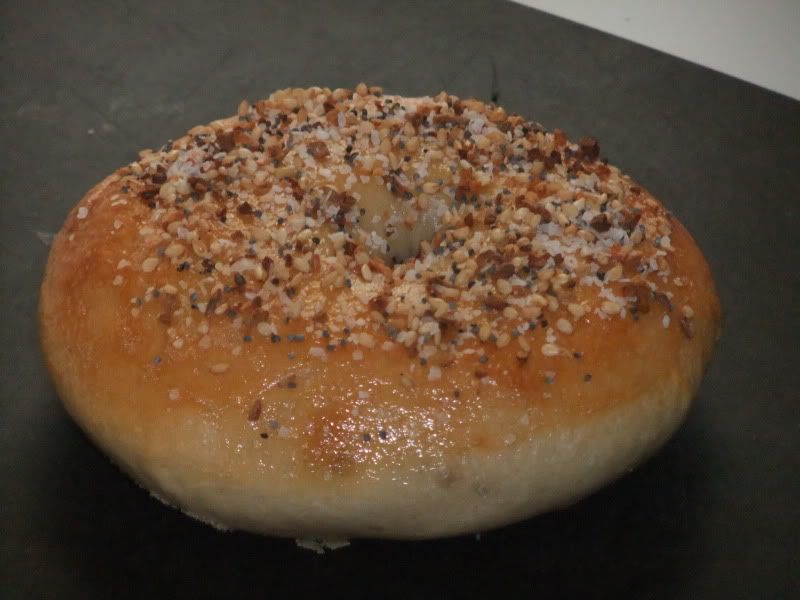
Whatever you want. My combo: toasted sesame seeds, poppy seeds, dried minced roasted garlic, and kosher salt.


Combine above bagel ingredients, and all of the sponge in electric mixer. On low speed, knead together for about 8 minutes. The dough gets nice and smooth, with all the flour incorporated. It's a little sticky when pinched, but mostly nice to touch. I weighed the dough, and I had 1117 grams of dough at this point. Because I'm a little obsessed, I played with it a little, until I determined that I liked the size the bagels would be if the dough were divided into eight. Or, approximately 138g each. Yes, I live in the US and my scale could weigh in ounces. However, I have an English degree, and think dividing pounds into ounces is annoying. Grams are more convenient for the mathematically challenged.

So, I divided and weighed my eight smooth balls of dough, punched holes in the center and stretched them to look like bagels. I laid them on a parchment-covered, cooking-sprayed cookie sheet, and covered them with a damp towel, while I wrote this. Probably about 20 minutes. (Seriously, the cooking spray is important, even on parchment. One of mine got very stuck in a place I apparently missed). Then, I tried the float test. You place one of the bagels in a bowl of water. If it floats within ten seconds, it's ready to be stuck in the fridge, over night, or even for a couple days. Mine didn't even try to sink, it just bobbed pleasantly on the surface. This was a definite change, since I tried floating one when I first formed the bagels, without a rest period, and it sunk like a tiny Titanic. Yay. If at first yours don't succeed in floating, let 'em rise another ten minutes, then try again. Since mine were floating, I went ahead and combined my bagel-topping for the morning, and went to bed.

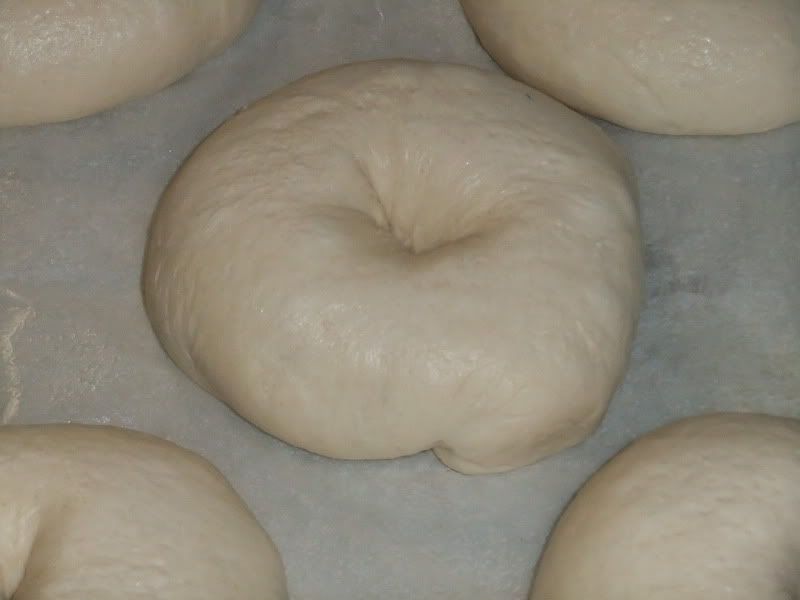
This morning, my refrigerated bagels were so cute. They had puffed, and all but lost their center holes, leaving large dimples behind. I know I don't usually take and post pictures throughout the process, but I couldn't pass up a photo op of these chubby blobs of bagel dough.

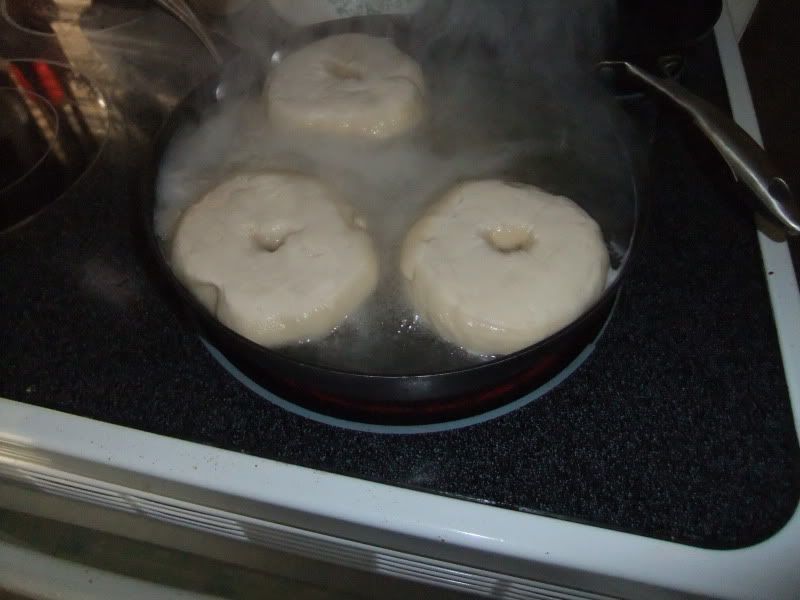
Preheat the oven to 450 degrees. In a deep, wide skillet, filled with about 2" of water, add 1 1/2 tbl non diastatic malt powder. This is what makes bagels shiny and taste bagel-y. Bring water to a boil, and add as many bagels as comfortably fit (my skillet only held three. I wanted smallish bagels, but my 138g bagels turned into normal-sized after all their rising and boiling). They float and only end up partially submerged. Boil for 1-2 minutes, then flip over and boil for another 1-2 minutes. In all my bagel homework, I learned that the longer you boil, the chewier the texture. Since I like a chewy bagel, mine boiled for about 1 1/2 - 2 minutes per side. I didn't have my stopwatch on me, so that's a guess. Boil them in batches until you're done. Since the camera was out anyway...


Sprinkle the same, greased, parchment papered cookie sheet they were on before with semolina flour to prevent further sticking. If you don't have semolina, corn meal might be a good alternative? Or nothing? I'm not sure they'd stick, but I used the semolina, since I had it. Here is where recipes diverged big time. Peter Reinhart says to top your bagels, and bake for five minutes, then rotate the pan 180 degrees, and bake for five more minutes. KA says to bake for 20 minutes, then top with seeds, cover loosely with foil and bake for five more. Yikes, that's quite a disparity in bake time, especially since both recipes are making bagels smaller than mine! Because I really hate the taste of burnt sesame seeds and garlic, I started by baking mine, naked, on the middle rack, for 7 minutes. I then rotated the pan 180 degrees, and baked for 7 more minutes. They were obviously getting cooked, but they were not golden, so I gave them another 5 minutes. The color was coming. I pulled them out, brushed them with egg white and sprinkled them with topping one at a time. You have to move fast, because the bagels are hot, and you're using egg white. You want a thin coat of egg white, not scrambled eggs on top! Once all bagels were topped, I put them in the oven for 2 minutes, then covered them with a piece of foil for another 4 minutes.

I only let them cool enough to snap some pictures before breaking into my first one to try it plain. The bottom was golden and crunchy, the entire outside just slightly crisp. They were definitely not as dense as the bagels I'm used to, but I liked that about them. They certainly tasted bagel-y, so I achieve my goal. I quickly spread a couple with cream cheese, capers, chive and red onion, and topped with smoked salmon. Yum. My only complaint is my own fault--I definitely used too much salt in my topping, so they were a little over-salty, especially with capers and smoked salmon.


I can tell you'll I'll be making them again soon, with a variation: my favorite bagel of all time is a slightly sweet, honey-whole wheat bagel, served with honey butter. Since I am officially done with classes (I finished my last final ten minutes ago!), I think my baking time might increase over the next couple weeks!

Sunday, February 28, 2010

Homemade Croissants, Attempt 1

In May 2002, I was lucky enough to spend a couple weeks in France--mostly Fanjeaux, with a couple days in Paris. Many remarkable things happened there, and I met people who changed my life. And, like many people who travel to France for the first time, I was awed by the food. Fanjeaux is a middle of nowhere town southeast of Toulouse. It has one restaurant, a single stop light, a cafe that serves as the town bar at night, and a solitary bakery. It was at that bakery that I had my first true, not-from-the-grocery-store-in-a-plastic-container croissant. Then, I had my first with chocolate. And my first with almonds. Although I was living in a community during my time in Fanjeaux, I've always been an early riser, and I took great joy in my own quiet walks through the town early in the morning. Inevitably, the scent from the bakery would call to me, and I'd wander that direction.

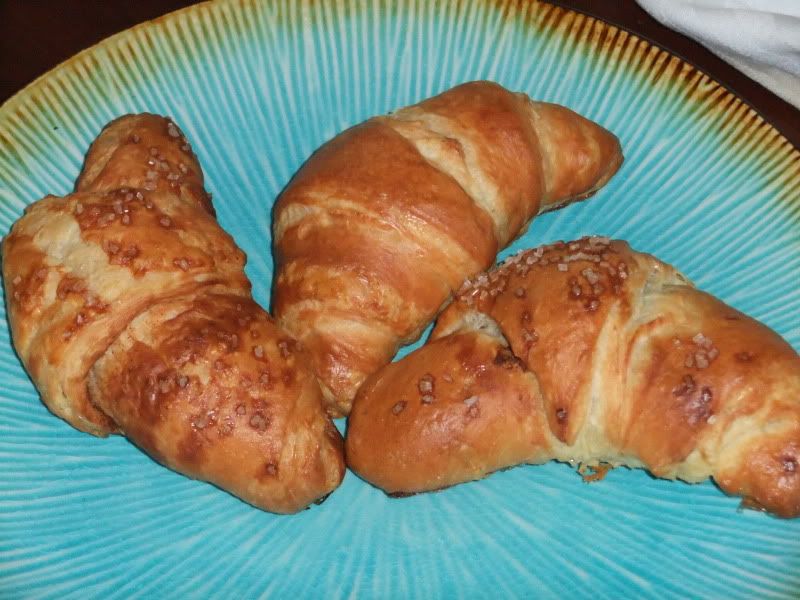
As my baking skills have grown since then, I've always thought about how, one day, I'd learn to make laminated dough, and would find a way to replicate those croissants in my own kitchen. Having a new convection oven, I've been more inspired than ever to try out more complicated recipes. Yesterday, I found myself home for the day, with only household chores I was eager to ignore. I've collected many recipes for croissants over time. So many, in fact, I'm not sure where this one originated. I reduced the proportions, and followed directions amalgamated from several other recipes. The croissants that resulted were not quite the perfection of my memory--mostly, I think I needed additional turns of the laminated dought to create more layers--but the buttery texture, the lightness, pleased me for my first attempt.


Makes: 14 good-sized croissants

2 sticks butter, softened
2 tbl flour

2 2/3 c flour
2 tsp instant yeast (I used SAF Red Instant Yeast)
1 tsp salt
1 1/2 tbl sugar
1/8 c water
1 c milk, warm
1/3 c half and half

1 egg
1 tbl water

Combine 2 tbl flour and butter, kneading until well combined. Shape butter into 4" square, wrap in foil, and refrigerate until firm.

In food processor, combine 1 1/3 cups flour in the work bowl and add the dry ingredients, including yeast. Pulse to mix. Pour the water, milk, and half-and-half through the feed tube. Pulse once or twice to moisten dry ingredients. Add the remaining 1 1/3 cup flour, 1/3 cup at a time, pulsing briefly after each addition. When the mixture forms a mass and begins to clean the sides of the bowl, pulse about 15 times. Mine was very wet--more like batter, so I added about another 1/3 cup flour. When that didn't help, I just went with it, transferred it into a bowl, covered it with plastic wrap, and stuck it in the fridge for a couple hours, where it firmed up nicely. Not to mention that it expanded into a pleasant smelling yeasty sponge. Put it in a bowl bigger than you think you need so you don't end up with a mess!

After a couple hours in the refrigerator, scoop the dough onto a floured surface, and press it into a square that will comfortably wrap the butter. Unwrap the block of butter and lay the block diagonally on the dough. Bring each point of dough into the center, overlapping the edges sufficiently, and seal well. With big rolling pin, roll the dough into a fairly large rectangle--I rolled to about 3/4" thick. If the butter breaks, let the dough and butter warm up a bit at room temp. If the butter is squishy, stick in the fridge for a bit. Fold the length of dough into thirds, as for a letter. Turn so that the open ends are at twelve and six o'clock. Roll again into a rectangle. This time, fold both ends into the middle and then close, as one would a book. Wrap the package of dough in a damp dishtowel, and stick in the refrigerator to chill for 1 or 2 hours.

Wash, rinse, repeat.

I did the same series of fold as the first time one more time. I let it chill again, then folded in thirds one more time. Next time, I will probably do the book fold a third time, too. I want it REALLY flaky, though.

Each time you re wrap in the damp towel and refrigerate, it will rise some more. I know this is a "duh" phenomenon, given all that yeast. It still surprised me, though. Consider yourself warned.

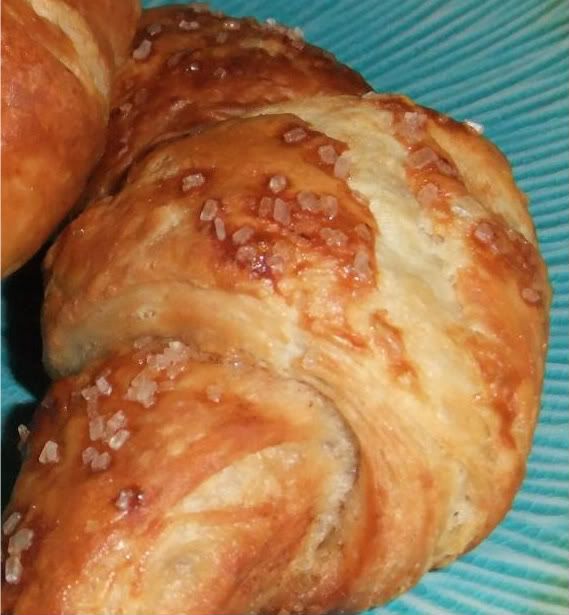
At this point, I rolled the dough and cut it in triangles. I rolled 6 triangles into plain old croissants. To another four, I added a mixture of cinnamon and sugar, and to the remaining four, chopped milk chocolate before they were rolled. I placed these onto cookie sheets, again covered with a damp kitchen towel, and refrigerated over night. This morning, I brushed the croissants with the water and egg mixture, sprinkled the sweet ones with coarse sugar, placed the cookie sheets of croissants into my oven (not preheated, because I'm lazy and figured they were cold, anyway), set on convection bake at 360 degrees. After 15 minutes, I rotated the trays. In another 15 minutes they were gorgeously golden.

We ate the chocolate ones immediately, hot from the oven with coffee. If not the quality of my first taste almost 8 years ago in France, they were certainly the best I've ever had in my own kitchen, or in this country, for that matter.

Monday, October 5, 2009

Caramel Apple Cheesecake

Mmm...fall. There are a number of things about fall I look forward to, including the ever changing colors of the leaves, pumpkin beers, Halloween, and apple desserts. My CSA has been keeping us in apples and pears for the last several weeks--so many that we can hardly keep up. In celebration of my dad's and brother-in-law's October birthdays, I made a caramel apple cheesecake. The singular inspiration being all the apples in my house, and the desire to make something other than apple pie. I couldn't find a recipe that was exactly what I wanted; Not Quite Nigella's came closest in terms what I was visualizing, but fell short of my exact expectations (I used my own cheesecake recipe, made it less sweet, I wanted more apples...). Like most dabbling food bloggers out there, I simply used the recipe as a jumping off point, and embellished. Here's the recipe, as I butchered it:

Crust:
Several large handfuls of vanilla wafers (I used the fun color minis, but I'm sure that's irrelevant)
6 tablespoons butter

Blend in food processor until it come together. Press into bottom of springform pan, and bake for 10 minutes or so until it's kinda firm and not going to float away when you add filling.

Apple Layer:
2 tablespoons butter
3 large apples, peeled, cored and sliced thinly (I used three different varieties)
3 tablespoons brown sugar
glug maple syrup
1/2 teaspoon cinnamon
a touch of powdered ginger
a touch of all spice
a touch of freshly grated nutmeg
1/2 tsp cornstarch

Saute apples with butter, brown sugar, and maple syrup until there is liquid from the apples in the pan. Add spices and cornstarch, continuing to cook over medium heat until apples are soft but not mushy, and there is a nice syrup. Smoothly layer onto cooked crust.

Cheesecake:
3- 8 oz packages of cream cheese at room temperature
1/2 cup sugar
3 eggs
2 teaspoons flour
1/4 cup cream
1 tsp vanilla bean paste
Whip cream cheese and sugar in electric mixer until smooth and fluffy. Add eggs, one at a time, beating until fully incorporated before adding the next one. In a small bowl, combine the cream and flour, stirring until smooth. Add to cream cheese mixture, along with vanilla bean paste. Mix until smooth and well blended. Pour slowly on top of apples (be careful here so you don't dislodge the apples).

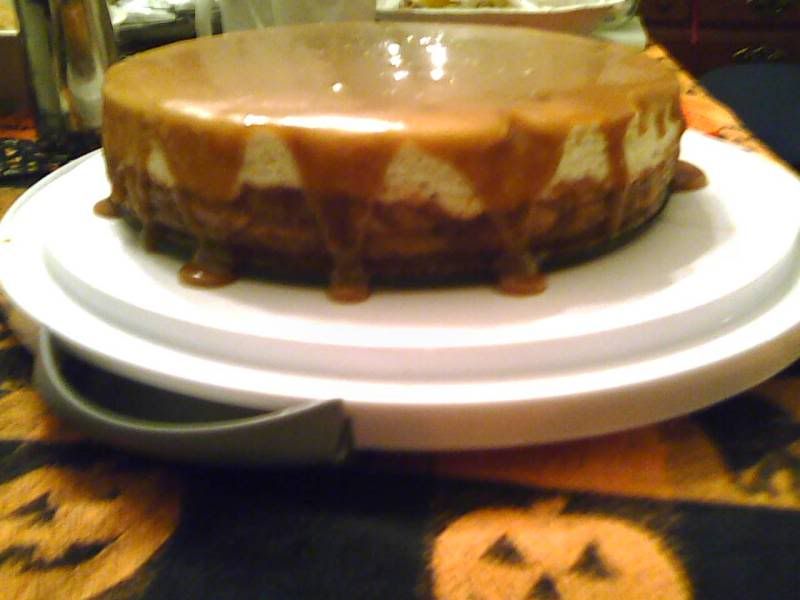
Bake in a water bath for about 55 minutes at 325. Center should be set but jiggly when you pull it out. Cool, the refrigerate until serving. Right before serving, top with caramel sauce.

Caramel Sauce:
6 tablespoons butter
2/3 cup brown sugar
1/4 cup cream

Melt butter and brown sugar together over medium heat, until it boils. Cook for several minutes until mixture is thick and fragrant (like, say, caramel!). Add cream, and stir until combined. If your cream is cold, it may seize the caramel mixture and bubble furiously. Just keep stirring over the heat until it comes together. Cool until ready to top cheesecake.

By all accounts, this dessert was a hit, and nearly every one stuffed themselves with an entire slice, even after a rather filling dinner. Pardon the poor quality of the photo--it was taken with my cell phone camera, since I was at my parents' house.

Sunday, September 20, 2009

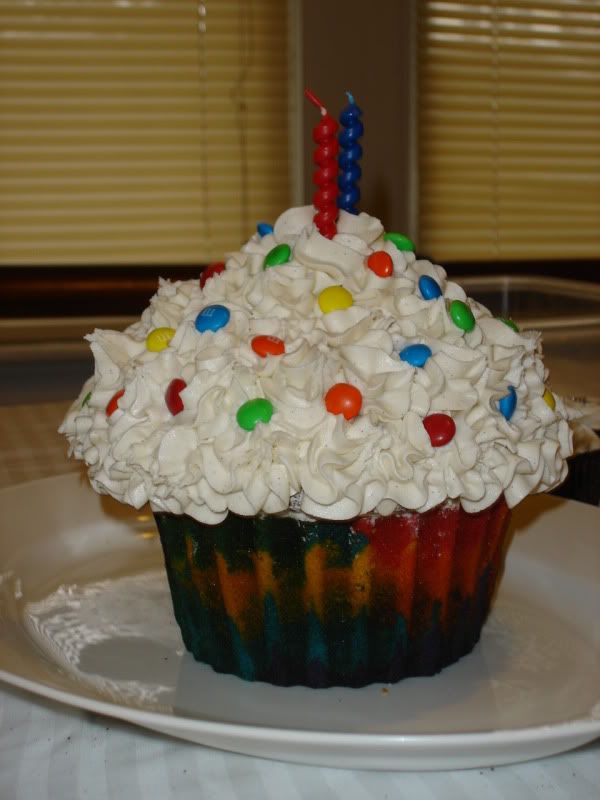
Allie and the Giant Rainbow Cupcake

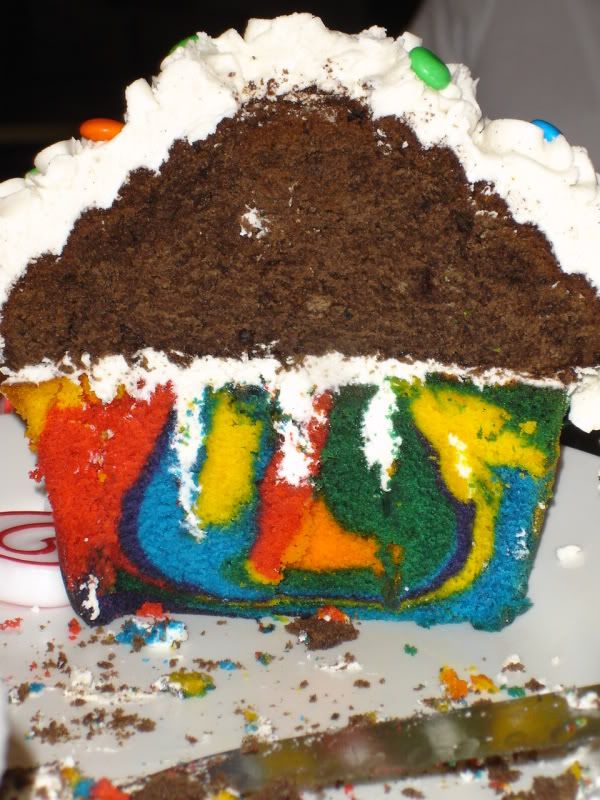
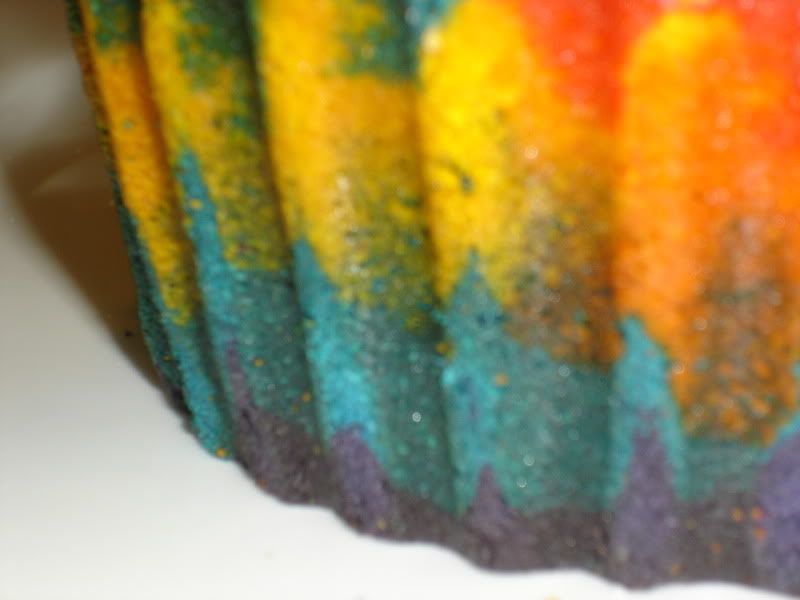
I pretty much demanded the Wilton Giant Cupcake pan for my birthday this year, and my niece's second birthday was the time to try it out. (I think I might have even begged to be allowed to make the cake, before I owned the pan.) For size perspective, see photo op with the normal-sized cupcakes. I had lots of ideas for how to make the cupcake, since decorating options are unlimited. I knew I didn't want to frost the bottom part, because I wanted the ridges of the pan to be obvious. I also knew I wanted a lot of color for the cake. Enter idea to try out not only my first ever cake in this pan, but my first ever attempt at a rainbow cake. Who needs to try things one at a time? Not me!

The mother of the birthday girl had said she wanted chocolate cake, though, so the top of the cake is chocolate. The birthday girl herself is a big fan of candy. I actually bought Mike and Ikes to use as giant sprinkles, but that didn't work out because they were a tropical variety of the candy, and the colors were pastel. Not what I was going for in this cake, but I'll definitely use them in the future. Besides, Jules loves M&Ms.

Now, this cake was not without it's own small disasters. I wanted a deep chocolate cake--something like a devil's food cake. After a lot of searching the internets, I decided on Hershey's Black Magic cake (which I've never made). Verdict: delicious, if you like impossibly spongy, soft cake. That can't stand the weight of itself, never mind of frosting. The normal-sized cupcakes were fine, but the giant cupcake top? Fell to pieces! I was so irritated that I didn't even take pictures. I promptly Googled "sturdy chocolate cake" and eventually decided on the Wilton recipe that came with the pan. Brilliant.

Now, about the rainbow-ing. I made a basic white cake recipe, because I wanted the colors to be pure, so there were no egg yolks involved (bonus: using up the million egg whites I always have leftover from all my ice cream making). Since I was pretty sure chocolate and rainbow cake would not bake at remotely the same pace, I made them separately, filling the opposite side of the pan with water. The rainbow cake. Baked. For. Forever. Seriously, I think it was more than 90 minutes. However, what came out was lovely and dense and very tasty. So I can't complain. (The cupcakes from the same batch were much lighter; the density is probably a result of the over-stirring to add the color, the waterbath next to it, and the temperature). I baked it at a very low temperature, because I wanted to avoid too much goldening on the outside, so that the colors would still be vivid. It was moderately successful, although I did trim at some of the ridges to brighten it up. Since I didn't frost it, I poked several holes into the bottom, and filled it with frosting, just to ensure it wouldn't be dry. And because everyone loves frosting.


Then I simply topped with the (second) chocolate cake, with a layer of frosting-glue between them. I gave the top a crumb coating, then finished with frosting swirls and M&Ms. The birthday girl herself wasn't too into it, but the adults at the party seemed pleased. Me? I can't wait to make the cake again...I have so many more ideas for it!

Tuesday, June 23, 2009

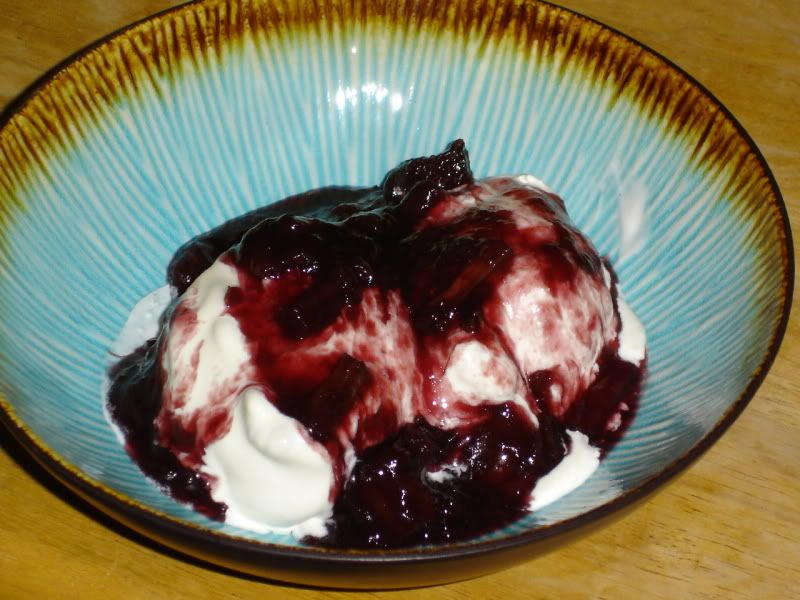
Red Wine Rhubarb Compote with Vanilla Ice Cream

Jackie brought me more rhubarb this week, and after last week's disaster I wasn't sure I was emotionally prepared to make another pie just yet. However, in my obsession with all recipes David Lebovitz, and my lack of familiarity with rhubarb, I went with a tried and true favorite ingredient: red wine. Since I decided to make this red wine rhubarb compote, I needed to whip up some ice cream to have with it. I have generally had a prejudice against Philadelphia style ice cream. I have always loved frozen custard style ice creams so much that when I began my ice cream making less than a year ago, I never bothered making any without egg yolks. I have actually altered Philadelphia style ice cream recipes to turn them into custards. Tonight, though, I wanted something fast, and not to bother with excessive cooking and cooling times. I had red wine rhubarb compote to consume! I made very small portions of both the ice cream and the compote--just enough for one dessert for two; however, the recipes are the full-sized portions. And so, I bring you one of the most simple, and delicious ice creams I can imagine, paired with a flavorful, rich, and spicy compote:

Philadelphia Style Vanilla Ice Cream:

3 cups cream
3/4 cup sugar
vanilla bean paste to taste (I used very little, to really let the cream shine)

Heat up one cup of cream on the stove and dissolve sugar. Add vanilla, and the rest of the cream. Once cooled, add to ice cream maker. (I didn't really let it cool. My ice cream maker is tough, and stood up quite well).

Red Wine Rhubarb Compote (I butchered this, and you should seek out the original recipe):

2 cups red wine (I used an inexpensive Little Penguin Shiraz that I've become fond of)
1/2 cup sugar
1 tablespoon honey
1 small cinnamon stick
several whole cloves
1 pound rhubarb, cut into small pieces

As my sister would say, throw it in a pot and cook it. After the rhubarb was poached, I removed it, and continued to reduce the wine to a thin syrup. I had a difficult time trying to find and remove the cloves, so I would probably use ground cloves in the future.

I didn't even let the ice cream firm up in the freezer. I scooped it from the maker into a bowl, topped with rhubarb, and served with two spoons. :-)

Wednesday, June 17, 2009

Cherry Pie-let


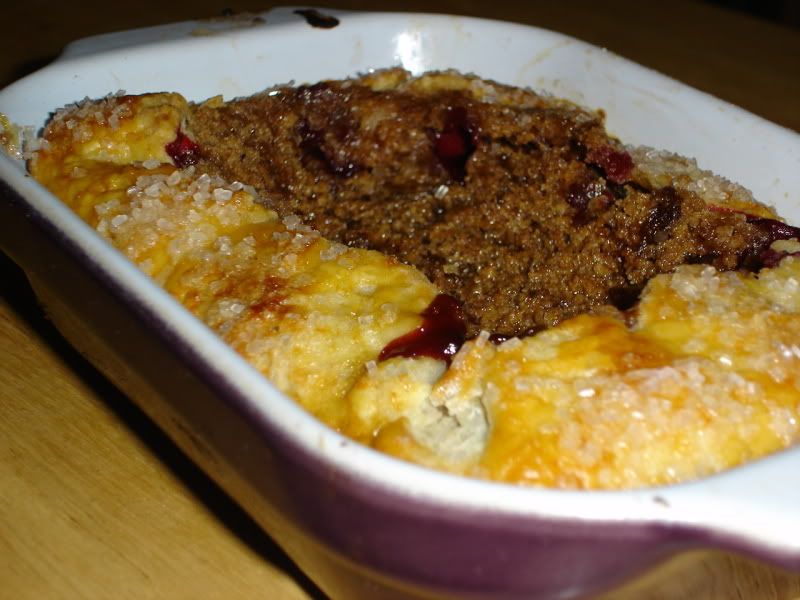
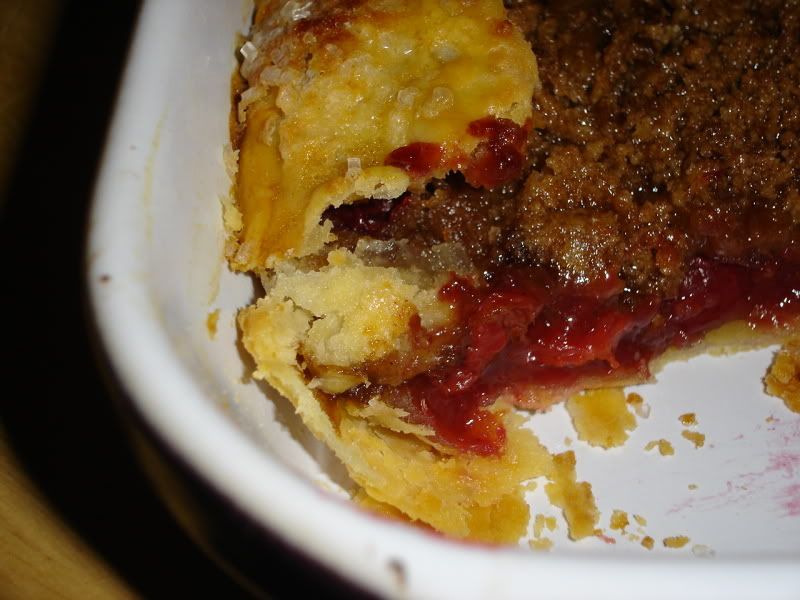
One of my fabulous coworkers brought me about a half quart of cherries this week, along with a bunch of rhubarb from her backyard (thanks, Jackie!). Carolyn was pretty eager for cherry pie, although there weren't quite enough cherries for a whole pie. Instead, I used a small rectangular dish, and half a recipe for pie crust--what I refer to as a pie-let. Carolyn generally likes all of her pies to have a streusel topping rather than a second crust, so that's what I did, even though the recipe calls for a double crust pie. I got the recipe from a book that is, apparently, not easy to find anymore: Lisa Yockelson's A Country Baking Treasury: Pies, Cakes, Cookies. I'm pretty sure one of my aunts gave me the book more than ten years ago, but it's still my go-to book for pies.

The basic recipe, which I cut by about a third for this mini-pie:

Two pie crusts--one for the bottom, one for the top
1/4 cup plus 2 tsp. all purpose flour
1 1/4 cups sugar
1/4 tsp cinnamon
1/4 tsp ground mace (I omitted this, because I didn't have it, and used a touch of nutmeg)
5 cups sour cherries, pitted
2 tbl sour cherry syrup (made of boiled down cherries, water and sugar)
2 tbl butter
egg white for washing crust
sanding sugar for crust

Line pie plate with one crust and refrigerate. Combine all the dry ingredients and mix well. Toss in cherries, and syrup, then pour cherries into bottom crust. Dot top with butter, and top with second crust. Brush on egg white, and sprinkle with sanding sugar. Cut steam vents, and bake at 425 for 25 minutes, then reduce to 350 for another 25 minutes.

If you want to make a streusel topping instead, like I did, combine the following in the food processor:

3/4 cup flour
1/4 cup sugar
1/4 cup brown sugar
5 tbl butter, cut into chunks
1/4 tsp cinnamon
1/4 tsp nutmeg

This makes a nice crumbly topping great on pie and muffins.

Stay tuned for something with rhubarb!

Sunday, June 14, 2009

Throwing Scones in Glass Houses

Scones. Scones are probably the baked treat my family most often expects of me. My mom always loved scones, and at a young age, I made it my mission to make her the perfect version. At least twelve or thirteen years later, I don’t ever even look at a recipe. Very loosely, here are the proportions:

3 cups flour
1/3 – 2/3 cups sugar
Salt
1 ½ tbl baking powder
1 stick butter, cold
3 eggs
3 oz. evaporated milk

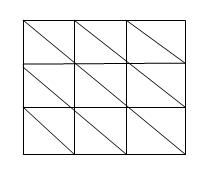
Combine the dry ingredients, and cut in the butter, as for pie crust. I keep the butter pea-sized. Use the amount of sugar to taste—sometimes I like it sweeter, sometimes less so. Whisk the eggs and milk, and add to the dry ingredients, being careful not to overwork. Pat it into whatever shape you want, and cut into whatever size you want. See how precise I am? Usually, I’ll pat the dough into a square about ¾ inch thick, and cut into nine squares, then cut the squares into triangles. Like this:

Bake in the oven, usually around 325, for 15 minutes or so. This really varies, depending on your oven, and how many you are making. They are done when they smell fantastic, and are a golden brown.

This recipe is very versatile. When making it for my family, or to freeze, I’ll actually quadruple it. I like doing that, because then it uses a dozen eggs, a full pound of butter, and a full 12 ounce can of evaporated milk. It seems strangely satisfying to me when that happens, but it makes A LOT of scones.
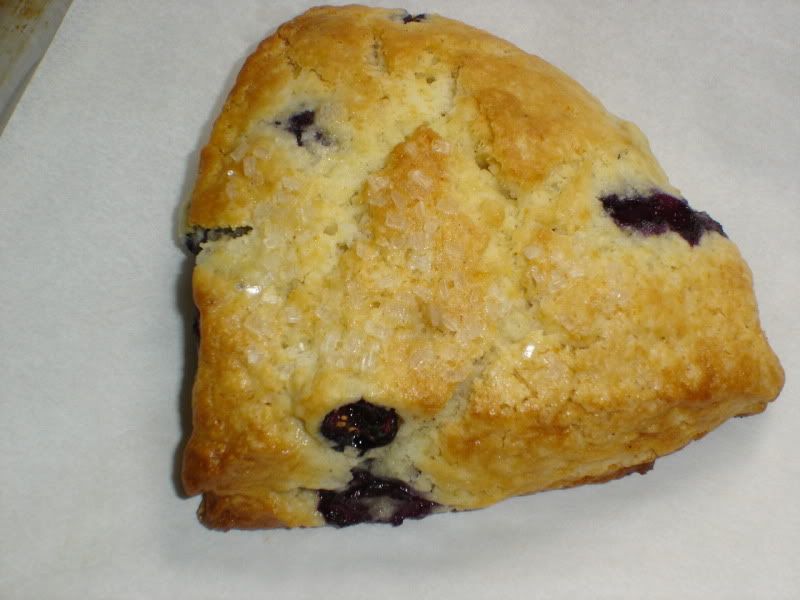
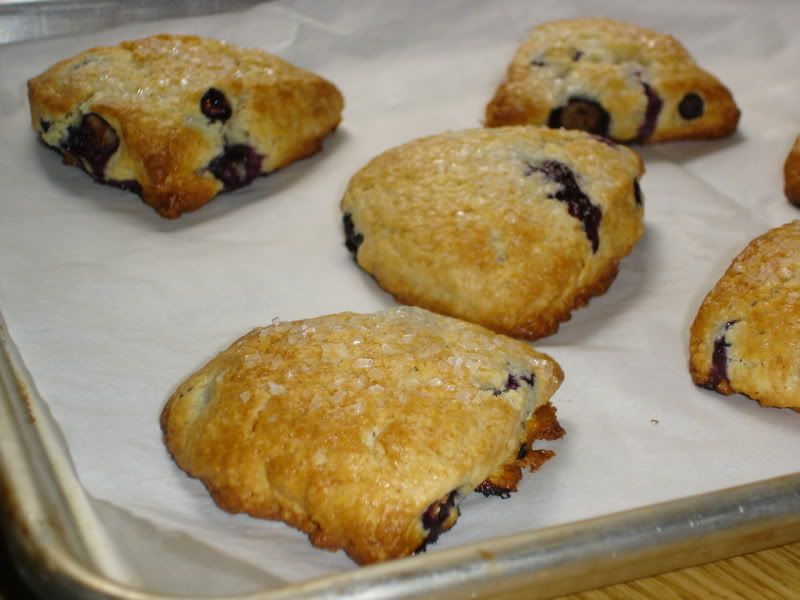
Changes to this recipe are simple to make. For example, last night, I only made 1/3 of the recipe, to make nine scones for breakfast. I used a moderate amount of sugar, used cream in place of the evaporated milk, added blueberries to the dry ingredients, vanilla to the eggs mixture, and patted together VERY carefully so as to not crush the berries. I then stuck it in the fridge over night, cut them this morning, brushed them with cream, and added sanding sugar to make them sparkle, and put them in the oven cold.

I sometimes will top them with cinnamon streusel, use chocolate chips, or fill a layer with a little jam. The recipe also does well in more savory adaptations; reduce the sugar, add garlic powder and cheddar, and you have a pretty tasty cheddar garlic scone. Add some rosemary, sea salt and asiago or parmesan, and it goes great with soup. You can also replace the evaporated milk with not only cream, but buttermilk or regular milk, to make slightly healthier.

Enjoy, and be creative!

Thursday, June 11, 2009

Berries and Bubbles!

It's raining in central Ohio this morning. Really raining. Rain makes me want to do a lot of things, including skip the gym, and spend some extra time in the kitchen. Which is why, at 7:30 this morning, I decided to put that champaign in my refrigerator to good use. It's been there since New Year's, after all.

When I walked into the kitchen this morning, the entire room smelled like a strawberry patch. Two quarts of fresh strawberries is a lot for us to eat, even though we've had them plain, with angel foodcake, and now dipped in chocolate (another bit of the morning's productivity). I had some simple syrup already prepared, so it took about ten minutes to put together my strawberry-champaign sorbet. I grabbed a handful or two of strawberries, hulled them, and tossed them in food processor until they were totally smooth. Then I added in just a touch of simple syrup, because they were already plenty sweet. I pushed the mixture through a sieve to remove the seeds, added several glugs of rose champaign, and poured it on into my ice cream maker.

Nothing starts the morning like a little berries and bubbles!


Monday, June 8, 2009

Double Chocolate Creme Brulee


I haven't exactly been consistent in updates, have I? I know I have yet to share any recipes or pictures for scones, which given the blog's name, probably should have been the first post. Hopefully, this creme brulee recipe will help you forgive me. Also, to all of you who voted for my cupcake, THANK YOU!

The book the recipe comes from is Lou Seibert Pappas' Creme Brulee. This is my first and only creme brulee cookbook, and I highly recommend it. I've been making the vanilla bean brulee for at least two years now, and this was actually my first time making any of the other recipes. However, I'll be coming back for more very soon. Overall, these weren't too sweet, and much of the sweetness came from the burnt sugar top. As a lover of all things custard, I'd make it again. Like, next week?

Double Chocolate Creme Brulee (with my changes in purple and italics)
(I halved the recipe and made three servings, and the directions are butchered. The original used too many words!)

2 cups heavy cream
6 large egg yolks
1/3 cup sugar, plus extra for topping (I prefer to use raw sugar for my topping, but regular sugar works)
1 tsp. vanilla extract (I used vanilla bean paste)
3 ounces white chocolate, chopped*
1 tablespoon brandy (I used Navan, which is a vanilla cognac)
2 ounces bittersweet chocolate, chopped*
1 tablespoon Kahlua (I used hazelnut Kahlua I bought in Mexico)

Preheat oven to 275. Heat cream in a small saucepan until bubble form around the edges. Whisk sugar and egg yolks until sugar is dissolved. Temper yolks into cream, and stir in vanilla. Put white chocolate in a small bowl, and add half of the cream mixture. Stir until chocolate is melted, then add cognac. To the cream mixture left in the pan: add bittersweet chocolate, and stir until chocolate is melted, then add Kahlua.

Place flan dishes in a baking pan, and divide the white chocolate mixture among the dishes. Let cool, and refrigerate for 30 minutes to cool and set . Also, put the bittersweet chocolate mixture in the fridge. After custards are cool and set, spoon bittersweet chocolate custard into white chocolate custard, and swirl with a fork. (Umm, I stuck them in the freezer for 30 minutes, then proceeded. I was in a time crunch. They didn't swirl especially well, so you should probably actually follow this step. They more turned light brown, but not very well mixed and a little streaky. Oops).

Place the baking dish of custards in the oven, and pour warm water into the baking dish so that it comes half way up the sides of the custard cups. Bake for 30-40 minutes until custard is set. The centers should jiggle just a little when done.

Cool, then refrigerate for at least two hours. (I cooled all the way but never refrigerated. I break rules). Before serving, evenly sprinkle sugar over the top, and have fun with your little blowtorch.

*Please, please, please use good quality chocolate here! When chocolate is the primary flavor in custard, you don't want to go with some generic chocolate chips from Giant Eagle(no offense, Giant Eagle...I heart you). For both the white and bittersweet, I used E. Guittard.