Sunday, January 31, 2010

We'll Resume Normal Programming Shortly

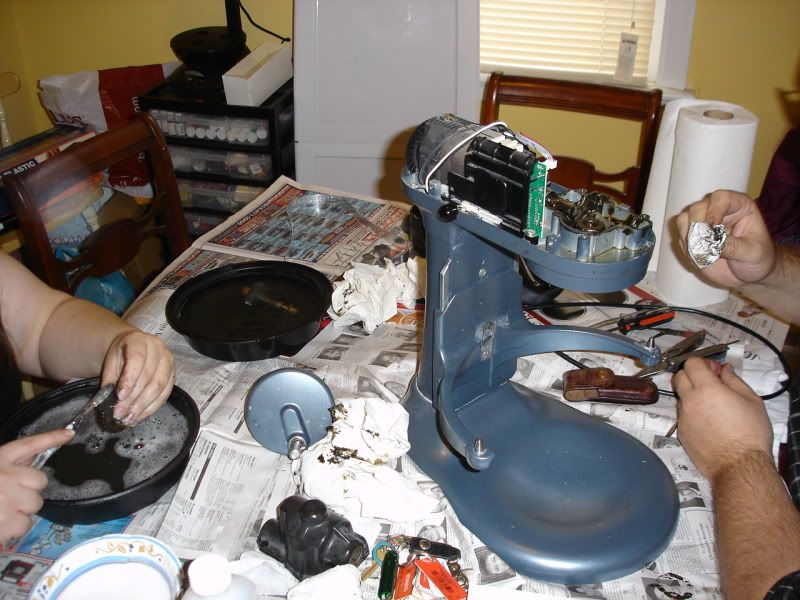
Well, a belated hello to 2010! I swear I've been baking--you just haven't heard about it. Early in December, as I began my Christmas baking, the unthinkable happened: my KitchenAid got sick. I say "got sick" because it's not dead, thanks to my mechanical engineer sister and brother-in-law. Or, they tell me my trusty steel blue buddy's going to make it out of this disaster just fine, perhaps better than new. However, there's been a lot of ordering parts, and losing parts, and breaking parts, and ordering more parts. So, umm, we'll be back to our regularly scheduled baking eventually.

Here are My Heroes, and my baby in pieces:


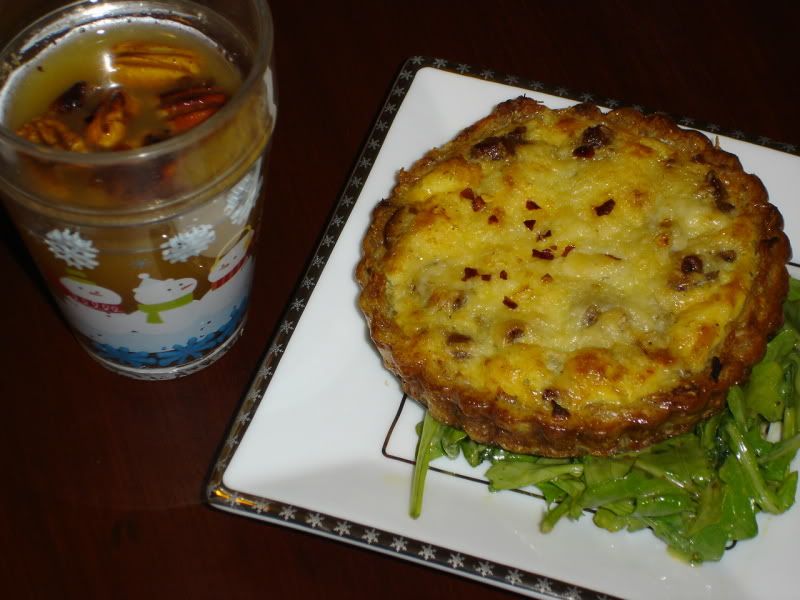
In the mean time, I've done a few things not normally seen here on A Scone's Throw. I bring you, breakfast for dinner!

For Christmas, I received mini tart pans and was eager to put them to use. These tiny quiches used left over mushrooms, onions and sausage, in a simple pastry. All I really did was make my standby pastry, and bake it for about 10 minutes. I then placed the cooked veggies and sausage into the shells, topped them with an egg scrambled with some (leftover) herbs, and topped with some cheese. I used white cheddar on mine, and Jarlsberg on Carolyn's...I differentiated them by sprinkling mine with a touch of red pepper flakes. They are sitting on top of a simple arugula salad dressed with white balsamic vinegar.


The drink on the side? A stroke of brilliance inspired by a local diner that I thought paired perfectly with breakfast for dinner: Crown Royal, orange juice, and a touch of maple syrup, topped with candied pecans.

Friday, December 4, 2009

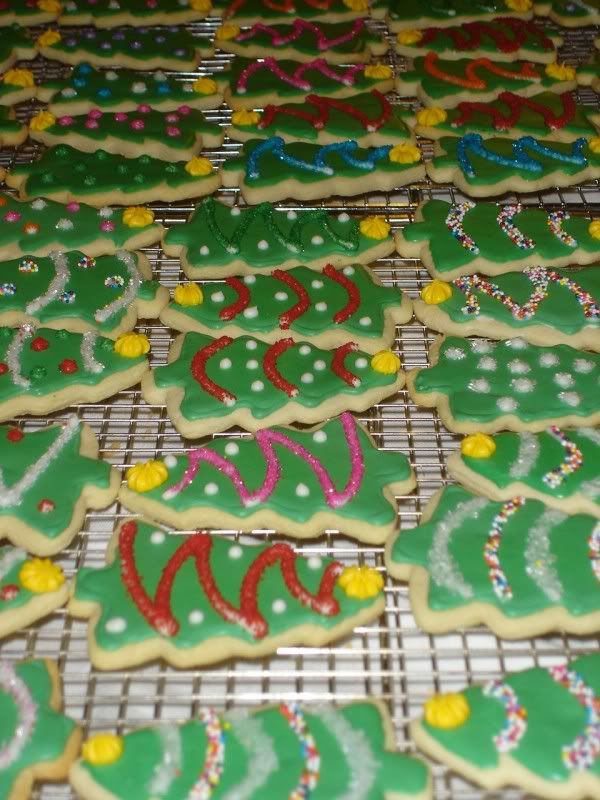
Oh, Christmas Tree


I've been a busy girl. A friend of mine with whom I often travel for work called me a couple weeks ago to see if I'd be interested in a baking job. For 15 dozen cookies. Sure, I said. Great. Absolutely.


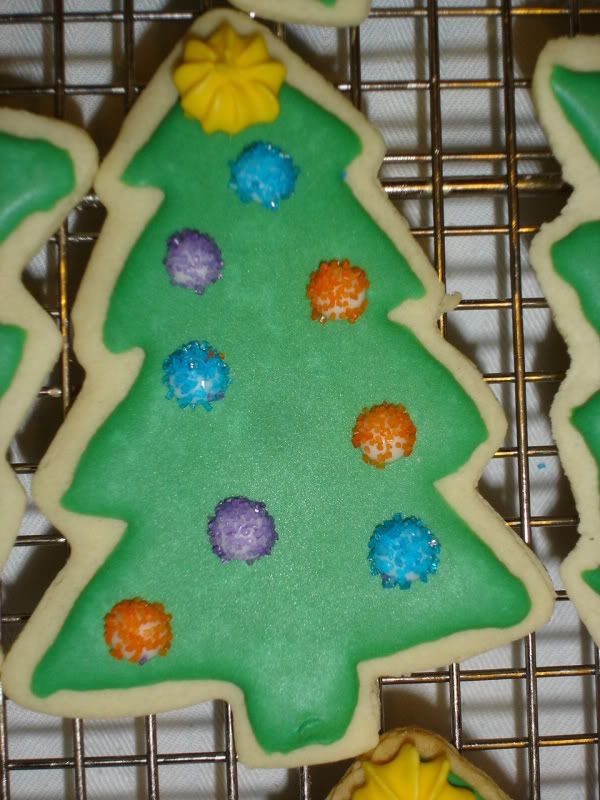
Now, I've baked a lot of cookies. I've decorated a lot of cookies. However, my royal icing experience has been entirely limited to those breast cancer cookies a couple months ago. I thought it would be quick and easy--outline, flood, decorate, no problem. Ha. I am definitely a buttercream girl through and through. Royal icing in large quantities is a messy slow process for me! I learned a lot, and have been operating on less than five hours of sleep every night this week. Tomorrow, I might just sleep until noon. There was one point this week where I'm pretty sure every flat surface of my dining room was covered with a layer of green trees--like my very own confectionery forest, that smelled almost nauseatingly sweet when one walked in the room.

There are 14 dozen cookies with royal icing, plus a dozen with my usual buttercream. Since I don't have any elves to help me decorate my cookies, in the future, I think the cost of said cookies is going to be a touch higher than I charged this time, purely because the time commitment and frustration/exhaustion factor was significantly higher than anticipated. But they are pretty, aren't they?

Sunday, November 1, 2009

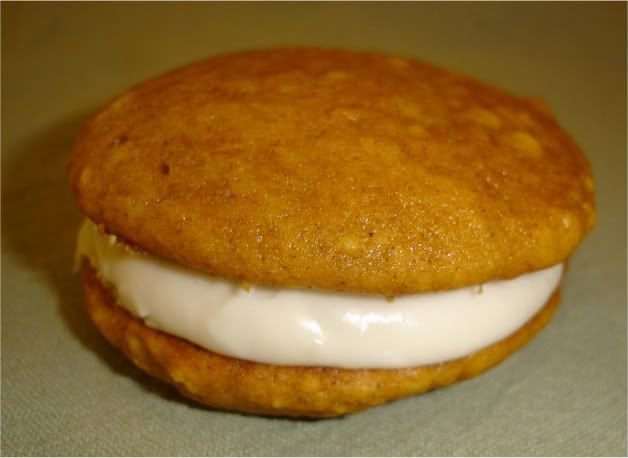
Pumpkin Whoopie Pies with Maple-Bourbon Cream Cheese Filling

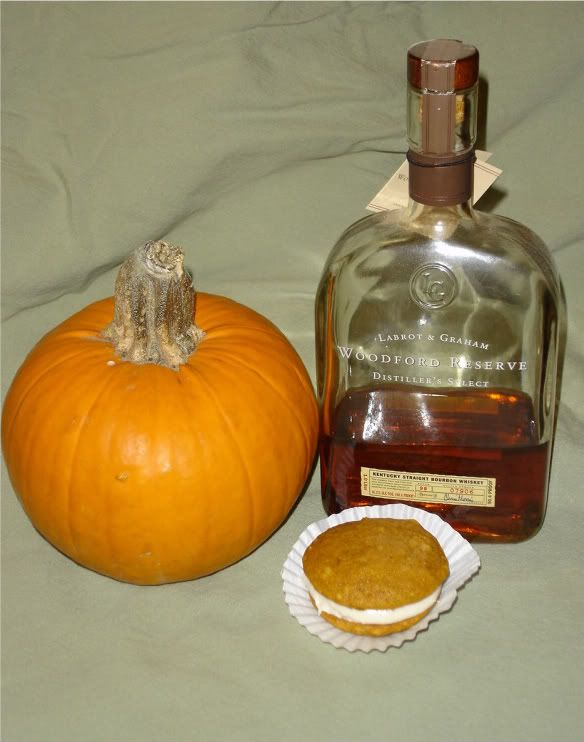
Oh, fall. How I love you, with your abundance of squash. We picked up a couple pie pumpkins last weekend (along with acorn and butternut squashes) at Hurley Farms in Indian Lake. This one pumpkin produced some pumpkin risotto, a half dozen whoopie pies, and a 3" pumpkin cheesecake for the two of us. The pumpkin whoopie pies were for a friend's birthday--a friend who has a love for pumpkin as deep as I do. The recipe was an adapted recipe from How to Eat a Cupcake. She halved the recipe when she made it; I quartered it. I also made the frosting extra-special for my friend; instead of a standard cream cheese frosting, I made a maple-bourbon cream cheese frosting, which appeals to pretty much his entire flavor palate (and mine--the frosting was SO good)

The proportions are mine, with the original proportions in parenthesis.

Pumpkin Whoopie Pies
Makes 14 cookies (7 pies if you can stand to wait until they are cool to taste that pumpkiny goodness)

5/8 cup all-purpose flour (2 3/4 cups)
1/2 teaspoon baking powder (2 tsp)
1/4 teaspoon baking soda (1 tsp)
1 teaspoons ground cinnamon (4 1/2 tsp)
1/4 teaspoon ground nutmeg (1 1/2 tsp)
1/4 teaspoon ground ginger (1 1/2 tsp)
1/8 teaspoon ground cloves (1/2 tsp)
1/2 stick (4 tablespoons) unsalted butter, at room temp (2 1/2 sticks)
1/4 cup sugar (1 1/2 cups)
1/2 tablespoon molasses (3 Tbsp)
1/2 teaspoon vanilla extract (2 tsp)
1 large eggs (4)
1/3 cup pumpkin puree (not pumpkin pie filling) (1 1/4 cups)
1 oz buttermilk (1/2 cup)

Preheat oven to 325 degrees F. Whisk dry ingredients (except sugar) together in a medium bowl.
Using electric mixer, beat butter, sugar, molasses and vanilla in large bowl to blend. Add eggs 1 at a time, beating until blended after each addition. Add pumpkin puree.
Mix in dry ingredients in 3 additions alternately with buttermilk in 2 additions, beating until just combined.
Line large baking sheets with parchment paper. Drop dough by rounded tablespoonfuls (I used a number 24 ice cream scoop) onto prepared sheets, spacing 2 inches apart, leaving enough room for dough to spread.

Bake for 10-15 minutes, until cake springs back when lightly pressed in the center. Cool completely on wire racks before filling.

Maple-Bourbon Cream Cheese Frosting (my own recipe)
3 oz. cream cheese, softened
1 tablespoon unsalted butter, softened
1-2 cups confectioners' sugar, sifted, plus more if needed
a bit of vanilla extract
a bit of maple extract
a good glug of bourbon (I used Woodford Reserve)

Blend cream cheese and butter until smooth and well combined. Add in 1 cup sugar and flavorings. Blend until combined. Add additional powdered sugar, a little at a time, until frosting becomes stiff enough to not run off the cookies. Taste for flavor, and adjust if necessary.

Spoon a good amount of frosting on half of the pies (or pipe on with a pastry bag), an squish a second pie on top. Place in the fridge for a while to let the frosting firm up some more. Then enjoy. Mmm.

Wednesday, October 21, 2009

Sugar Cookies and Royal Icing


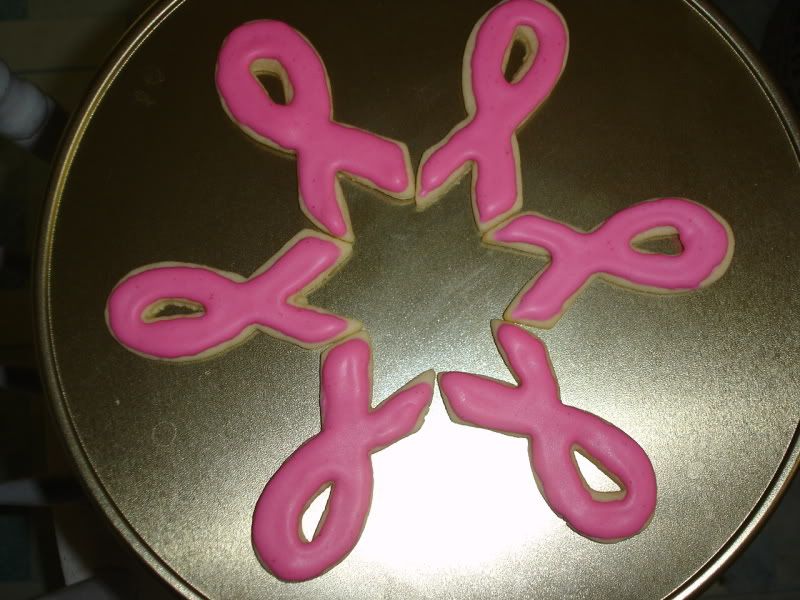
One thing I've probably never said here is how lucky I am to not only have a job in this economy, but to love my job and work for a place whose mission matches up so well with my own values. Working for a college certainly has its ups and downs, but the sense of community at my alma mater and employer is exemplary. There are a great number of big and little things that happen across campus that give me warm, fuzzy feelings routinely, and this month's Cookies for the Cure event is no exception. October is breast cancer awareness month, and in addition to a great number of awareness activities, our Wellness Council decided to ask faculty and staff to donate cookies, wrapped in baggies tied with pink ribbon. Every Wednesday, they then sell these cookies during the lunch hour, and donate all the proceeds. It's a bake sale to save boobs! I love it!

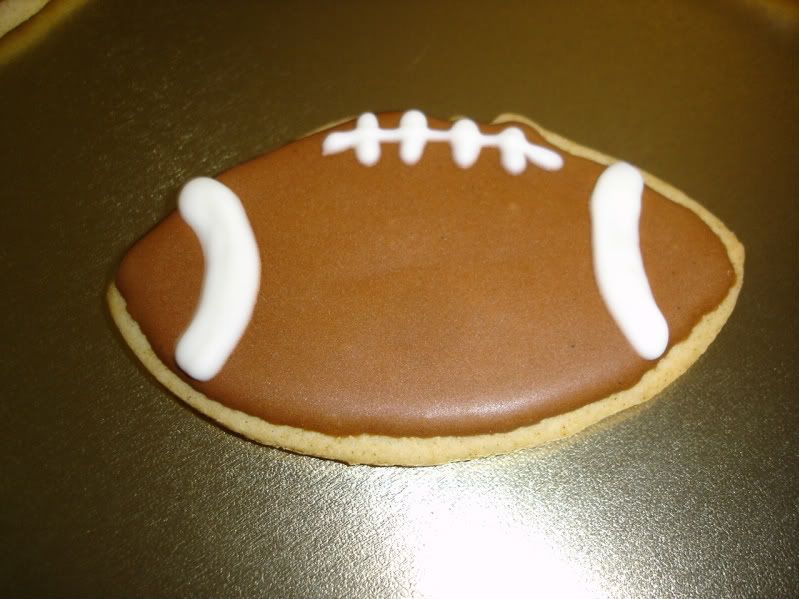
I thought this was a prime opportunity to try a different cookie recipe. I say "opportunity" because no one in particular would be eating these cookies. I've been wanting to try my hand at decorating with royal icing, but if I brought these decorated sugar cookies anywhere, a number of people would be pretty miffed since I'm always told my frosting (buttercream) is the best part, and that the cookies are merely a vehicle for the frosting. I figured charity was as good a reason as any to try out a new recipe, though, so I hit up Martha. I used her basic sugar cookie recipe and royal icing recipes. Of course, with minor alterations: I halved both recipes, and flavored the icing.

Frankly, I thought the icing was terrible at first. I tried using vanilla extract, and didn't think that improved the taste, so I then added almond extract until it was palatable. I then put a dab on a broken cookie, and ate them together. Better, for sure, but I wasn't sold. I decorated two cookies, and let them dry. I then force-fed them to Carolyn, my official taste-tester. And, she liked them. So I tried another. And, after the icing hardens, it actually does taste better. I still wasn't 100% sold, so I took some to a family game night, and observed reactions. When one game night attendee broke one in half in an effort to "be good," and immediately went back for the other half (which someone else had already eaten!), I figured I had done ok. Although the designs I did were very simple for my first shot, I was pleased with the effect of royal icing, was eventually happy with the taste, and will definitely use it again.

A the very least, the people selling them at work liked them. Maybe it'll drum up some holiday business for me?

Monday, October 5, 2009

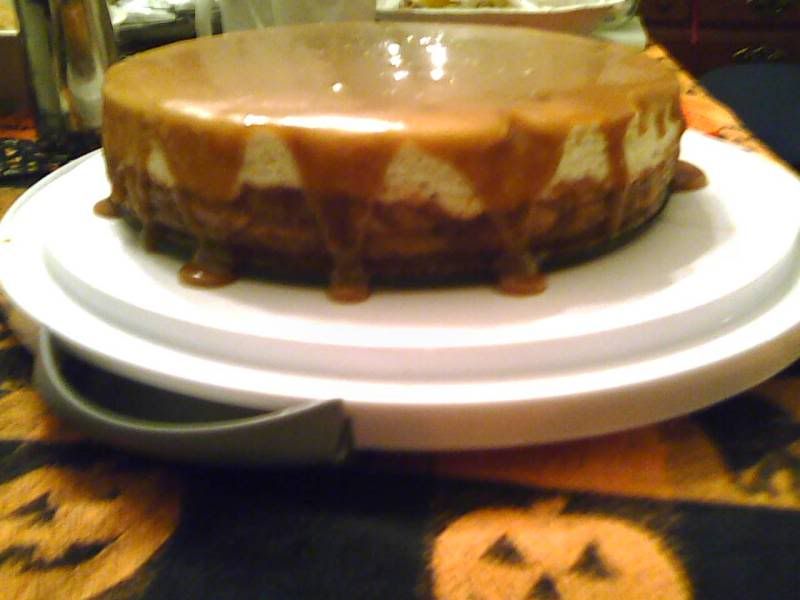
Caramel Apple Cheesecake

Mmm...fall. There are a number of things about fall I look forward to, including the ever changing colors of the leaves, pumpkin beers, Halloween, and apple desserts. My CSA has been keeping us in apples and pears for the last several weeks--so many that we can hardly keep up. In celebration of my dad's and brother-in-law's October birthdays, I made a caramel apple cheesecake. The singular inspiration being all the apples in my house, and the desire to make something other than apple pie. I couldn't find a recipe that was exactly what I wanted; Not Quite Nigella's came closest in terms what I was visualizing, but fell short of my exact expectations (I used my own cheesecake recipe, made it less sweet, I wanted more apples...). Like most dabbling food bloggers out there, I simply used the recipe as a jumping off point, and embellished. Here's the recipe, as I butchered it:

Crust:
Several large handfuls of vanilla wafers (I used the fun color minis, but I'm sure that's irrelevant)
6 tablespoons butter

Blend in food processor until it come together. Press into bottom of springform pan, and bake for 10 minutes or so until it's kinda firm and not going to float away when you add filling.

Apple Layer:
2 tablespoons butter
3 large apples, peeled, cored and sliced thinly (I used three different varieties)
3 tablespoons brown sugar
glug maple syrup
1/2 teaspoon cinnamon
a touch of powdered ginger
a touch of all spice
a touch of freshly grated nutmeg
1/2 tsp cornstarch

Saute apples with butter, brown sugar, and maple syrup until there is liquid from the apples in the pan. Add spices and cornstarch, continuing to cook over medium heat until apples are soft but not mushy, and there is a nice syrup. Smoothly layer onto cooked crust.

Cheesecake:
3- 8 oz packages of cream cheese at room temperature
1/2 cup sugar
3 eggs
2 teaspoons flour
1/4 cup cream
1 tsp vanilla bean paste
Whip cream cheese and sugar in electric mixer until smooth and fluffy. Add eggs, one at a time, beating until fully incorporated before adding the next one. In a small bowl, combine the cream and flour, stirring until smooth. Add to cream cheese mixture, along with vanilla bean paste. Mix until smooth and well blended. Pour slowly on top of apples (be careful here so you don't dislodge the apples).

Bake in a water bath for about 55 minutes at 325. Center should be set but jiggly when you pull it out. Cool, the refrigerate until serving. Right before serving, top with caramel sauce.

Caramel Sauce:
6 tablespoons butter
2/3 cup brown sugar
1/4 cup cream

Melt butter and brown sugar together over medium heat, until it boils. Cook for several minutes until mixture is thick and fragrant (like, say, caramel!). Add cream, and stir until combined. If your cream is cold, it may seize the caramel mixture and bubble furiously. Just keep stirring over the heat until it comes together. Cool until ready to top cheesecake.

By all accounts, this dessert was a hit, and nearly every one stuffed themselves with an entire slice, even after a rather filling dinner. Pardon the poor quality of the photo--it was taken with my cell phone camera, since I was at my parents' house.

Sunday, September 20, 2009

Allie and the Giant Rainbow Cupcake

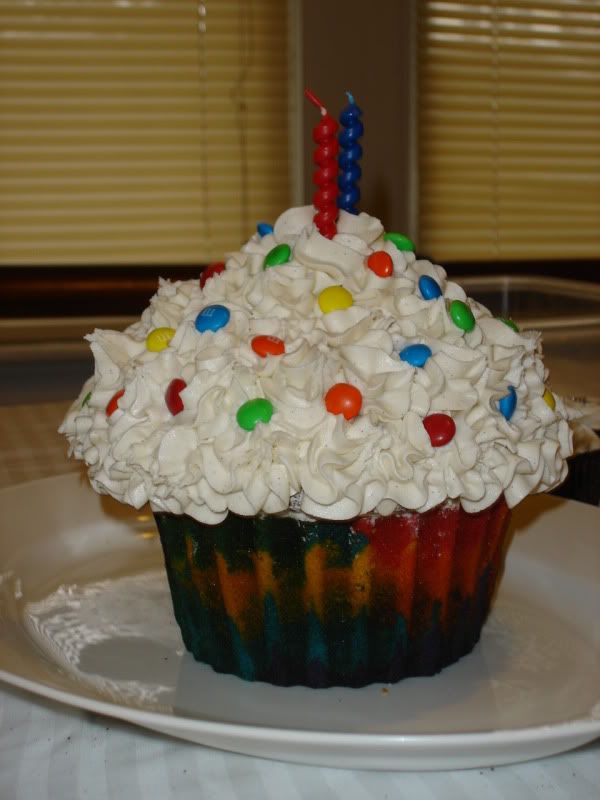
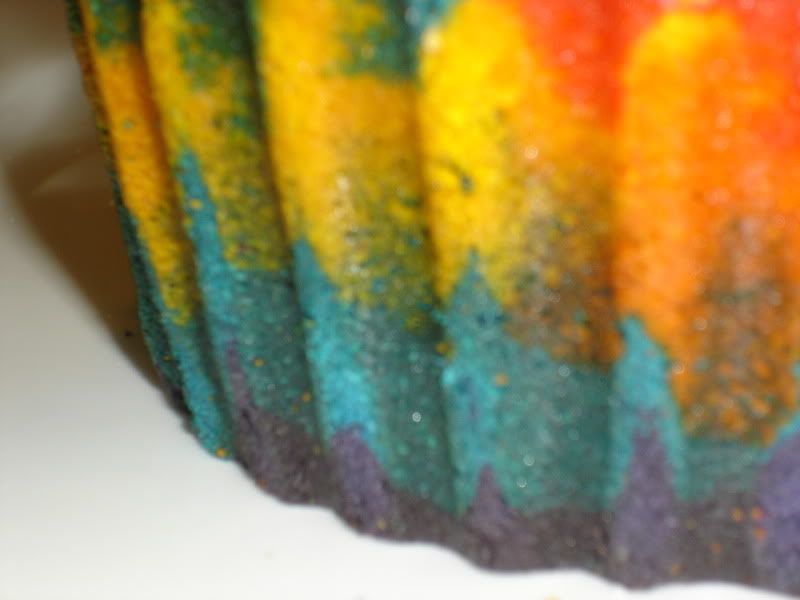
I pretty much demanded the Wilton Giant Cupcake pan for my birthday this year, and my niece's second birthday was the time to try it out. (I think I might have even begged to be allowed to make the cake, before I owned the pan.) For size perspective, see photo op with the normal-sized cupcakes. I had lots of ideas for how to make the cupcake, since decorating options are unlimited. I knew I didn't want to frost the bottom part, because I wanted the ridges of the pan to be obvious. I also knew I wanted a lot of color for the cake. Enter idea to try out not only my first ever cake in this pan, but my first ever attempt at a rainbow cake. Who needs to try things one at a time? Not me!

The mother of the birthday girl had said she wanted chocolate cake, though, so the top of the cake is chocolate. The birthday girl herself is a big fan of candy. I actually bought Mike and Ikes to use as giant sprinkles, but that didn't work out because they were a tropical variety of the candy, and the colors were pastel. Not what I was going for in this cake, but I'll definitely use them in the future. Besides, Jules loves M&Ms.

Now, this cake was not without it's own small disasters. I wanted a deep chocolate cake--something like a devil's food cake. After a lot of searching the internets, I decided on Hershey's Black Magic cake (which I've never made). Verdict: delicious, if you like impossibly spongy, soft cake. That can't stand the weight of itself, never mind of frosting. The normal-sized cupcakes were fine, but the giant cupcake top? Fell to pieces! I was so irritated that I didn't even take pictures. I promptly Googled "sturdy chocolate cake" and eventually decided on the Wilton recipe that came with the pan. Brilliant.

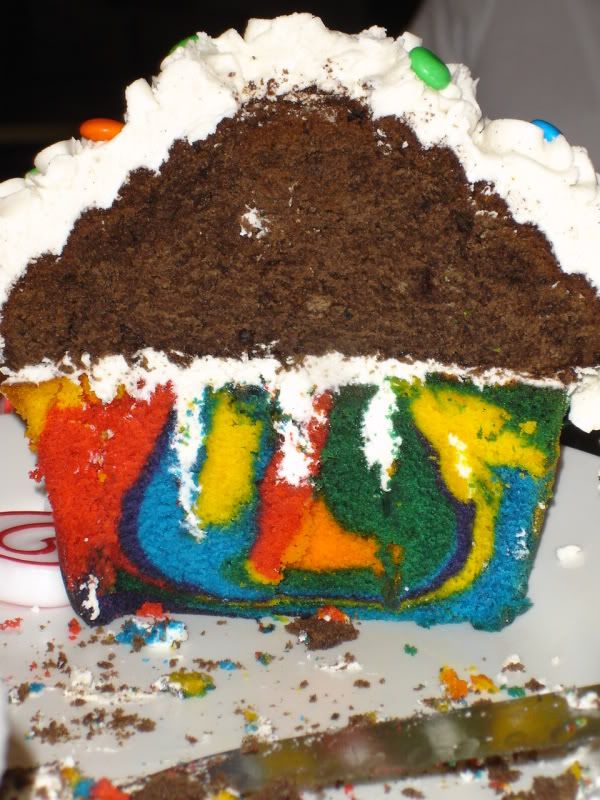
Now, about the rainbow-ing. I made a basic white cake recipe, because I wanted the colors to be pure, so there were no egg yolks involved (bonus: using up the million egg whites I always have leftover from all my ice cream making). Since I was pretty sure chocolate and rainbow cake would not bake at remotely the same pace, I made them separately, filling the opposite side of the pan with water. The rainbow cake. Baked. For. Forever. Seriously, I think it was more than 90 minutes. However, what came out was lovely and dense and very tasty. So I can't complain. (The cupcakes from the same batch were much lighter; the density is probably a result of the over-stirring to add the color, the waterbath next to it, and the temperature). I baked it at a very low temperature, because I wanted to avoid too much goldening on the outside, so that the colors would still be vivid. It was moderately successful, although I did trim at some of the ridges to brighten it up. Since I didn't frost it, I poked several holes into the bottom, and filled it with frosting, just to ensure it wouldn't be dry. And because everyone loves frosting.


Then I simply topped with the (second) chocolate cake, with a layer of frosting-glue between them. I gave the top a crumb coating, then finished with frosting swirls and M&Ms. The birthday girl herself wasn't too into it, but the adults at the party seemed pleased. Me? I can't wait to make the cake again...I have so many more ideas for it!

Sunday, August 23, 2009

Candied Bacon


By now, you've undoubtedly noticed my affinity not only for ice cream, but my enormous crush on David Lebovitz. I often tell people that I could be a vegetarian, except that I love bacon too much. (In truth, I'm not anything close to a vegetarian, except that I can go days without eating meat and not really notice.) Bacon, however, is a serious food-love, second only to ice cream. I'm sure you can see where this is going. Bacon in desserts is very trendy right now: bacon cupcakes, bacon donuts, bacon chocolate. And David has a recipe for candied bacon ice cream. I've been wanting to try it for months, but last night, I finally did it.

Now, because I can't leave any recipe well enough alone, I made a number of changes. You should check out David's original recipe before making any decisions.

For the candied bacon:
5 strips bacon
about 2 tablespoons light brown sugar
maple syrup (my addition)

Now, I halved the recipe for the ice cream. Except I didn't halve the bacon. I figured I'd want to nibble on the extra. I was actually concerned that if I didn't make extra, I'd eat it all and leave none for the ice cream. It was a good decision, as you'll see at the end of the post.

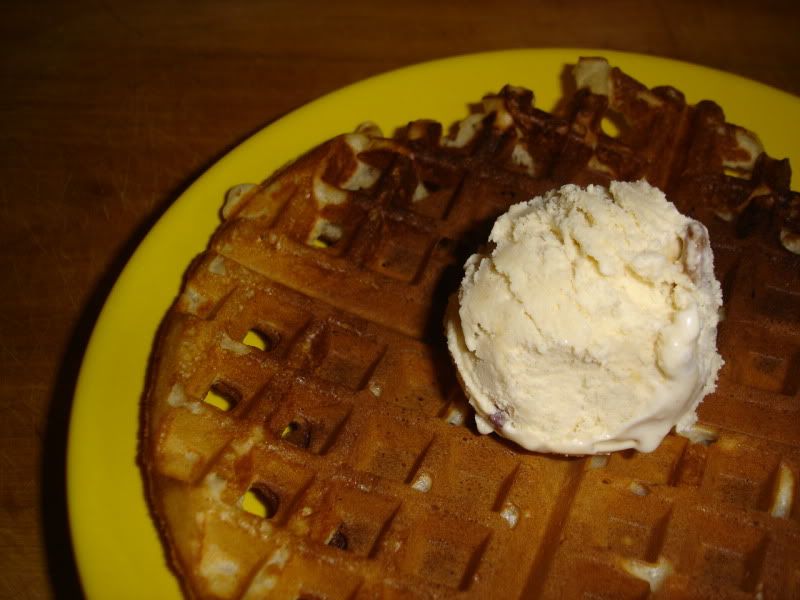
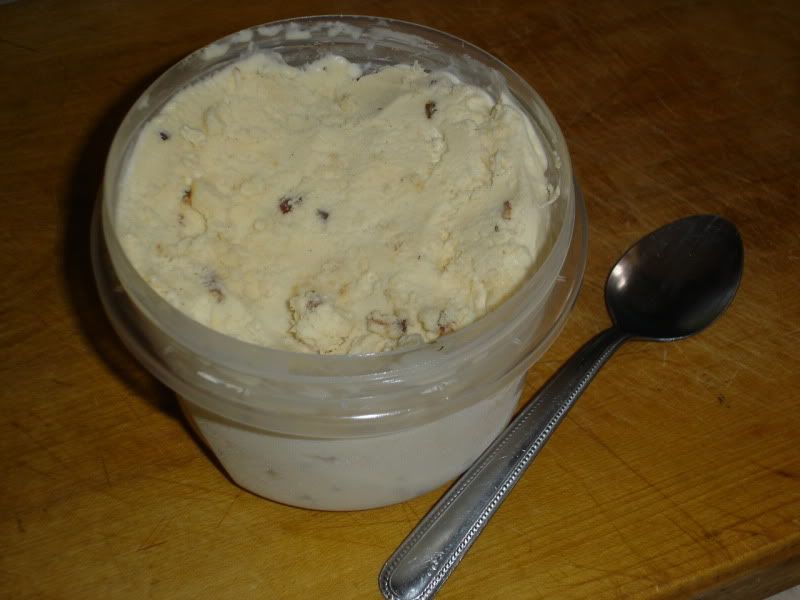
My ice cream, perhaps due to the changes I made, tastes like a great breakfast of french toast and bacon. This is probably due more to the fact that the french toast I make is very much custard based, and I use vanilla, Navan, maple and cinnamon when I make it. I don't know that everyone would feel this way--it's more that it tastes like my french toast than french toast in general, I think.

For the ice cream custard:
1 tablespoon butter plus salt if not salted butter
1/3 cup (packed) brown sugar
squeeze of maple syrup (my addition)
1 cup milk
3/4 cup cream
2 large egg yolks
1 teaspoon Navan (my addition, David recommends rum or whiskey)
a couple drops of vanilla bean paste
a tiny pinch of cinnamon

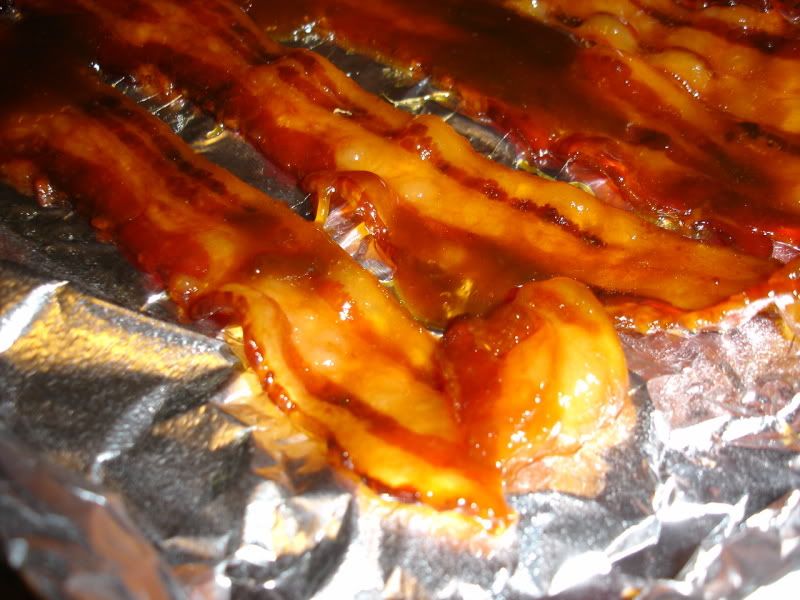
To candy the bacon, turn the oven to 375 and lay the strips of bacon in a baking dish, and top with brown sugar. Drizzle with maple syrup to taste. Bake for 12-16 minutes, occasionally flipping the bacon strips over and dragging them through the syrupy liquid. Continue to bake until dark and done-looking. Remove from oven, and lay on a sheet of aluminum foil sprayed with non-stick spray. (At this point, I stuck the strips in the freezer to cool faster). Once cool, chop into small pieces. You want them fairly small, or else they really get stuck in the teeth.

To make the ice cream custard, melt the butter in a heavy, medium-size saucepan. Stir in the brown sugar, maple syrup to taste, and the milk. Stir until brown sugar is dissolved, and mixture is not quite boiling. Pour the cream into a bowl set in an ice bath and set a mesh strainer over the top.

In a separate bowl, stir together the egg yolks, then gradually temper them with the brown sugar mixture, whisking the yolks constantly as you pour. Pour the mixture back into the saucepan. Cook over low to moderate heat, constantly stirring and scraping the bottom with a heatproof spatula, until the custard thickens enough to coat the spatula.

Strain the custard into the half-and-half, stirring over the ice bath, until cool. Add liquor, vanilla and cinnamon, if using.

Refrigerate the mixture. Once thoroughly chilled, freeze in your ice cream maker according to the manufacturer's instructions. Add the bacon bits during the last moment of churning, or stir them in when you remove the ice cream from the machine.

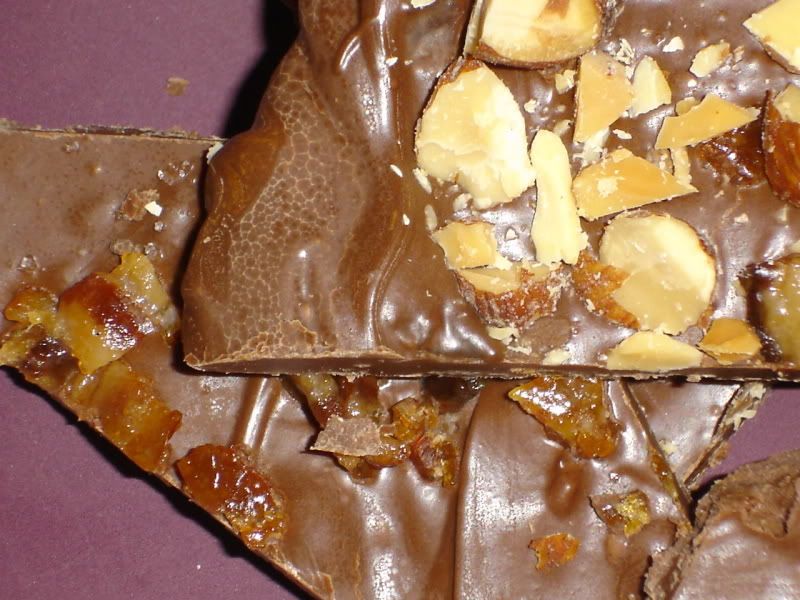
I did have plenty of left over candied bacon, and decided to make some chocolates with it. By this time, it was getting late, so I was rather lazy. I didn't temper the chocolate, so you'll notice it's not shiny. I also didn't use any molds. I simply melted a combination of semisweet and milk chocolates in a double boiled, and stirred in about 1 1/2 strips of diced candied bacon. I then spread the bacon-chocolate mixture on waxed paper in two distinct portions. I sprinkled the first with the remaining bacon and a bit of fleur de sel. I topped the other portion with finely chopped smoked almonds. Once cooled, I broke it into pieces. I actually prefer the one topped with smoked almonds--the smokiness of the almonds brings out the smokiness of the bacon in a fabulous way.

I have to admit, I will probably make more candied bacon. It's delicious, and I'm already thinking of other ways to use it...