Thursday, December 16, 2010

Cookie Time!

I can't believe it's been more than two months since I've posted. In the time I've been gone, I did cupcakes for a wedding, made a baklava cheesecake for Thanksgiving, and have a good headstart on my Christmas baking. A couple weeks ago was our annual church bazaar, which includes a bake sale. I have some cookies I make every year, but this year I became obsessed with making ornaments. Don't ask why. I didn't even own an ornament cookie cutter before this. But, I sure did go and buy one, and have a blast decorating the cookies.

The cookie and icing recipes are the same as the those I used last year for the trees I made.


I didn't have much of a plan going into these
cookies, besides having fun. Sorry about the reflecting light in the snowman and snow flake cookies; they were already packaged for the church when I remembered I wanted to take pictures!


Monday, October 11, 2010

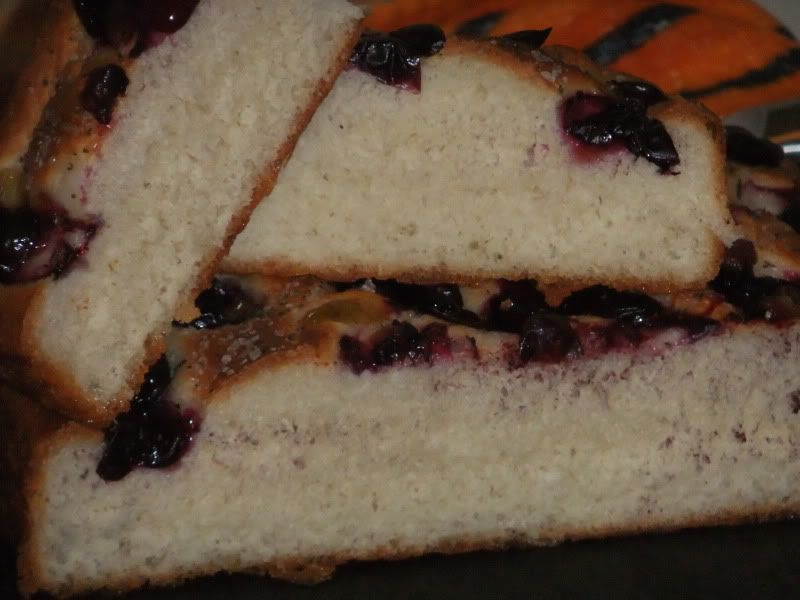
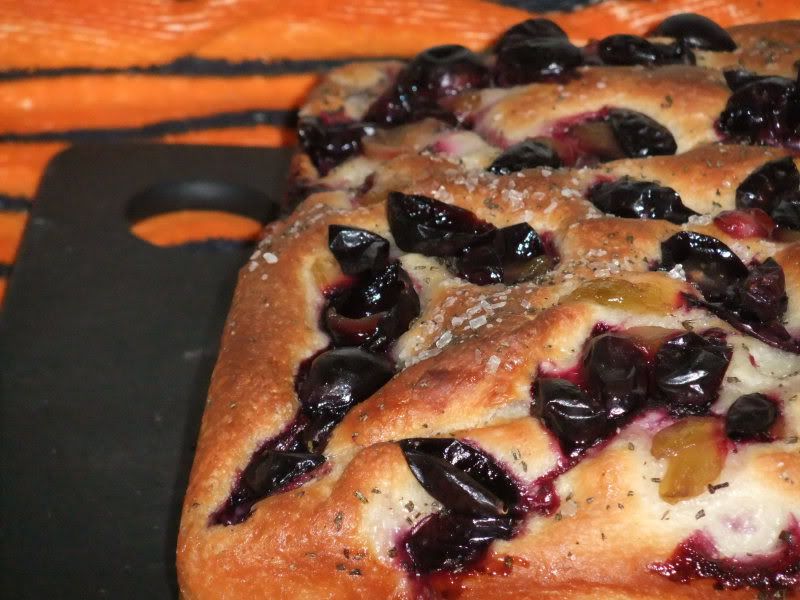
Concord Grape and Rosemary Focaccia

I've been obsessed with making pizza lately; I've been tossing thin crust pizzas, to be baked at the highest temperature my oven will reach, with a different array of toppings at least once a week. After a visit to the Italian fest this weekend, and some of the best thick-crust pizza of my life, I decided I need to tackle a thicker crust. Then, at Hurley's Market at Indian Lake, I found some of the most beautiful concord grapes. I've been eager to get my hands on some concords to try this Smitten Kitchen recipe, but I couldn't resist a few changes. I didn't want that thinner crust she had. My favorite focaccia is a two-inch thick, well-herbed, well-oiled, lightly golden piece of carb heaven from a local bakery, and that was what I wanted to emulate, while still incorporating the sweet-savory combination of concords and rosemary.

I started researching focaccia recipes, while in the back of my head knowing two things from previous experience: I wanted a small amount of sugar in the dough (makes it delightfully addictive), and I wanted a cold-fermentation rise. My recent experience with thin crust pizzas has shown me how much the flavor and texture develop overnight in my refrigerator, and I was hoping that would translate equally well in focaccia. From there, I went to my two most trusted sources: King Arthur Flour, and Peter Reinhart. I made a smaller loaf, and a few other adjustments, including the addition of high gluten flour. One change I will try the next time is to increase the water; this creates a sloppier dough, but also yields light, airy holes, which this dough is lacking. In some ways, I think this dough is almost too tender, white-bready. I'm thinking about nixing the powdered milk, and replacing some flour with semolina.

Now, for just a second, I want to talk about sweet, salty, tangy brilliance that is the concord grape/rosemary topping on this lovely bread. I thought Smitten Kitchen's photos looked so good, and I was dying to try this combination that reminded me of the backyard growing up: grapevines on one side, and mom's glorious herb garden on the other. Once it started baking however, doubts began to set in. It smelled glorious, don't get me wrong. But, it also sort of smelled like grape jelly pizza, so I started to become skeptical. Don't be. Come on. This is like having your wine ON your bread, and not merely with it. Go. Get in the kitchen. Make this, before concords are out of season. If you prefer a thinner crust, please refer to the Smitten Kitchen link above!


Concord Grape and Rosemary Focaccia
makes one 8x8, delightfully thick bread

1 1/3 c. all purpose flour
3/4 c. high gluten flour
1 1/4 tsp. baking soda
1 tbl. powdered dry milk
1 tbl. sugar
1 1/4 tsp. instant yeast
1/2 tsp. kosher salt
1/4 c. olive oil, plus additional
3/4 c. cool water
1 c. halved and seeded concord grapes
1 tsp. fresh rosemary (I like mine very finely chopped, almost to powder)
course sugar for sprinkling
kosher salt for sprinkling

Combine first nine ingredients in stand mixer, and knead with dough hook for 10 minutes. Grease glass bowl large enough for dough to double. Add dough to bowl, covering dough on all sides with olive oil. Cover with plastic wrap, and place in refrigerator overnight. (Mine was in for about 20 hours).

About an hour and a half before baking, remove dough from refrigerator. Line the bottom an 8 x 8 with parchment paper, and brush the paper and sides of pan with olive olive. Stretch and push the dough into the pan, deflating it as little as possible. Brush on more olive oil, cover with towel, and allow to come to room temperature and rise.

About 30 minutes before baking, preheat the oven to 425 degrees. Right before baking, sprinkle dough with coarse sugar, kosher salt, rosemary, and grapes. Bake for 20 - 30 minutes. Enjoy the bizarre scents wafting through your kitchen. Try to let it cool before digging in.

Saturday, September 18, 2010

Hate OSU, Love the Cookies

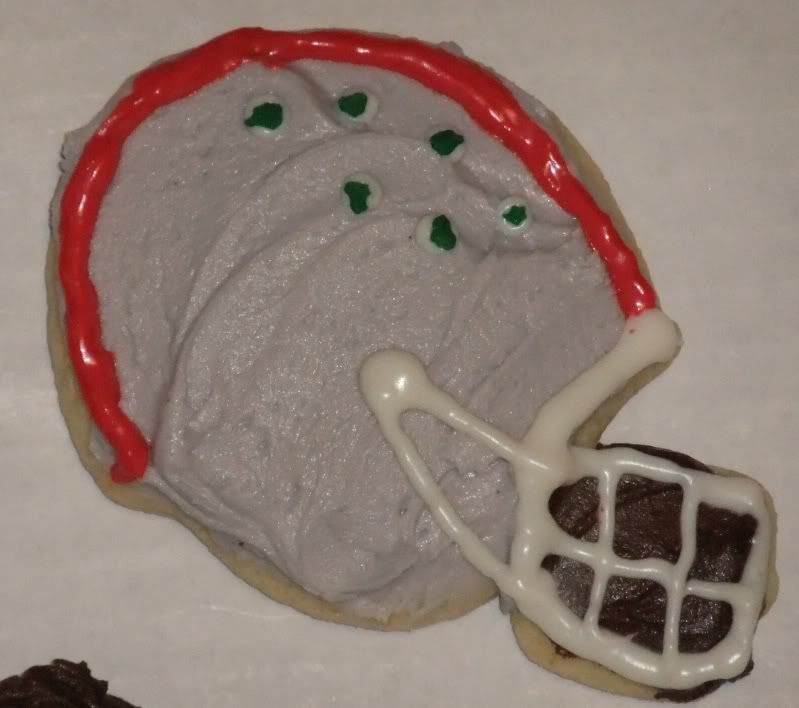
Any person who knows me knows that I hate OSU, and especially OSU football, with a passion. It's pretty much the worst part of living in central Ohio. However, I have willingly joined a family of insane OSU football lovers, and am frequently subjected to screams when things go well, and curses when they don't. I am even the owner of O, S, and U shaped cookie cutters (the only alphabet letters I own, for those interested in purchasing me baking-related gifts).

Today, when asked to come up with a quick dessert to take to my sister-in-law's house for niece birthday love (I can't believe she's three!) and for the second half of the OSU game, these cookies seemed perfect. Besides, I did buy those red and silver sprinkles ages ago, and thought this was a good use. Although, I might have been mocked that this was my idea of a "quick dessert."


I have to admit, I'm particular fond of my buckeyes (really, the holes from making the Os), as well as the marijua--I mean, buckeye leaves on the helmets. The cookies made today's game bearable...as well as the puzzle of Las Vegas we worked on diligently!

Friday, August 27, 2010

Sweet, Boozy, Italian Happiness

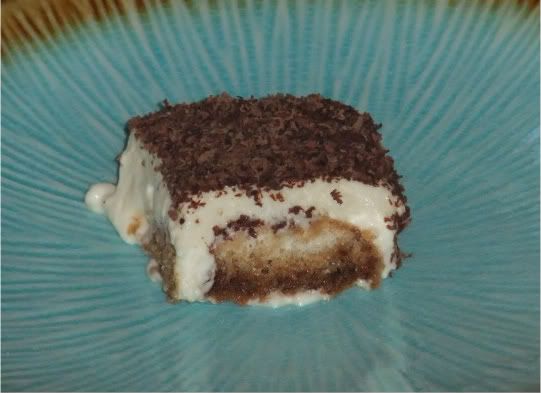
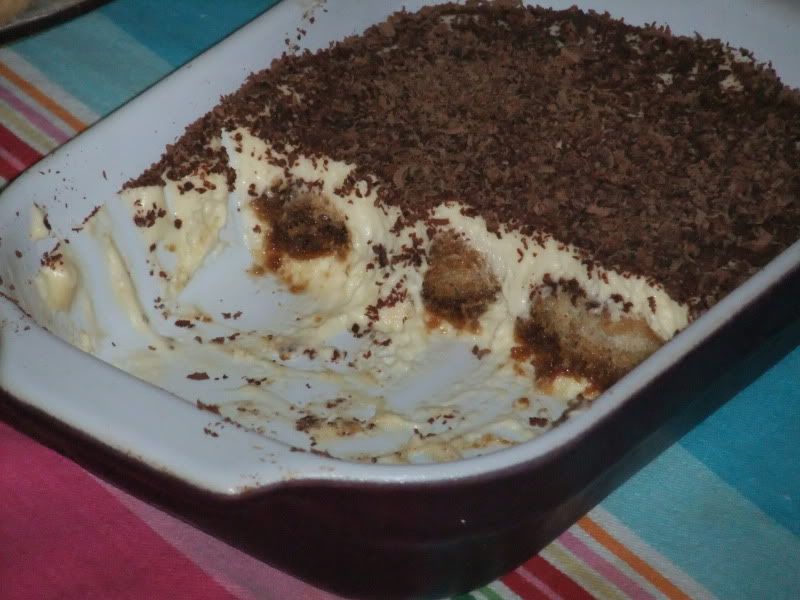
Several weeks ago, I was thrilled to find that Miceli's, a Cleveland cheese maker, now has a comparatively inexpensive mascarpone (oddly, it's not featured anywhere on their website). I immediately bought it with plans for tiramisu. The wedding cakes I made (more pictures of that later) took precedence, though, and I only got to the tiramisu yesterday. I made a miniature, one layer tiramisu, using a 5' x 8' ceramic dish I have. I forgot to take pictures before we dug in after a dinner of wine, bread, cheese and veggies, so there are no pictures of the fully assembled, un-attacked dessert. Oops.

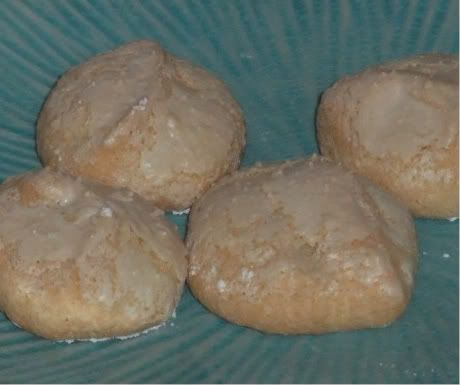
I used La Tartine Gourmand's recipe for lady fingers, but only made 1/3 of the recipe, since I was trying make a very small portion, and didn't want an abundance of cookies. I had a few leftover, however, and found I really like them! They are barely sweet, and a little dry, but pleasantly flavored. I didn't feel like doing the whole piping bag deal to make fingers, so I just used a small scoop, and made normal, round cookies. I based my tiramisu recipe off of David Lebovitz's recipe, but again, reduced it significantly. I wish I had used a smaller dish, or individual dishes like David's though, just so I could have managed another layer of lady fingers before running out of filling. The only other change I would make is in the rum/espresso mixture. It's supposed to be boozy, but I just found it too boozy. I think it's probably the rum--I'm not actually a huge rum fan, so next time, I'm thinking about using kahlua instead, to up the coffee flavor in addition to the booze.

Lady Fingers
1 egg, separated
2 tablespoons cornstarch
2 tablespoons flour
1 oz. sugar
powdered sugar for dusting

Preheat oven to 350. Whip egg whites with half of the sugar, until the whites form stiff peaks, gradually adding more sugar until it's all incorporated. Mix in the egg yolks. then sift the cornstarch and flour into the egg mixture, gently folding until just combined. Do not mix quickly or deflate the egg whites. You want fluffy here! On a parchment lined baking sheet, you can either pipe the batter into the traditional finger shape, or if you're lazy like me, just use a small scoop to make rounds. Space them a bit apart, since they will puff. Sift powdered sugar over cookies, and let it absorb. Repeat. Bake for 10 to 15 minutes until golden. Let cool.


Tiramisu
1/4 cup espresso (I used water and espresso powder)
1 tablespoon dark rum
1/2 tablespoon cognac (I used my baking buddy, Navan)
1 large eggs, separated, at room temperature
small pinch of salt
3 1/2 tablespoons sugar, divided
1/2 cup mascarpone
lady finger from recipe above
bittersweet chocolate for grating on top

Combine espresso, rum, and cognac, and set aside. Whip egg whites, salt and half of the sugar until firm peaks form. In another bowl, whip egg yolk and remaining sugar until thick and pale. Add the mascarpone to the egg yolk mixture, combining until smooth. Carefully fold in egg whites, in two stages, until completely combined. Spoon a small portion of egg mixture into the serving dish. Dip the lady fingers into the espresso mixture for a few seconds, and layer into serving dish. Feel free to break cookies to get a full layer of cookies. Spread cookie layer with egg mixture. Grate chocolate on top, and put in the fridge for as long as you can handle.

Saturday, August 7, 2010

Peach Beehives

I've been so busy lately; baking, while it's happened on occasion, hasn't been of the photogenic variety. However, I think you'll find these worth the wait. Just back from vacation, I have 1/4 peck of Ohio's first ripe peaches of the season (from Hurley Farms at Indian Lake) sitting on my dining room table. One of Carolyn's favorite summer desserts is something her mom makes, called Peach Beehives. Like any time I try to duplicate something someone's mom makes, it comes with high expectations and the decision as to whether to simply recreate an identical dish, or to attempt making it my own.
Today, I decided to make this mom classic my own in small ways. I used my favorite pie crust recipe, sprinkled coarse sugar on the crust for extra crunch and sparkle, and added some booze to the sauce (always a way to reclaim any recipe as my own...just add booze!).

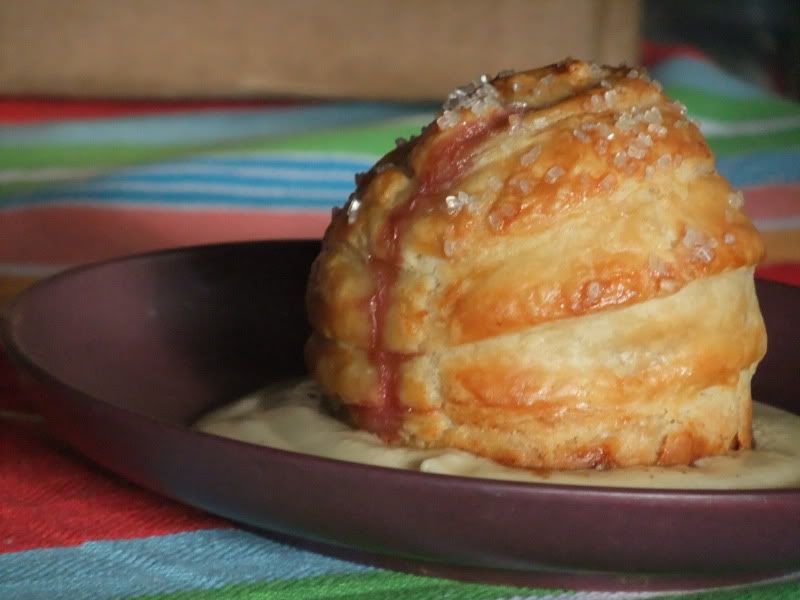
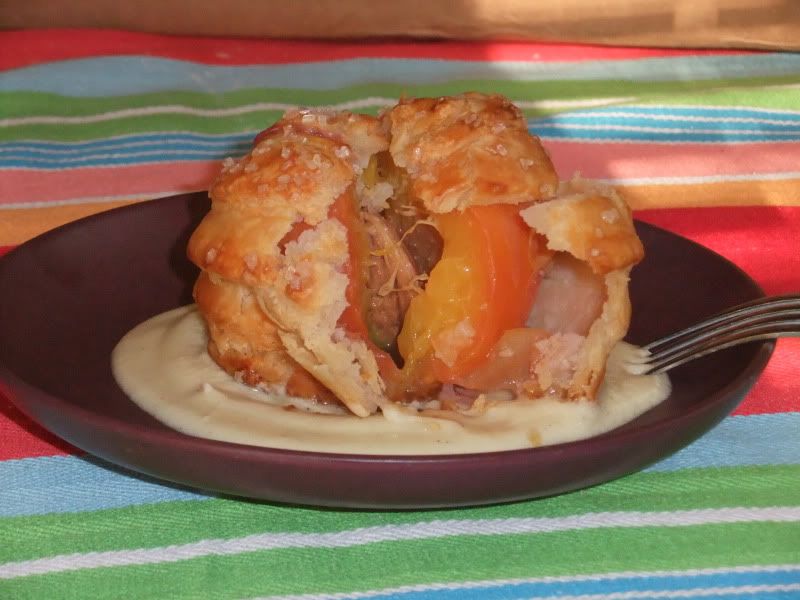
One of the most unique parts of this recipe is that the peaches are left completely alone. You don't season them, you don't peel them, or pit them. All that happens is that they are carefully encased in crust, exalting them in their peachy, peak-season glory. Most interestingly, somewhere in the baking process, the skin of the peaches all but dissolves. It's not tough or even noticible in the final product. I also love that single rivulet of pinkish peach juice that leaked out of the top and dripped down the side. It lets you know there is a lush, juicy treat waiting just inside that crispy crust.

I attempted to reduce the quantities in the various recipes I looked over, and ended up with an almost perfect amount of crust for two peaches (just enough extra to bake up scraps with cinnamon and sugar) by halving what I usually make for a single crust pie. The sauce is another story...I have a ton of it left. Good thing it's tasty enough to just eat off of a spoon.

Peaches:
most recipes use prepared crusts; I made 1/2 batch of my favorite recipe
2 peaches, washed and still damp
half an egg white (use remaining white and yolk in sauce)
coarse sugar

Cut the crust into 1/2" in strips, and wrap around the peaches, overlapping each strip halfway over the one before it, so it looks like a beehive. I found having damp peaches helped the crust strips stick to the peaches quite well. Press the strips firmly into one another, being careful not to squash or misshape them, but making sure they are well sealed. Place peaches on a parchment covered baking sheet. Brush peaches with egg white, and sprinkle with sugar. Bake at 400 degrees for 30-45 minutes until golden brown and pretty.


Sauce:
1/4 c butter
1 egg yolk, plus the half of the white you didn't use on the peaches (farm fresh if you can)
1 tbl cream
1 tbl Navan (vanilla cognac)
a few drops vanilla bean paste
1 c powdered sugar
pinch of freshly grated nutmeg

Cream the butter with an electric mixer, then add the egg yolk, beating until smooth and fluffy. Add cream, Navan, and vanilla bean paste, continuing to beat until completely smooth. Add the powdered sugar 1/4 c at a time, fully incorporating each portion before adding the next. If one wanted a thicker sauce, one could add more powdered sugar...but I liked it exactly how it came out, smooth and spoonable! Place under or over beehives right before serving, preferably while the peaches are still warm.


Saturday, May 22, 2010

CAKE!

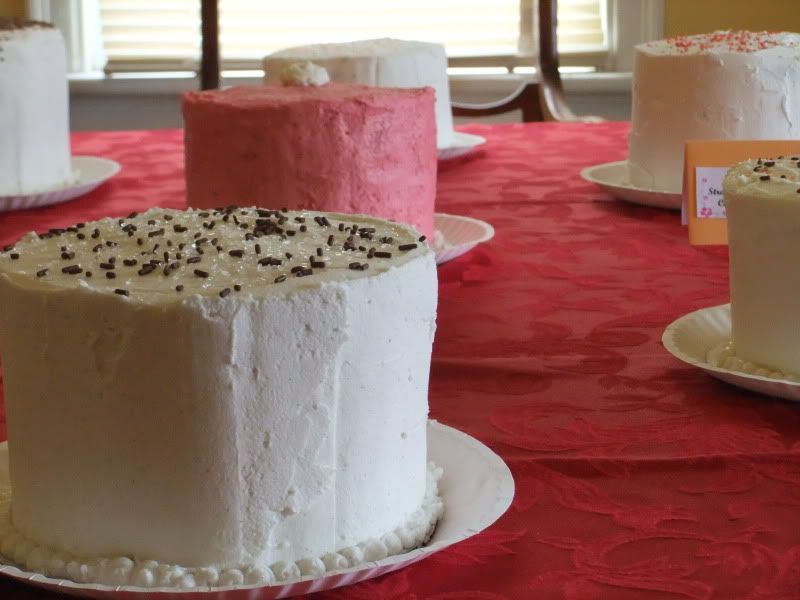
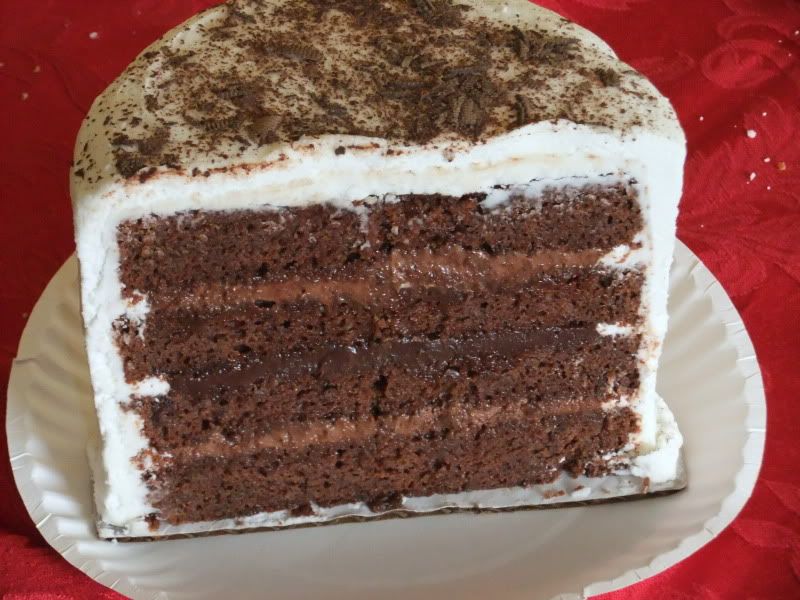
There are a couple of wonderful, crazy people in my life who are entrusting to me their wedding cakes. The first wedding, in August, is one of my nieces. The second wedding, in November, is one of my friends I've known since I was a kid. I decided to have both couples over last weekend for cake tasting! It was a bit of an undertaking, making seven cakes, but I've learned quite a lot already (parchment paper makes everything easier, cakes take longer to bake than I remember, white chocolate makes frosting very hard when chilled, champagne flavoring tastes more like bubble gum than bubbly, mango cake is a terrible, terrible idea). I had asked both brides to give me flavor ideas, and they both gave me general ideas, but nothing specific, so I ran with my own ideas.


Here are the flavors I ended up with:
  • vanilla cake with raspberry butter cream
  • mango cake with mango curd and white chocolate-key lime frosting (cake-FAIL, frosting-good)
  • pumpkin cake with bourbon cream cheese frosting
  • strawberry cake with vanilla champagne butter cream
  • chocolate cake with dark chocolate ganache, chocolate mousse and white chocolate cream cheese frosting
  • vanilla cake with raspberry filling and swiss meringue butter cream
  • chocolate and vanilla cakes with chocolate ganache and vanilla butter cream
I can't think of much else to say, except that it was a huge amount of cake, and even after forcing cake off on both couples to take home, my coworkers still enjoyed the remains all week long. I haven't been informed of final decisions by the brides and grooms just yet, but I think the over all favorite was the pumpkin cake.


Sunday, April 25, 2010

Bagels, Glorious Everything Bagels


The first time it occurred to me to make my own bagels was back when stupid Panera increased their costs to something like $1.09 for their "cafe" bagels, which are the non-fancy flavors. I was really annoyed. Then, in November, one of my favorite food blogs, Smitten Kitchen, posted the recipe for Peter Reinhart's Bagels. That was in November, and I promptly began acquiring necessary ingredients I didn't already have, like high gluten flour, and non-diastatic malt powder. Those of you in NE Ohio might not be aware you possess a rare and beautiful gem in the plaza at Chapel Hill: you have access to Mr. Bulky's. On a recent trip up and down their spice aisle, I found the perfect ingredient for my dream everything-bagel: dried, minced, roasted garlic. Smelled heavenly. Then, a couple weeks ago, King Arthur Flour sent me an email about making my own baby bagels. Ok, muses of baking, I get it. I'll make the damn bagels already.

I have to admit, Smitten Kitchen's lengthy instructions on bagel making intimidated me, and made me feel like I needed a ton of time to make my own bagels. So, Saturday afternoon was reserved for baking. I got up and went to the farmer's market before heading to work in the morning, was home by 1:15, and made a spectacular lunch that involved arugula from the market. Then, amid the gray, rainy weather, I ended up snuggled on the couch with my sweetie, catching up on missed episodes of Bones. And then I fell asleep. I woke up in time to grill out for dinner, but my bagel preparation time had rapidly faded. I quickly reviewed both recipes, and took the best from both worlds...or something. I wanted to fully prepare and shape the dough before bed, so that they could be boiled and popped in the oven in the morning with as little to-do as possible. Peter Reinhart's bagels gave me that option (KA's requires shaping and a 90 minute rise in the AM). The steaming step in the KA recipe also would have required me to dig our my veggie steamer. So I stuck with Reinhart's recipe, but with proportions closer to KA's recipe. What? There is nothing in the world two people need with as many bagels as 8 cups of flour would produce! I still ended up with 8 rather hearty sized bagels. Here's my recipe, but you should really educate yourself with the links above before trying to follow my guide!

Sponge:
1 cup high gluten flour
1/8 tsp instant yeast

1/2 cup cool water


Combine and let sit, covered, for at least two hours.

Bagels:
3 1/2 cups high gluten flour
1 1/2 tsp instant yeast

1 tbl non-diastatic malt powder

1 1/2 tsp
salt 1 cup warm water.
another 1 1/2 tbl non-diastatic malt powder for boiling


Bagel Topping:
one egg white for washing
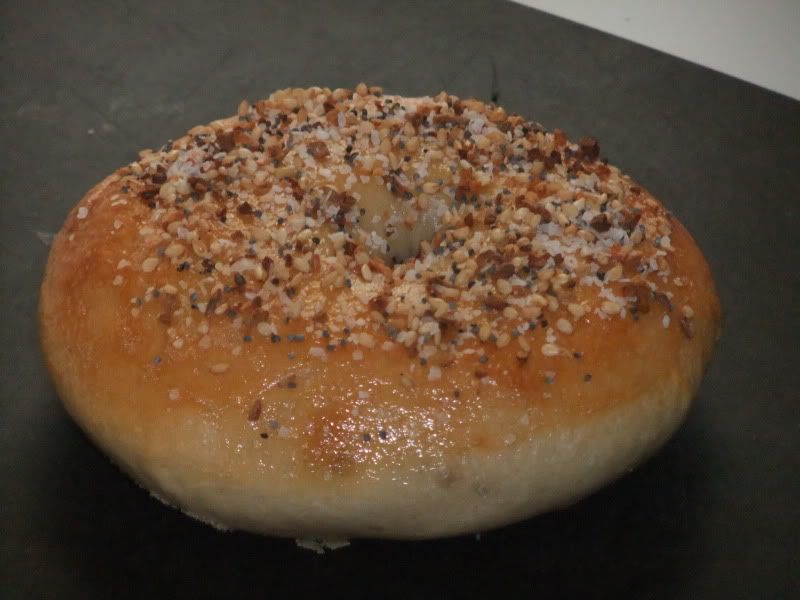
Whatever you want. My combo: toasted sesame seeds, poppy seeds, dried minced roasted garlic, and kosher salt.


Combine above bagel ingredients, and all of the sponge in electric mixer. On low speed, knead together for about 8 minutes. The dough gets nice and smooth, with all the flour incorporated. It's a little sticky when pinched, but mostly nice to touch. I weighed the dough, and I had 1117 grams of dough at this point. Because I'm a little obsessed, I played with it a little, until I determined that I liked the size the bagels would be if the dough were divided into eight. Or, approximately 138g each. Yes, I live in the US and my scale could weigh in ounces. However, I have an English degree, and think dividing pounds into ounces is annoying. Grams are more convenient for the mathematically challenged.

So, I divided and weighed my eight smooth balls of dough, punched holes in the center and stretched them to look like bagels. I laid them on a parchment-covered, cooking-sprayed cookie sheet, and covered them with a damp towel, while I wrote this. Probably about 20 minutes. (Seriously, the cooking spray is important, even on parchment. One of mine got very stuck in a place I apparently missed). Then, I tried the float test. You place one of the bagels in a bowl of water. If it floats within ten seconds, it's ready to be stuck in the fridge, over night, or even for a couple days. Mine didn't even try to sink, it just bobbed pleasantly on the surface. This was a definite change, since I tried floating one when I first formed the bagels, without a rest period, and it sunk like a tiny Titanic. Yay. If at first yours don't succeed in floating, let 'em rise another ten minutes, then try again. Since mine were floating, I went ahead and combined my bagel-topping for the morning, and went to bed.

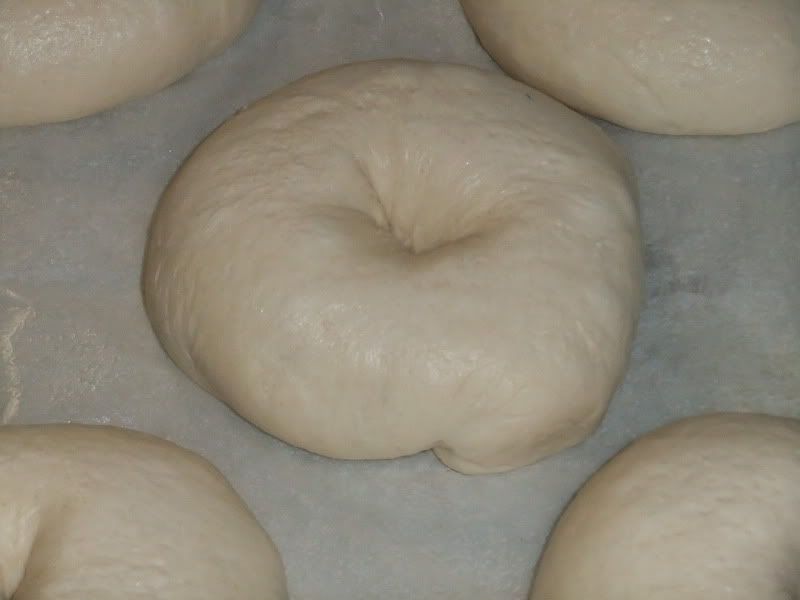
This morning, my refrigerated bagels were so cute. They had puffed, and all but lost their center holes, leaving large dimples behind. I know I don't usually take and post pictures throughout the process, but I couldn't pass up a photo op of these chubby blobs of bagel dough.

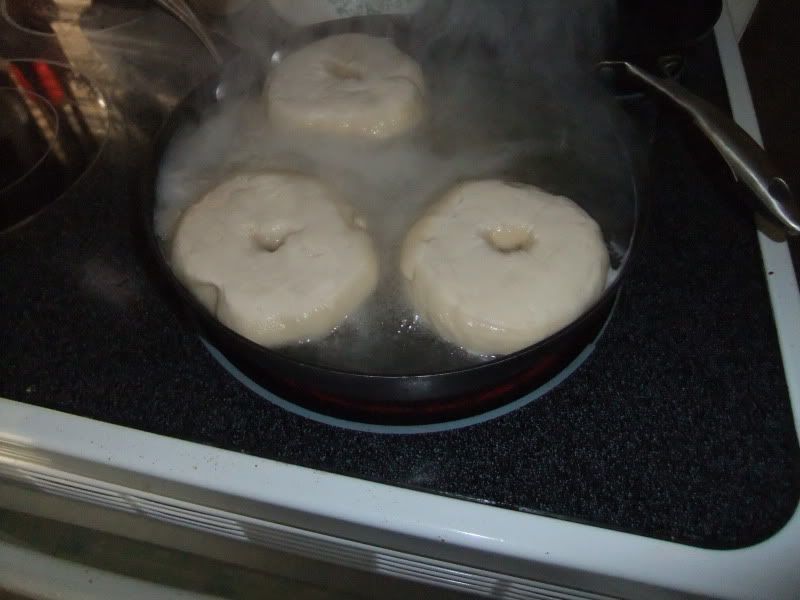
Preheat the oven to 450 degrees. In a deep, wide skillet, filled with about 2" of water, add 1 1/2 tbl non diastatic malt powder. This is what makes bagels shiny and taste bagel-y. Bring water to a boil, and add as many bagels as comfortably fit (my skillet only held three. I wanted smallish bagels, but my 138g bagels turned into normal-sized after all their rising and boiling). They float and only end up partially submerged. Boil for 1-2 minutes, then flip over and boil for another 1-2 minutes. In all my bagel homework, I learned that the longer you boil, the chewier the texture. Since I like a chewy bagel, mine boiled for about 1 1/2 - 2 minutes per side. I didn't have my stopwatch on me, so that's a guess. Boil them in batches until you're done. Since the camera was out anyway...


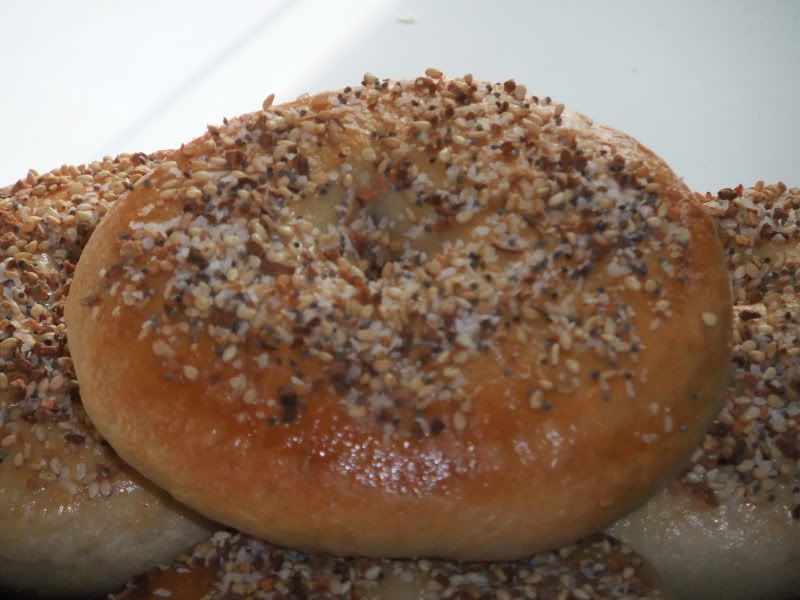
Sprinkle the same, greased, parchment papered cookie sheet they were on before with semolina flour to prevent further sticking. If you don't have semolina, corn meal might be a good alternative? Or nothing? I'm not sure they'd stick, but I used the semolina, since I had it. Here is where recipes diverged big time. Peter Reinhart says to top your bagels, and bake for five minutes, then rotate the pan 180 degrees, and bake for five more minutes. KA says to bake for 20 minutes, then top with seeds, cover loosely with foil and bake for five more. Yikes, that's quite a disparity in bake time, especially since both recipes are making bagels smaller than mine! Because I really hate the taste of burnt sesame seeds and garlic, I started by baking mine, naked, on the middle rack, for 7 minutes. I then rotated the pan 180 degrees, and baked for 7 more minutes. They were obviously getting cooked, but they were not golden, so I gave them another 5 minutes. The color was coming. I pulled them out, brushed them with egg white and sprinkled them with topping one at a time. You have to move fast, because the bagels are hot, and you're using egg white. You want a thin coat of egg white, not scrambled eggs on top! Once all bagels were topped, I put them in the oven for 2 minutes, then covered them with a piece of foil for another 4 minutes.

I only let them cool enough to snap some pictures before breaking into my first one to try it plain. The bottom was golden and crunchy, the entire outside just slightly crisp. They were definitely not as dense as the bagels I'm used to, but I liked that about them. They certainly tasted bagel-y, so I achieve my goal. I quickly spread a couple with cream cheese, capers, chive and red onion, and topped with smoked salmon. Yum. My only complaint is my own fault--I definitely used too much salt in my topping, so they were a little over-salty, especially with capers and smoked salmon.


I can tell you'll I'll be making them again soon, with a variation: my favorite bagel of all time is a slightly sweet, honey-whole wheat bagel, served with honey butter. Since I am officially done with classes (I finished my last final ten minutes ago!), I think my baking time might increase over the next couple weeks!