Saturday, April 30, 2011

The Very Hungry Caterpillar: A Literary Study in Cupcakes

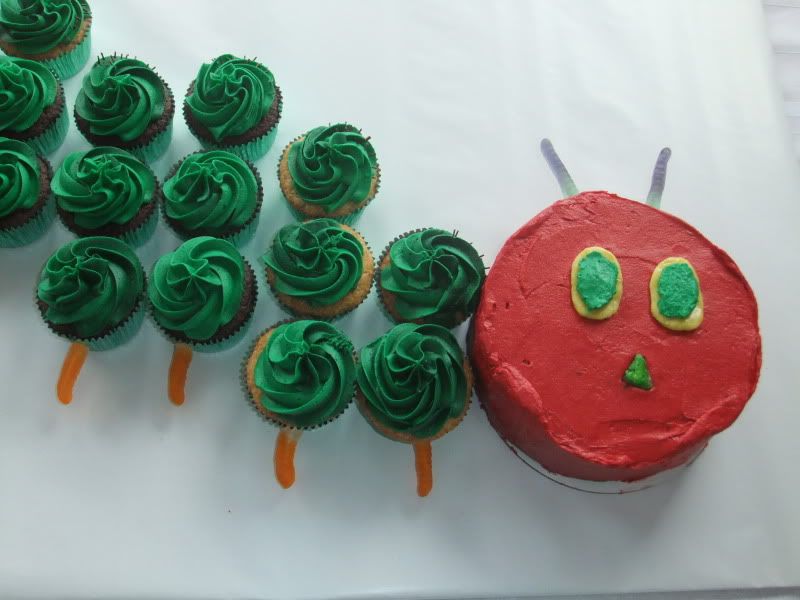
I don't know about you, but I LOVE the idea of 1st birthday parties that follow a literary theme. What? I'm a book worm. So, I especially like a party that focuses on a book about a caterpillar who eats his way to a bellyache. Particularly when there is a giant caterpillar head smash cake for the birthday boy. Now, I'm not exactly an expert on children's birthday parties, but my friend went ALL OUT for this birthday. Fancy sign on the door. Cut out sausages, ice cream cones, lollipops, cake, pie, strawberries, oranges, and pears (complete with holes eaten through them) on the windows. A balloon caterpillar over the mantle. This was some serious dedication. Good thing I had an eye for detail on this cake, and included spiky little hairs on his back, six feet, and purple antennae.

If you don't know Eric Carle's masterpiece, get thee to a library, or to Amazon. Right. Now. This is children's literature brilliance we're talking. Colors! Counting! Metamorphosis! Messages about a balanced diet! Here's the little guy as pictured on the cover of the book:


And here's the Big Guy on my friend's kitchen table. He's about three feet long, and comes in chocolate or vanilla. I'm not totally thrilled with how thin and uneven the frosting is on the head, but the birthday boy's mom had a request about limiting sugar and frosting quantity. Something silly about not wanting red vomit tonight...go figure.


Friday, March 4, 2011

Ciabatta: Attempt 1

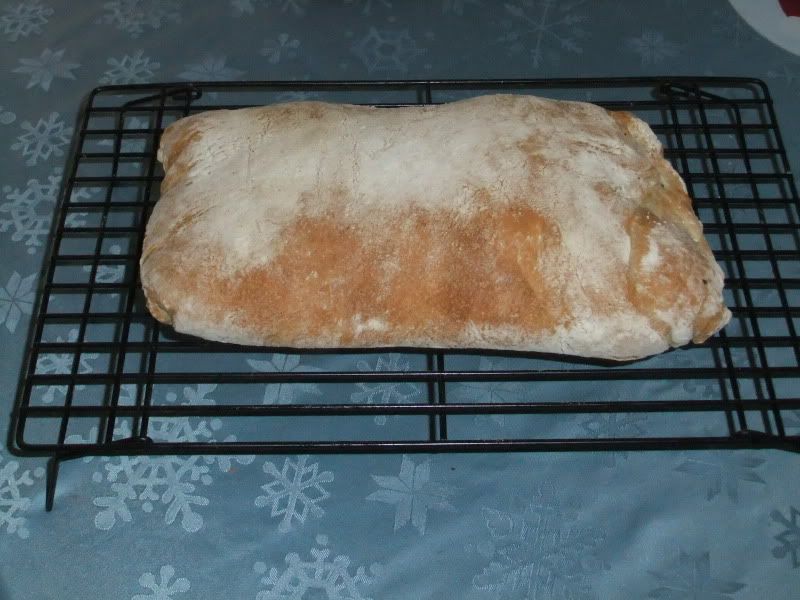
I've been told by a certain someone who shall remain nameless that she's tired of looking at green macarons. So I'm bumping them down with a pic of the first loaf of ciabatta I made--a month late.


The outside is prettier than the inside. Although the flavor was great, there weren't the big holes and texture I associate with ciabatta--it was a dense loaf, with small holes. I'll work on that for next time. I used Peter Reinhart's recipe from The Bread Baker's Apprentice, which I got for Christmas.

I am finishing school and working full time again, so I'm not sure when an original (or at least Allie-tested) recipe will go up again. But, money is good. Gotta pay off all those school loans somehow, and baking doesn't even cover interest payments. :-)

Sunday, January 9, 2011

Pistachio Macarons


I spent my Christmas break baking up a storm. Since I'm sans paying job right now, I gave all my family and friends homemade treats as gifts this year. My sister wanted "something pistachio," but left the decision up to me. I'd been meaning to make some macarons, and decided this was the perfect time to do it. I decided on a pistachio shell, and a honey swiss meringue butter cream filling. The filling gave me fits, but in the end it all worked out. Most importantly, my sister liked them, and I finally got over being intimidated by macarons.

I made a practice batch, wherein I discovered several things to help those who haven't made them before:

  • If you're going to use food coloring, use very little. It turns super dark later if you use too much. My first macarons were GREEN (not pictured).
  • Every recipe says to use powdered food coloring. I only have gel food coloring. The first time, I added the gel color as I was grinding the pistachios and almonds. This is when I added way too much, because it was so light when it was in the flour, and then it turned really dark when it was wet. The second batch, I just added a couple drops directly to the egg whites after they were whipped. I was able to control the color more, and didn't notice that it made the batter too liquid-y.
  • I can't pipe evenly. For my second batch, I traced rows of a half dollar coin on the back side of the parchment so they were closer to the same size.
  • Slightly wetting the underside of the parchment, one row of cookies at a time, was the only way I could get the baked cookies off the parchment sheet without crushing them.
  • The shells keep longer than I thought. My first batch stayed really fresh and chewy and nice in a ziploc bag for more than a week (unfilled). I had read they get soggy. Mine didn't.
  • Let them sit before baking to develop a shell. My first batch I only let sit for about 30 minutes, and most of them rose lopsidedly--flat on one side with a foot on the other. The second batch I let sit for an hour, and they rose more evenly, with pretty frilly feet all around.
  • I've indicated before my preference for weighing ingredients, anyway, but for macarons, I think it's really important. I wouldn't try this without a scale, since the batter is so delicate.
  • On aging egg whites: both times I made the recipe, 90 gr was perfectly 3 egg whites, aged overnight. They weighed about 91-92 grams fresh, but dried a bit overnight to 90 gr.
  • I used my food processor to turn the nuts and powdered sugar into the fine flour. I ground it as much as I could, then sifted. What wouldn't go through the sifter went back into the processor, then was sifted again. I did that several times. I'm considering just buying pistachio flour for next time.
  • Every website says to use raw nuts. I only had roasted, salted nuts. They were still very, very tasty. In fact, I might add a pinch of salt if ever I'm using unsalted nuts. Because I liked my sweet things with a pinch of salt. I also tend to think roasted nuts taste better than raw nuts, and I don't think it impacted the texture at all.
  • One way to make this process less daunting is to make the nut flour/sugar mixture ahead of time. Macarons seem to take a long time, partly because this step is intensive. Doing it a couple days in advance makes the macarons come together MUCH faster.

Without further ado:

For the shells:
90 gr egg whites, aged overnight on your counter
30 gr granulated sugar
200 gr powdered sugar
55 gr almonds
55 gr pistachios
green food coloring

Combine the powdered sugar, almonds and pistachios in the food processor, and grind into a powder. Sift well. This step can be done well in advance, storing the nut/sugar flour in a sealed container. In a stand mixer, whip egg whites until foamy, and slowly add granulated sugar. Whip into a glossy meringue (stiff peaks, but glossy, not dry). If using gel food coloring, add to meringue until desired color is reached, thoroughly blending. Add flour mixture, and stir with quick strokes at first to combine, then gentler strokes. Don't deflate the egg whites all the way. Tartelette says this should all take less than 50 strokes, so that's what I went with. When you drizzle the batter from a spoon back into the bowl, it should take about 10 seconds to disappear. If it doesn't disappear, it's not stirred enough. If it disappears right away, you've over stirred. So take it slow.

Fill a pastry bag with a plain tip (I used a Wilton 12), and pipe small rounds in rows onto a parchment covered baking sheet. Preheat oven to 275. Let cookies sit for at least an hour so that I firm shell forms. Bake, one tray at a time, for about 15 minutes. They should look dry, but not turning golden. If not done at 15 minutes, watch carefully until done. (Mine took about 18 minutes before starting to brown). Let cool and remove from cookie sheet.


For the Filling:
2 egg whites
1/4 c sugar
1/4 c honey
pinch of salt
2 sticks of butter, softened

In the top of a double boiler set over simmering water, whisk together the egg whites, sugar, honey and salt. Continue whisking until the sugar is dissolved and the mixture becomes too hot to touch about 8 minutes.

Transfer the mixture to the bowl of an electric mixer fitted with a whisk attachment. Beat on, medium-high speed until the egg whites hold a stiff peak, about 8 minutes, and is no longer warm. Add the-butter, one tablespoon at a time, beating after each addition until incorporated. Keep at room temperature.


To Assemble:
Match up shells so they are paired together by size. Fill piping bag with filling, and pipe a good blob of filling (about a tablespoon, depending on cookie size) on one shell, and top with a second. Repeat until all shells are used. Eat.

Thursday, December 16, 2010

Cookie Time!

I can't believe it's been more than two months since I've posted. In the time I've been gone, I did cupcakes for a wedding, made a baklava cheesecake for Thanksgiving, and have a good headstart on my Christmas baking. A couple weeks ago was our annual church bazaar, which includes a bake sale. I have some cookies I make every year, but this year I became obsessed with making ornaments. Don't ask why. I didn't even own an ornament cookie cutter before this. But, I sure did go and buy one, and have a blast decorating the cookies.

The cookie and icing recipes are the same as the those I used last year for the trees I made.


I didn't have much of a plan going into these
cookies, besides having fun. Sorry about the reflecting light in the snowman and snow flake cookies; they were already packaged for the church when I remembered I wanted to take pictures!


Monday, October 11, 2010

Concord Grape and Rosemary Focaccia

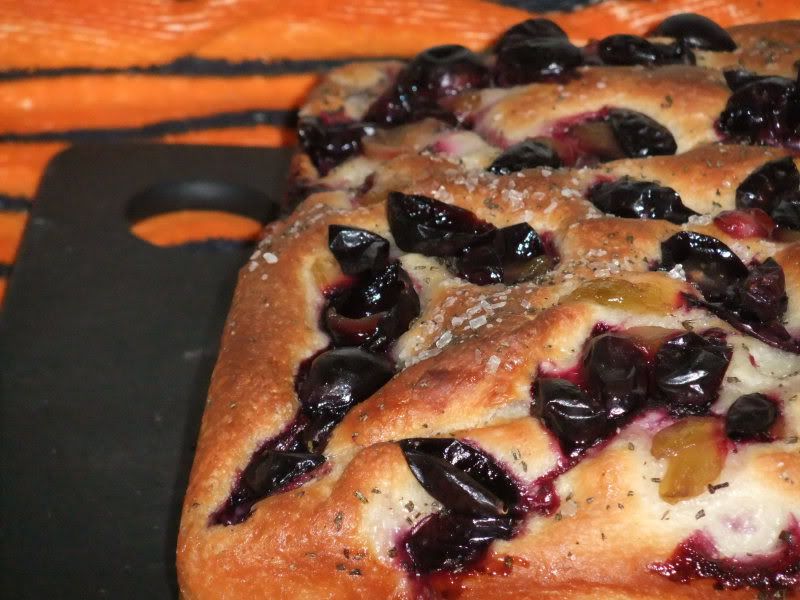
I've been obsessed with making pizza lately; I've been tossing thin crust pizzas, to be baked at the highest temperature my oven will reach, with a different array of toppings at least once a week. After a visit to the Italian fest this weekend, and some of the best thick-crust pizza of my life, I decided I need to tackle a thicker crust. Then, at Hurley's Market at Indian Lake, I found some of the most beautiful concord grapes. I've been eager to get my hands on some concords to try this Smitten Kitchen recipe, but I couldn't resist a few changes. I didn't want that thinner crust she had. My favorite focaccia is a two-inch thick, well-herbed, well-oiled, lightly golden piece of carb heaven from a local bakery, and that was what I wanted to emulate, while still incorporating the sweet-savory combination of concords and rosemary.

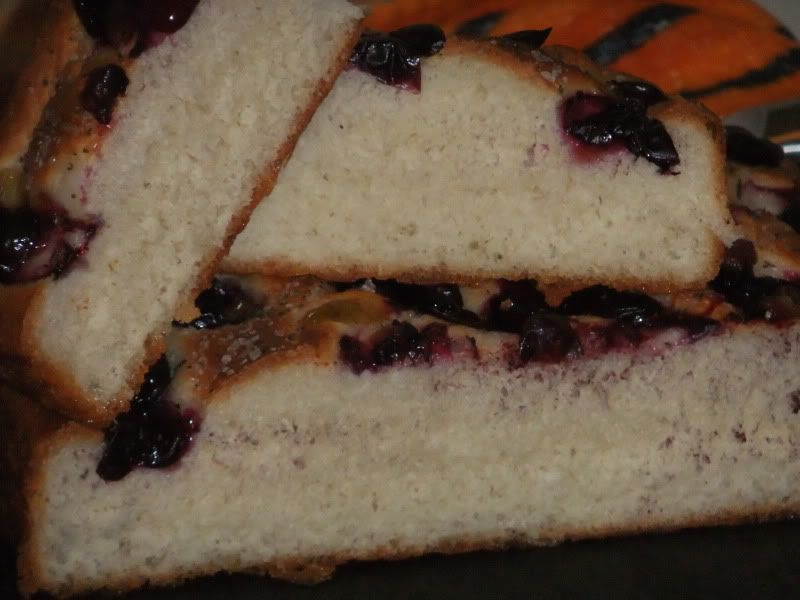
I started researching focaccia recipes, while in the back of my head knowing two things from previous experience: I wanted a small amount of sugar in the dough (makes it delightfully addictive), and I wanted a cold-fermentation rise. My recent experience with thin crust pizzas has shown me how much the flavor and texture develop overnight in my refrigerator, and I was hoping that would translate equally well in focaccia. From there, I went to my two most trusted sources: King Arthur Flour, and Peter Reinhart. I made a smaller loaf, and a few other adjustments, including the addition of high gluten flour. One change I will try the next time is to increase the water; this creates a sloppier dough, but also yields light, airy holes, which this dough is lacking. In some ways, I think this dough is almost too tender, white-bready. I'm thinking about nixing the powdered milk, and replacing some flour with semolina.

Now, for just a second, I want to talk about sweet, salty, tangy brilliance that is the concord grape/rosemary topping on this lovely bread. I thought Smitten Kitchen's photos looked so good, and I was dying to try this combination that reminded me of the backyard growing up: grapevines on one side, and mom's glorious herb garden on the other. Once it started baking however, doubts began to set in. It smelled glorious, don't get me wrong. But, it also sort of smelled like grape jelly pizza, so I started to become skeptical. Don't be. Come on. This is like having your wine ON your bread, and not merely with it. Go. Get in the kitchen. Make this, before concords are out of season. If you prefer a thinner crust, please refer to the Smitten Kitchen link above!


Concord Grape and Rosemary Focaccia
makes one 8x8, delightfully thick bread

1 1/3 c. all purpose flour
3/4 c. high gluten flour
1 1/4 tsp. baking soda
1 tbl. powdered dry milk
1 tbl. sugar
1 1/4 tsp. instant yeast
1/2 tsp. kosher salt
1/4 c. olive oil, plus additional
3/4 c. cool water
1 c. halved and seeded concord grapes
1 tsp. fresh rosemary (I like mine very finely chopped, almost to powder)
course sugar for sprinkling
kosher salt for sprinkling

Combine first nine ingredients in stand mixer, and knead with dough hook for 10 minutes. Grease glass bowl large enough for dough to double. Add dough to bowl, covering dough on all sides with olive oil. Cover with plastic wrap, and place in refrigerator overnight. (Mine was in for about 20 hours).

About an hour and a half before baking, remove dough from refrigerator. Line the bottom an 8 x 8 with parchment paper, and brush the paper and sides of pan with olive olive. Stretch and push the dough into the pan, deflating it as little as possible. Brush on more olive oil, cover with towel, and allow to come to room temperature and rise.

About 30 minutes before baking, preheat the oven to 425 degrees. Right before baking, sprinkle dough with coarse sugar, kosher salt, rosemary, and grapes. Bake for 20 - 30 minutes. Enjoy the bizarre scents wafting through your kitchen. Try to let it cool before digging in.
Saturday, September 18, 2010

Hate OSU, Love the Cookies

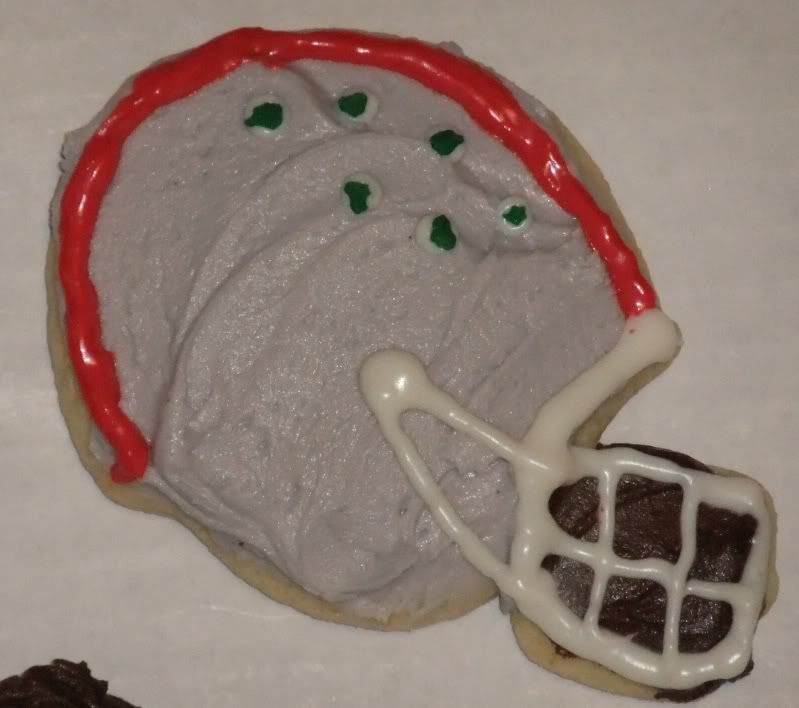
Any person who knows me knows that I hate OSU, and especially OSU football, with a passion. It's pretty much the worst part of living in central Ohio. However, I have willingly joined a family of insane OSU football lovers, and am frequently subjected to screams when things go well, and curses when they don't. I am even the owner of O, S, and U shaped cookie cutters (the only alphabet letters I own, for those interested in purchasing me baking-related gifts).

Today, when asked to come up with a quick dessert to take to my sister-in-law's house for niece birthday love (I can't believe she's three!) and for the second half of the OSU game, these cookies seemed perfect. Besides, I did buy those red and silver sprinkles ages ago, and thought this was a good use. Although, I might have been mocked that this was my idea of a "quick dessert."


I have to admit, I'm particular fond of my buckeyes (really, the holes from making the Os), as well as the marijua--I mean, buckeye leaves on the helmets. The cookies made today's game bearable...as well as the puzzle of Las Vegas we worked on diligently!

Friday, August 27, 2010

Sweet, Boozy, Italian Happiness

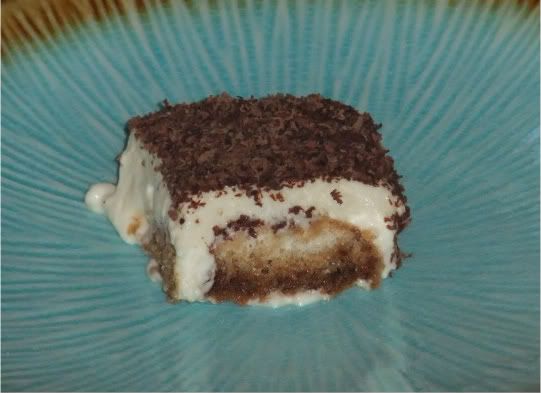
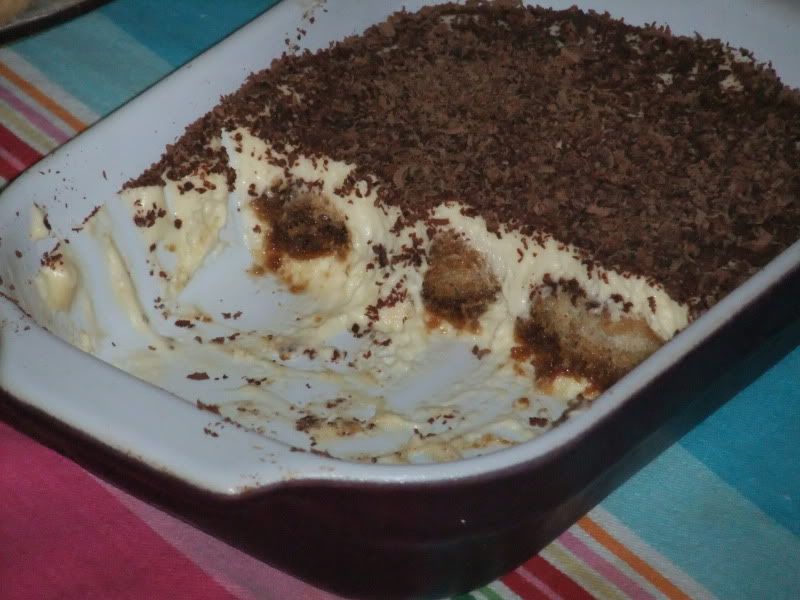
Several weeks ago, I was thrilled to find that Miceli's, a Cleveland cheese maker, now has a comparatively inexpensive mascarpone (oddly, it's not featured anywhere on their website). I immediately bought it with plans for tiramisu. The wedding cakes I made (more pictures of that later) took precedence, though, and I only got to the tiramisu yesterday. I made a miniature, one layer tiramisu, using a 5' x 8' ceramic dish I have. I forgot to take pictures before we dug in after a dinner of wine, bread, cheese and veggies, so there are no pictures of the fully assembled, un-attacked dessert. Oops.

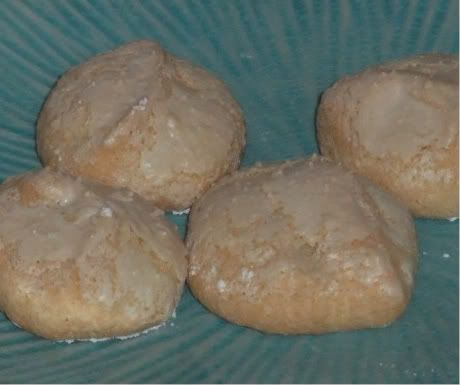
I used La Tartine Gourmand's recipe for lady fingers, but only made 1/3 of the recipe, since I was trying make a very small portion, and didn't want an abundance of cookies. I had a few leftover, however, and found I really like them! They are barely sweet, and a little dry, but pleasantly flavored. I didn't feel like doing the whole piping bag deal to make fingers, so I just used a small scoop, and made normal, round cookies. I based my tiramisu recipe off of David Lebovitz's recipe, but again, reduced it significantly. I wish I had used a smaller dish, or individual dishes like David's though, just so I could have managed another layer of lady fingers before running out of filling. The only other change I would make is in the rum/espresso mixture. It's supposed to be boozy, but I just found it too boozy. I think it's probably the rum--I'm not actually a huge rum fan, so next time, I'm thinking about using kahlua instead, to up the coffee flavor in addition to the booze.

Lady Fingers
1 egg, separated
2 tablespoons cornstarch
2 tablespoons flour
1 oz. sugar
powdered sugar for dusting

Preheat oven to 350. Whip egg whites with half of the sugar, until the whites form stiff peaks, gradually adding more sugar until it's all incorporated. Mix in the egg yolks. then sift the cornstarch and flour into the egg mixture, gently folding until just combined. Do not mix quickly or deflate the egg whites. You want fluffy here! On a parchment lined baking sheet, you can either pipe the batter into the traditional finger shape, or if you're lazy like me, just use a small scoop to make rounds. Space them a bit apart, since they will puff. Sift powdered sugar over cookies, and let it absorb. Repeat. Bake for 10 to 15 minutes until golden. Let cool.


Tiramisu
1/4 cup espresso (I used water and espresso powder)
1 tablespoon dark rum
1/2 tablespoon cognac (I used my baking buddy, Navan)
1 large eggs, separated, at room temperature
small pinch of salt
3 1/2 tablespoons sugar, divided
1/2 cup mascarpone
lady finger from recipe above
bittersweet chocolate for grating on top

Combine espresso, rum, and cognac, and set aside. Whip egg whites, salt and half of the sugar until firm peaks form. In another bowl, whip egg yolk and remaining sugar until thick and pale. Add the mascarpone to the egg yolk mixture, combining until smooth. Carefully fold in egg whites, in two stages, until completely combined. Spoon a small portion of egg mixture into the serving dish. Dip the lady fingers into the espresso mixture for a few seconds, and layer into serving dish. Feel free to break cookies to get a full layer of cookies. Spread cookie layer with egg mixture. Grate chocolate on top, and put in the fridge for as long as you can handle.