Tuesday, June 23, 2009

Red Wine Rhubarb Compote with Vanilla Ice Cream

Jackie brought me more rhubarb this week, and after last week's disaster I wasn't sure I was emotionally prepared to make another pie just yet. However, in my obsession with all recipes David Lebovitz, and my lack of familiarity with rhubarb, I went with a tried and true favorite ingredient: red wine. Since I decided to make this red wine rhubarb compote, I needed to whip up some ice cream to have with it. I have generally had a prejudice against Philadelphia style ice cream. I have always loved frozen custard style ice creams so much that when I began my ice cream making less than a year ago, I never bothered making any without egg yolks. I have actually altered Philadelphia style ice cream recipes to turn them into custards. Tonight, though, I wanted something fast, and not to bother with excessive cooking and cooling times. I had red wine rhubarb compote to consume! I made very small portions of both the ice cream and the compote--just enough for one dessert for two; however, the recipes are the full-sized portions. And so, I bring you one of the most simple, and delicious ice creams I can imagine, paired with a flavorful, rich, and spicy compote:

Philadelphia Style Vanilla Ice Cream:

3 cups cream
3/4 cup sugar
vanilla bean paste to taste (I used very little, to really let the cream shine)

Heat up one cup of cream on the stove and dissolve sugar. Add vanilla, and the rest of the cream. Once cooled, add to ice cream maker. (I didn't really let it cool. My ice cream maker is tough, and stood up quite well).

Red Wine Rhubarb Compote (I butchered this, and you should seek out the original recipe):

2 cups red wine (I used an inexpensive Little Penguin Shiraz that I've become fond of)
1/2 cup sugar
1 tablespoon honey
1 small cinnamon stick
several whole cloves
1 pound rhubarb, cut into small pieces

As my sister would say, throw it in a pot and cook it. After the rhubarb was poached, I removed it, and continued to reduce the wine to a thin syrup. I had a difficult time trying to find and remove the cloves, so I would probably use ground cloves in the future.

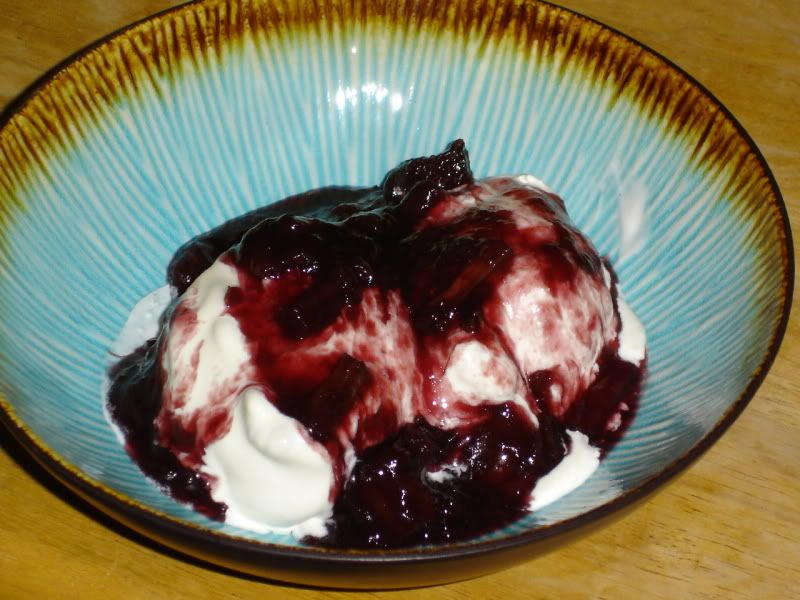
I didn't even let the ice cream firm up in the freezer. I scooped it from the maker into a bowl, topped with rhubarb, and served with two spoons. :-)

Thursday, June 18, 2009

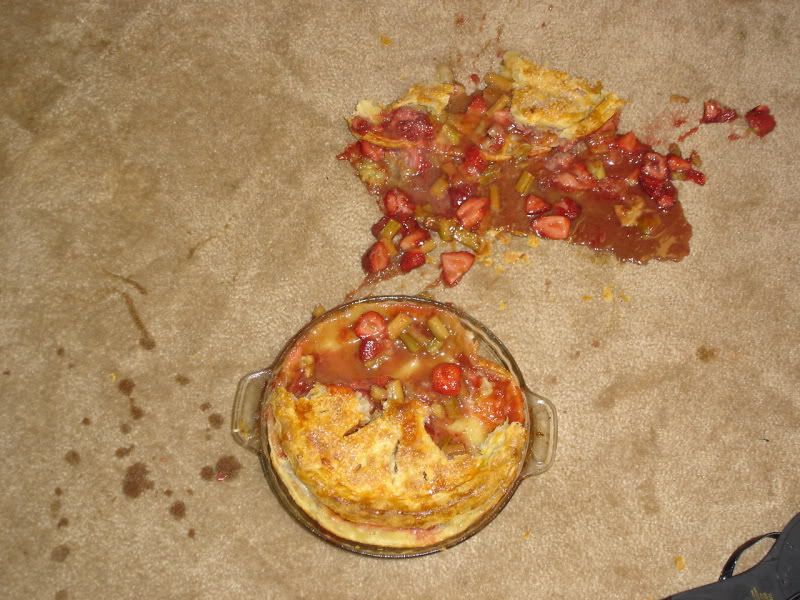
Strawberry-Rhubarb Disaster

Today, after work, I eagerly got to my baking. I had made the pie crust yesterday, and got right to business rolling the dough, making the filling, designing a lovely steam-vent pattern on the top crust. I baked it. It was beautiful. It was golden. Puffed, with juicy drips of jam visible between the sparkles of sugar.

From the oven, I walked into my dining room to set it on the cooling rack. Inches from the cooling rack, I felt disaster looming: the butter from the crust had made the pie plate slippery, and it shot from my silicone-mitted hand, skidded off the table, and tumbled to the floor, onto our beige carpet. Yes, that's a sandal in the lower right corner.


I'd be lying if I said I didn't salvage the parts that landed on top. And you know what? It's fantastic.

Wednesday, June 17, 2009

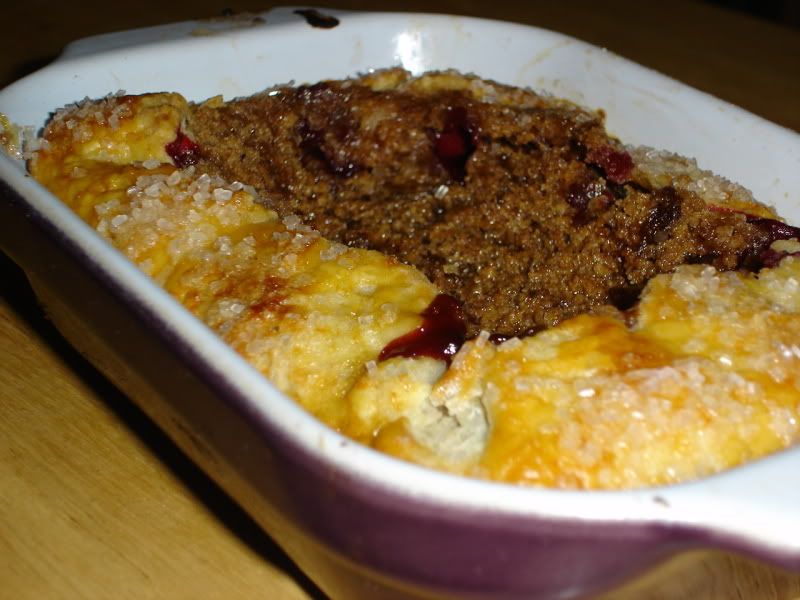
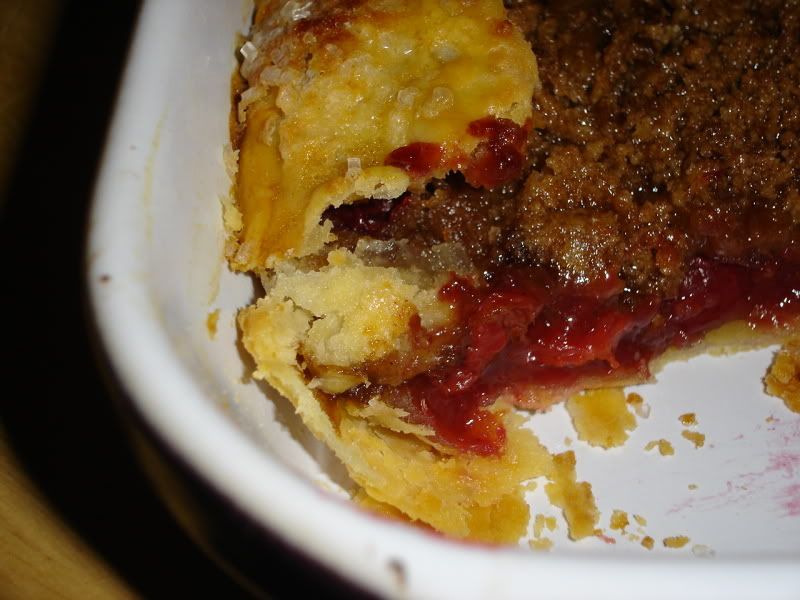
Cherry Pie-let


One of my fabulous coworkers brought me about a half quart of cherries this week, along with a bunch of rhubarb from her backyard (thanks, Jackie!). Carolyn was pretty eager for cherry pie, although there weren't quite enough cherries for a whole pie. Instead, I used a small rectangular dish, and half a recipe for pie crust--what I refer to as a pie-let. Carolyn generally likes all of her pies to have a streusel topping rather than a second crust, so that's what I did, even though the recipe calls for a double crust pie. I got the recipe from a book that is, apparently, not easy to find anymore: Lisa Yockelson's A Country Baking Treasury: Pies, Cakes, Cookies. I'm pretty sure one of my aunts gave me the book more than ten years ago, but it's still my go-to book for pies.

The basic recipe, which I cut by about a third for this mini-pie:

Two pie crusts--one for the bottom, one for the top
1/4 cup plus 2 tsp. all purpose flour
1 1/4 cups sugar
1/4 tsp cinnamon
1/4 tsp ground mace (I omitted this, because I didn't have it, and used a touch of nutmeg)
5 cups sour cherries, pitted
2 tbl sour cherry syrup (made of boiled down cherries, water and sugar)
2 tbl butter
egg white for washing crust
sanding sugar for crust

Line pie plate with one crust and refrigerate. Combine all the dry ingredients and mix well. Toss in cherries, and syrup, then pour cherries into bottom crust. Dot top with butter, and top with second crust. Brush on egg white, and sprinkle with sanding sugar. Cut steam vents, and bake at 425 for 25 minutes, then reduce to 350 for another 25 minutes.

If you want to make a streusel topping instead, like I did, combine the following in the food processor:

3/4 cup flour
1/4 cup sugar
1/4 cup brown sugar
5 tbl butter, cut into chunks
1/4 tsp cinnamon
1/4 tsp nutmeg

This makes a nice crumbly topping great on pie and muffins.

Stay tuned for something with rhubarb!

Sunday, June 14, 2009

Throwing Scones in Glass Houses

Scones. Scones are probably the baked treat my family most often expects of me. My mom always loved scones, and at a young age, I made it my mission to make her the perfect version. At least twelve or thirteen years later, I don’t ever even look at a recipe. Very loosely, here are the proportions:

3 cups flour
1/3 – 2/3 cups sugar
Salt
1 ½ tbl baking powder
1 stick butter, cold
3 eggs
3 oz. evaporated milk

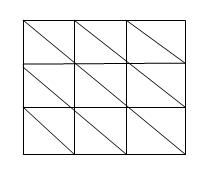
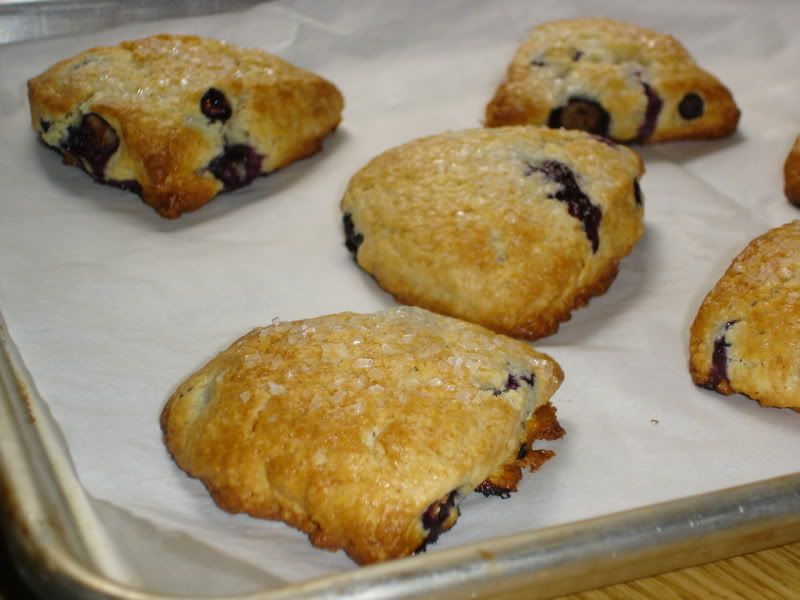
Combine the dry ingredients, and cut in the butter, as for pie crust. I keep the butter pea-sized. Use the amount of sugar to taste—sometimes I like it sweeter, sometimes less so. Whisk the eggs and milk, and add to the dry ingredients, being careful not to overwork. Pat it into whatever shape you want, and cut into whatever size you want. See how precise I am? Usually, I’ll pat the dough into a square about ¾ inch thick, and cut into nine squares, then cut the squares into triangles. Like this:

Bake in the oven, usually around 325, for 15 minutes or so. This really varies, depending on your oven, and how many you are making. They are done when they smell fantastic, and are a golden brown.

This recipe is very versatile. When making it for my family, or to freeze, I’ll actually quadruple it. I like doing that, because then it uses a dozen eggs, a full pound of butter, and a full 12 ounce can of evaporated milk. It seems strangely satisfying to me when that happens, but it makes A LOT of scones.
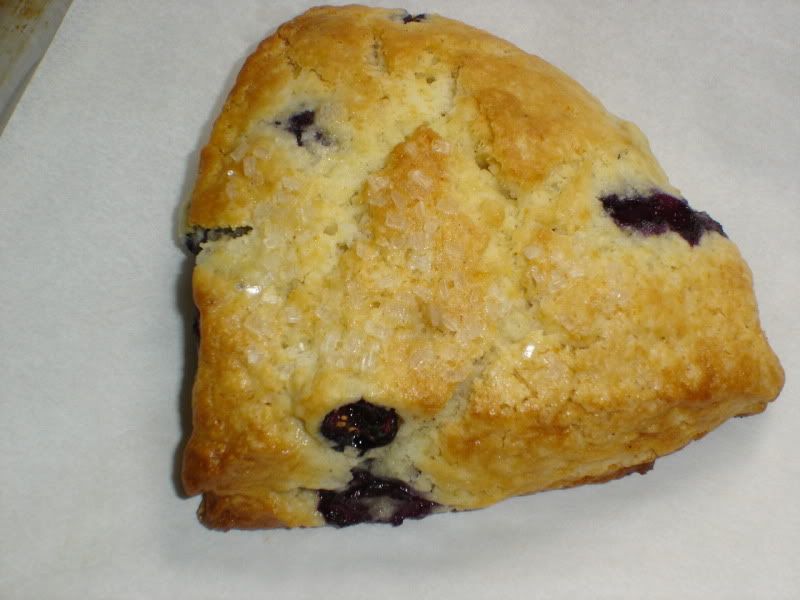
Changes to this recipe are simple to make. For example, last night, I only made 1/3 of the recipe, to make nine scones for breakfast. I used a moderate amount of sugar, used cream in place of the evaporated milk, added blueberries to the dry ingredients, vanilla to the eggs mixture, and patted together VERY carefully so as to not crush the berries. I then stuck it in the fridge over night, cut them this morning, brushed them with cream, and added sanding sugar to make them sparkle, and put them in the oven cold.

I sometimes will top them with cinnamon streusel, use chocolate chips, or fill a layer with a little jam. The recipe also does well in more savory adaptations; reduce the sugar, add garlic powder and cheddar, and you have a pretty tasty cheddar garlic scone. Add some rosemary, sea salt and asiago or parmesan, and it goes great with soup. You can also replace the evaporated milk with not only cream, but buttermilk or regular milk, to make slightly healthier.

Enjoy, and be creative!

Thursday, June 11, 2009

Berries and Bubbles!

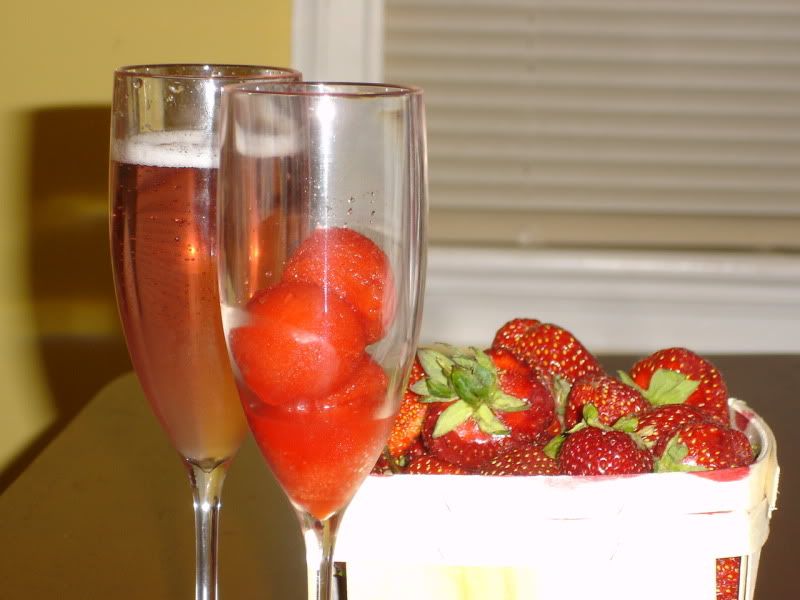
It's raining in central Ohio this morning. Really raining. Rain makes me want to do a lot of things, including skip the gym, and spend some extra time in the kitchen. Which is why, at 7:30 this morning, I decided to put that champaign in my refrigerator to good use. It's been there since New Year's, after all.

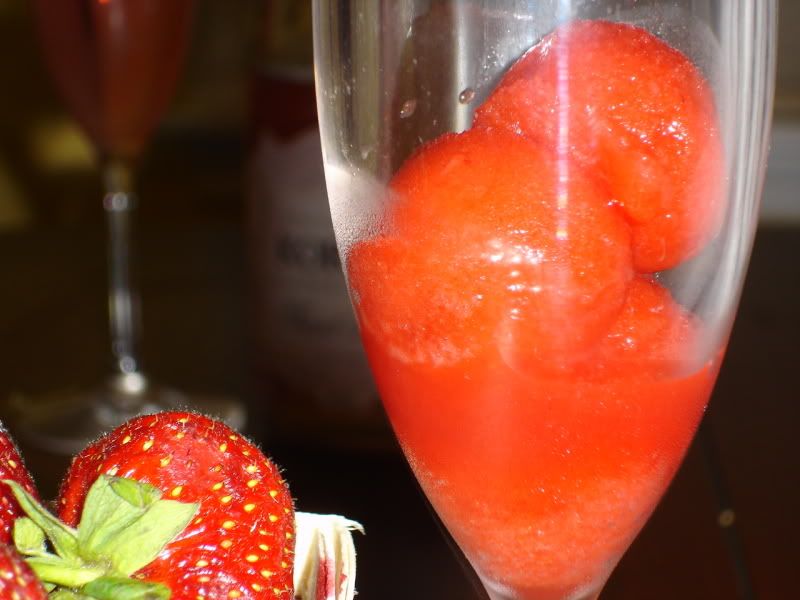
When I walked into the kitchen this morning, the entire room smelled like a strawberry patch. Two quarts of fresh strawberries is a lot for us to eat, even though we've had them plain, with angel foodcake, and now dipped in chocolate (another bit of the morning's productivity). I had some simple syrup already prepared, so it took about ten minutes to put together my strawberry-champaign sorbet. I grabbed a handful or two of strawberries, hulled them, and tossed them in food processor until they were totally smooth. Then I added in just a touch of simple syrup, because they were already plenty sweet. I pushed the mixture through a sieve to remove the seeds, added several glugs of rose champaign, and poured it on into my ice cream maker.

Nothing starts the morning like a little berries and bubbles!


Wednesday, June 10, 2009

CSA Share: Day 1

After a lot of reading about the benefits of local produce, I decided back in January that we would join a CSA this year. If you're not familiar with what a CSA, or community supported agriculture group is, the basic idea is that you pre-purchase "shares" from a local farm. You pay upfront, in the beginning of a growing season, and pick up the freshest veggies you've ever had when they come in season. Every CSA works a little differently, and you can find the best options for you at Local Harvest. Local harvest is where I found The Wayward Seed, and several other nearby options. I sent emails to the farms I liked, and after communicating with the farmers, chose the one that suited me best. The truth is, I just found The Wayward Seed to be very personable, eager to answer my questions as an ignorant newbie in the CSA world, and I was very impressed with the beautiful photos on the website. I started pretty small this year, and am only getting a single-person share of vegetables, and of fruits, every other week.

What I really loved about the idea of joining a CSA, in addition to the positive impact it has on the local farming economy and the environment (not to mention the high quality of the food!), was that I didn't get a choice in the vegetables I get every week. I love to cook, but like most people, I get in a rut. I buy the same things over and over, and don't venture too far out of what I know how to cook. I was assured, however, that I'd get recipes for the more obscure produce each week, and that the flavors and quality would be the best around. And you know what? They are!

Here's what I got today:


A tour of the veggies, from the upper left, clockwise around the strawberries: braising greens, hakurei turnips, fresh cilantro, white radishes, evergreen hearty scallions, and red pac choi.

When I picked up the goods, they talked me through each vegetable, and gave cooking and storage suggestions. They also encouraged me to go through and taste each element of the braising greens mix, because it was a variety of greens, including mustard greens and several other things I can't remember; I'm so glad I did this! I don't know greens very well, and a couple were surprisingly peppery, but delicious raw. And so, for dinner tonight, I grilled chicken breasts that I marinated in olive oil, garlic, cilantro and lime juice, and I roasted a combination of the turnips, braising greens, and red potatoes. The turnips were amazing! They were quite tasty before they were cooked--sweet and crunchy--but after they were cooked, they were soft, buttery and slightly caramelized. I really wish I had more! I only used about half of the greens, and definitely am looking forward to using up the rest later this week. The taste combination is quite unique, and, much to my pleasure, all new for me.

And the strawberries? Let me just tell you, you can smell them from five feet away, and my fingers would be dyed red right now if I hadn't stopped myself from eating an entire quart...
Monday, June 8, 2009

Double Chocolate Creme Brulee


I haven't exactly been consistent in updates, have I? I know I have yet to share any recipes or pictures for scones, which given the blog's name, probably should have been the first post. Hopefully, this creme brulee recipe will help you forgive me. Also, to all of you who voted for my cupcake, THANK YOU!

The book the recipe comes from is Lou Seibert Pappas' Creme Brulee. This is my first and only creme brulee cookbook, and I highly recommend it. I've been making the vanilla bean brulee for at least two years now, and this was actually my first time making any of the other recipes. However, I'll be coming back for more very soon. Overall, these weren't too sweet, and much of the sweetness came from the burnt sugar top. As a lover of all things custard, I'd make it again. Like, next week?

Double Chocolate Creme Brulee (with my changes in purple and italics)
(I halved the recipe and made three servings, and the directions are butchered. The original used too many words!)

2 cups heavy cream
6 large egg yolks
1/3 cup sugar, plus extra for topping (I prefer to use raw sugar for my topping, but regular sugar works)
1 tsp. vanilla extract (I used vanilla bean paste)
3 ounces white chocolate, chopped*
1 tablespoon brandy (I used Navan, which is a vanilla cognac)
2 ounces bittersweet chocolate, chopped*
1 tablespoon Kahlua (I used hazelnut Kahlua I bought in Mexico)

Preheat oven to 275. Heat cream in a small saucepan until bubble form around the edges. Whisk sugar and egg yolks until sugar is dissolved. Temper yolks into cream, and stir in vanilla. Put white chocolate in a small bowl, and add half of the cream mixture. Stir until chocolate is melted, then add cognac. To the cream mixture left in the pan: add bittersweet chocolate, and stir until chocolate is melted, then add Kahlua.

Place flan dishes in a baking pan, and divide the white chocolate mixture among the dishes. Let cool, and refrigerate for 30 minutes to cool and set . Also, put the bittersweet chocolate mixture in the fridge. After custards are cool and set, spoon bittersweet chocolate custard into white chocolate custard, and swirl with a fork. (Umm, I stuck them in the freezer for 30 minutes, then proceeded. I was in a time crunch. They didn't swirl especially well, so you should probably actually follow this step. They more turned light brown, but not very well mixed and a little streaky. Oops).

Place the baking dish of custards in the oven, and pour warm water into the baking dish so that it comes half way up the sides of the custard cups. Bake for 30-40 minutes until custard is set. The centers should jiggle just a little when done.

Cool, then refrigerate for at least two hours. (I cooled all the way but never refrigerated. I break rules). Before serving, evenly sprinkle sugar over the top, and have fun with your little blowtorch.

*Please, please, please use good quality chocolate here! When chocolate is the primary flavor in custard, you don't want to go with some generic chocolate chips from Giant Eagle(no offense, Giant Eagle...I heart you). For both the white and bittersweet, I used E. Guittard.