I made a practice batch, wherein I discovered several things to help those who haven't made them before:
Without further ado:
For the shells:
90 gr egg whites, aged overnight on your counter
30 gr granulated sugar
200 gr powdered sugar
55 gr almonds
55 gr pistachios
green food coloring
Combine the powdered sugar, almonds and pistachios in the food processor, and grind into a powder. Sift well. This step can be done well in advance, storing the nut/sugar flour in a sealed container. In a stand mixer, whip egg whites until foamy, and slowly add granulated sugar. Whip into a glossy meringue (stiff peaks, but glossy, not dry). If using gel food coloring, add to meringue until desired color is reached, thoroughly blending. Add flour mixture, and stir with quick strokes at first to combine, then gentler strokes. Don't deflate the egg whites all the way. Tartelette says this should all take less than 50 strokes, so that's what I went with. When you drizzle the batter from a spoon back into the bowl, it should take about 10 seconds to disappear. If it doesn't disappear, it's not stirred enough. If it disappears right away, you've over stirred. So take it slow.
Fill a pastry bag with a plain tip (I used a Wilton 12), and pipe small rounds in rows onto a parchment covered baking sheet. Preheat oven to 275. Let cookies sit for at least an hour so that I firm shell forms. Bake, one tray at a time, for about 15 minutes. They should look dry, but not turning golden. If not done at 15 minutes, watch carefully until done. (Mine took about 18 minutes before starting to brown). Let cool and remove from cookie sheet.
For the Filling:
2 egg whites
1/4 c sugar
1/4 c honey
pinch of salt
2 sticks of butter, softened
In the top of a double boiler set over simmering water, whisk together the egg whites, sugar, honey and salt. Continue whisking until the sugar is dissolved and the mixture becomes too hot to touch about 8 minutes.
Transfer the mixture to the bowl of an electric mixer fitted with a whisk attachment. Beat on, medium-high speed until the egg whites hold a stiff peak, about 8 minutes, and is no longer warm. Add the-butter, one tablespoon at a time, beating after each addition until incorporated. Keep at room temperature.
To Assemble:
Match up shells so they are paired together by size. Fill piping bag with filling, and pipe a good blob of filling (about a tablespoon, depending on cookie size) on one shell, and top with a second. Repeat until all shells are used. Eat.
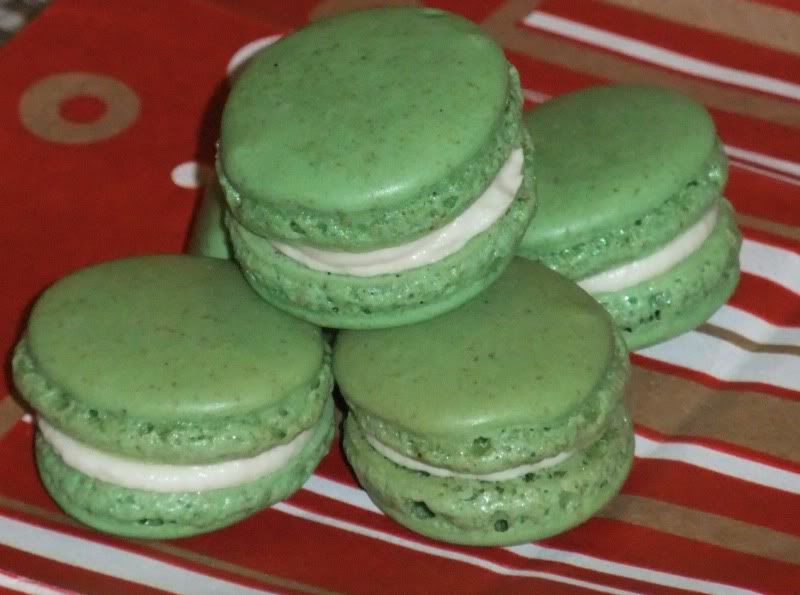
- If you're going to use food coloring, use very little. It turns super dark later if you use too much. My first macarons were GREEN (not pictured).
- Every recipe says to use powdered food coloring. I only have gel food coloring. The first time, I added the gel color as I was grinding the pistachios and almonds. This is when I added way too much, because it was so light when it was in the flour, and then it turned really dark when it was wet. The second batch, I just added a couple drops directly to the egg whites after they were whipped. I was able to control the color more, and didn't notice that it made the batter too liquid-y.
- I can't pipe evenly. For my second batch, I traced rows of a half dollar coin on the back side of the parchment so they were closer to the same size.
- Slightly wetting the underside of the parchment, one row of cookies at a time, was the only way I could get the baked cookies off the parchment sheet without crushing them.
- The shells keep longer than I thought. My first batch stayed really fresh and chewy and nice in a ziploc bag for more than a week (unfilled). I had read they get soggy. Mine didn't.
- Let them sit before baking to develop a shell. My first batch I only let sit for about 30 minutes, and most of them rose lopsidedly--flat on one side with a foot on the other. The second batch I let sit for an hour, and they rose more evenly, with pretty frilly feet all around.
- I've indicated before my preference for weighing ingredients, anyway, but for macarons, I think it's really important. I wouldn't try this without a scale, since the batter is so delicate.
- On aging egg whites: both times I made the recipe, 90 gr was perfectly 3 egg whites, aged overnight. They weighed about 91-92 grams fresh, but dried a bit overnight to 90 gr.
- I used my food processor to turn the nuts and powdered sugar into the fine flour. I ground it as much as I could, then sifted. What wouldn't go through the sifter went back into the processor, then was sifted again. I did that several times. I'm considering just buying pistachio flour for next time.
- Every website says to use raw nuts. I only had roasted, salted nuts. They were still very, very tasty. In fact, I might add a pinch of salt if ever I'm using unsalted nuts. Because I liked my sweet things with a pinch of salt. I also tend to think roasted nuts taste better than raw nuts, and I don't think it impacted the texture at all.
- One way to make this process less daunting is to make the nut flour/sugar mixture ahead of time. Macarons seem to take a long time, partly because this step is intensive. Doing it a couple days in advance makes the macarons come together MUCH faster.
Without further ado:
For the shells:
90 gr egg whites, aged overnight on your counter
30 gr granulated sugar
200 gr powdered sugar
55 gr almonds
55 gr pistachios
green food coloring
Combine the powdered sugar, almonds and pistachios in the food processor, and grind into a powder. Sift well. This step can be done well in advance, storing the nut/sugar flour in a sealed container. In a stand mixer, whip egg whites until foamy, and slowly add granulated sugar. Whip into a glossy meringue (stiff peaks, but glossy, not dry). If using gel food coloring, add to meringue until desired color is reached, thoroughly blending. Add flour mixture, and stir with quick strokes at first to combine, then gentler strokes. Don't deflate the egg whites all the way. Tartelette says this should all take less than 50 strokes, so that's what I went with. When you drizzle the batter from a spoon back into the bowl, it should take about 10 seconds to disappear. If it doesn't disappear, it's not stirred enough. If it disappears right away, you've over stirred. So take it slow.
Fill a pastry bag with a plain tip (I used a Wilton 12), and pipe small rounds in rows onto a parchment covered baking sheet. Preheat oven to 275. Let cookies sit for at least an hour so that I firm shell forms. Bake, one tray at a time, for about 15 minutes. They should look dry, but not turning golden. If not done at 15 minutes, watch carefully until done. (Mine took about 18 minutes before starting to brown). Let cool and remove from cookie sheet.
For the Filling:
2 egg whites
1/4 c sugar
1/4 c honey
pinch of salt
2 sticks of butter, softened
In the top of a double boiler set over simmering water, whisk together the egg whites, sugar, honey and salt. Continue whisking until the sugar is dissolved and the mixture becomes too hot to touch about 8 minutes.
Transfer the mixture to the bowl of an electric mixer fitted with a whisk attachment. Beat on, medium-high speed until the egg whites hold a stiff peak, about 8 minutes, and is no longer warm. Add the-butter, one tablespoon at a time, beating after each addition until incorporated. Keep at room temperature.
To Assemble:
Match up shells so they are paired together by size. Fill piping bag with filling, and pipe a good blob of filling (about a tablespoon, depending on cookie size) on one shell, and top with a second. Repeat until all shells are used. Eat.
No comments:
Post a Comment