The first time it occurred to me to make my own bagels was back when stupid Panera increased their costs to something like $1.09 for their "cafe" bagels, which are the non-fancy flavors. I was really annoyed. Then, in November, one of my favorite food blogs, Smitten Kitchen, posted the recipe for Peter Reinhart's Bagels. That was in November, and I promptly began acquiring necessary ingredients I didn't already have, like high gluten flour, and non-diastatic malt powder. Those of you in NE Ohio might not be aware you possess a rare and beautiful gem in the plaza at Chapel Hill: you have access to Mr. Bulky's. On a recent trip up and down their spice aisle, I found the perfect ingredient for my dream everything-bagel: dried, minced, roasted garlic. Smelled heavenly. Then, a couple weeks ago, King Arthur Flour sent me an email about making my own baby bagels. Ok, muses of baking, I get it. I'll make the damn bagels already.
I have to admit, Smitten Kitchen's lengthy instructions on bagel making intimidated me, and made me feel like I needed a ton of time to make my own bagels. So, Saturday afternoon was reserved for baking. I got up and went to the farmer's market before heading to work in the morning, was home by 1:15, and made a spectacular lunch that involved arugula from the market. Then, amid the gray, rainy weather, I ended up snuggled on the couch with my sweetie, catching up on missed episodes of Bones. And then I fell asleep. I woke up in time to grill out for dinner, but my bagel preparation time had rapidly faded. I quickly reviewed both recipes, and took the best from both worlds...or something. I wanted to fully prepare and shape the dough before bed, so that they could be boiled and popped in the oven in the morning with as little to-do as possible. Peter Reinhart's bagels gave me that option (KA's requires shaping and a 90 minute rise in the AM). The steaming step in the KA recipe also would have required me to dig our my veggie steamer. So I stuck with Reinhart's recipe, but with proportions closer to KA's recipe. What? There is nothing in the world two people need with as many bagels as 8 cups of flour would produce! I still ended up with 8 rather hearty sized bagels. Here's my recipe, but you should really educate yourself with the links above before trying to follow my guide!
Sponge:
1 cup high gluten flour
1/8 tsp instant yeast
1/2 cup cool water
Combine and let sit, covered, for at least two hours.
Bagels:
3 1/2 cups high gluten flour
1 1/2 tsp instant yeast
1 tbl non-diastatic malt powder
1 1/2 tsp salt 1 cup warm water.
another 1 1/2 tbl non-diastatic malt powder for boiling
Bagel Topping:
one egg white for washing
Whatever you want. My combo: toasted sesame seeds, poppy seeds, dried minced roasted garlic, and kosher salt.
Combine above bagel ingredients, and all of the sponge in electric mixer. On low speed, knead together for about 8 minutes. The dough gets nice and smooth, with all the flour incorporated. It's a little sticky when pinched, but mostly nice to touch. I weighed the dough, and I had 1117 grams of dough at this point. Because I'm a little obsessed, I played with it a little, until I determined that I liked the size the bagels would be if the dough were divided into eight. Or, approximately 138g each. Yes, I live in the US and my scale could weigh in ounces. However, I have an English degree, and think dividing pounds into ounces is annoying. Grams are more convenient for the mathematically challenged.
So, I divided and weighed my eight smooth balls of dough, punched holes in the center and stretched them to look like bagels. I laid them on a parchment-covered, cooking-sprayed cookie sheet, and covered them with a damp towel, while I wrote this. Probably about 20 minutes. (Seriously, the cooking spray is important, even on parchment. One of mine got very stuck in a place I apparently missed). Then, I tried the float test. You place one of the bagels in a bowl of water. If it floats within ten seconds, it's ready to be stuck in the fridge, over night, or even for a couple days. Mine didn't even try to sink, it just bobbed pleasantly on the surface. This was a definite change, since I tried floating one when I first formed the bagels, without a rest period, and it sunk like a tiny Titanic. Yay. If at first yours don't succeed in floating, let 'em rise another ten minutes, then try again. Since mine were floating, I went ahead and combined my bagel-topping for the morning, and went to bed.
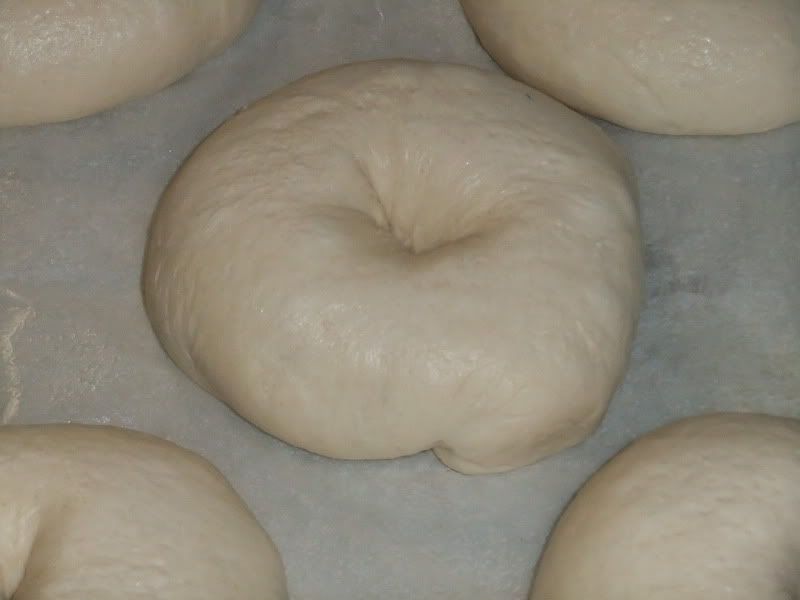
This morning, my refrigerated bagels were so cute. They had puffed, and all but lost their center holes, leaving large dimples behind. I know I don't usually take and post pictures throughout the process, but I couldn't pass up a photo op of these chubby blobs of bagel dough.
 Preheat the oven to 450 degrees. In a deep, wide skillet, filled with about 2" of water, add 1 1/2 tbl non diastatic malt powder. This is what makes bagels shiny and taste bagel-y. Bring water to a boil, and add as many bagels as comfortably fit (my skillet only held three. I wanted smallish bagels, but my 138g bagels turned into normal-sized after all their rising and boiling). They float and only end up partially submerged. Boil for 1-2 minutes, then flip over and boil for another 1-2 minutes. In all my bagel homework, I learned that the longer you boil, the chewier the texture. Since I like a chewy bagel, mine boiled for about 1 1/2 - 2 minutes per side. I didn't have my stopwatch on me, so that's a guess. Boil them in batches until you're done. Since the camera was out anyway...
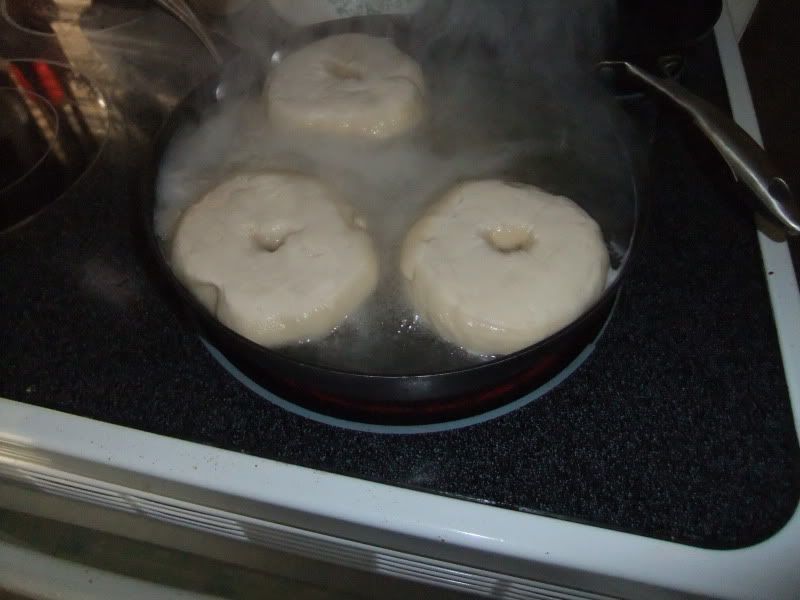
Sprinkle the same, greased, parchment papered cookie sheet they were on before with semolina flour to prevent further sticking. If you don't have semolina, corn meal might be a good alternative? Or nothing? I'm not sure they'd stick, but I used the semolina, since I had it. Here is where recipes diverged big time. Peter Reinhart says to top your bagels, and bake for five minutes, then rotate the pan 180 degrees, and bake for five more minutes. KA says to bake for 20 minutes, then top with seeds, cover loosely with foil and bake for five more. Yikes, that's quite a disparity in bake time, especially since both recipes are making bagels smaller than mine! Because I really hate the taste of burnt sesame seeds and garlic, I started by baking mine, naked, on the middle rack, for 7 minutes. I then rotated the pan 180 degrees, and baked for 7 more minutes. They were obviously getting cooked, but they were not golden, so I gave them another 5 minutes. The color was coming. I pulled them out, brushed them with egg white and sprinkled them with topping one at a time. You have to move fast, because the bagels are hot, and you're using egg white. You want a thin coat of egg white, not scrambled eggs on top! Once all bagels were topped, I put them in the oven for 2 minutes, then covered them with a piece of foil for another 4 minutes.
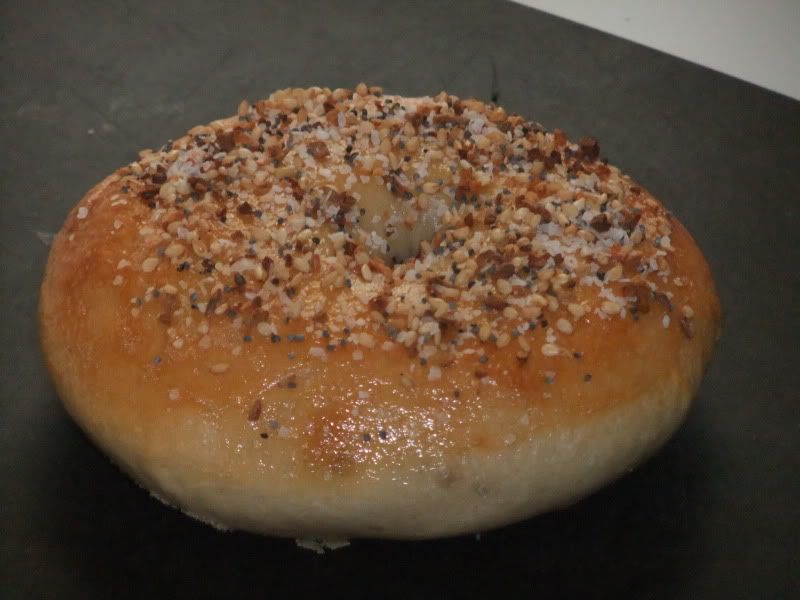
I only let them cool enough to snap some pictures before breaking into my first one to try it plain. The bottom was golden and crunchy, the entire outside just slightly crisp. They were definitely not as dense as the bagels I'm used to, but I liked that about them. They certainly tasted bagel-y, so I achieve my goal. I quickly spread a couple with cream cheese, capers, chive and red onion, and topped with smoked salmon. Yum. My only complaint is my own fault--I definitely used too much salt in my topping, so they were a little over-salty, especially with capers and smoked salmon.

I can tell you'll I'll be making them again soon, with a variation: my favorite bagel of all time is a slightly sweet, honey-whole wheat bagel, served with honey butter. Since I am officially done with classes (I finished my last final ten minutes ago!), I think my baking time might increase over the next couple weeks!
2 comments:
Yum! Chris and I will take some :)
Wow - those look so good! I'm so impressed! BTW - I totally forget that we had talked about white balsamic. Thanks for the reminder! It's great stuff.. Oh - and I hope you enter again this year. I'm posting the details on Friday!
Post a Comment